


posted by roman, jarhead, kong
After i finally managed to update the Tutorial section with all the new Tutorials in form of banners (check them out) i have again some space to look into the future. Don't miss to look at Yvonne's fat Article about Blending. Here we go with 2 fun bases i did beside. They were just build for fun as i was in the mood to build up some bases.
Building a display base on a slim socket
I was in the mood for a change. When i look into my cabinet there is a lot of finished stuff, done on big sockets. I was in the mood of something more elegant. I did shot some pictures and maybe this could be an inspiration for some of you.
I took a slim 4-edged wooden batten and cut it in small pieces with a saw. I planned to have two sides plain and to make this look good i choose to try a method i saw over at Jim's cool blog - Figure it out. Using plastic card for the plain edges was my goal. I did cut the plastic card into fitting pieces and made it clean from the cutting process by using fine sandpaper. Then i glued the plastic card in place by using super glue.

Next step, all glued together, another go with the sandpaper at the upper edge to make it plain was needed:

Preparing Milliput Standard Yellow by mixing it together 1/1 to fill up the empty space. I also prepared some slate stones which i did cut in pieces with an old knife. Don't use a scalpel for such things, they are not hard enough and you might hurt you badly - old knife is perfect or you can also use a hammer - you know hammertime!


After i brought the Milliput in place i also placed the stones into it and arranged them as i wished. It is pretty cool as you can move the stones to the place you want them while the milliput is still soft. I tried to fit the miniatures in place and moved the stones like i want to. I also build up another slim base with some gypsum pieces because the mood was so big. After everything was dry i cleaned the edges again by using sandpaper (not done at the photo yet, haha):
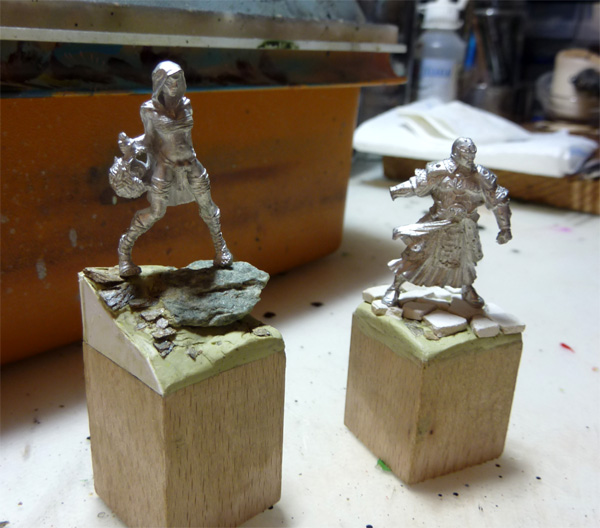
The models which i put up to the base are from the left, Pulp City's some kind of evil Little Red Riding Hood and a chinese warrior of Helldorado, both in 28 mm. I am not sure if i will paint them up soon, there is still something else to do but i was in the mood to build a base as i told you.
I hope this could inspire... even it is a really short article...
Keep on happy painting!
Regards
Roman


Thanks for the tutorial.
Tony
http://dampfpanzerwagon.blogspot.com/
Always welcome, Tony... very nice blog you got there! Really was strucked down for a big moment, i will keep an eye on that cool stuff you are doing over there - you got linked up to the jungle :)
great idea. Thanks!
:)
INSPIRERD! :P
After this step, do you prime the miniature on the display base and paint the miniature on the base or do you prime and paint them apart?
I usually prime both together if the base is not build to high (for example a tree or a wall). If I am able to reach every part of the miniature I will paint base and model together. If the base is to big I paint them seperatly.
Thanks!