I Want To Be a Miniature Sculptor
(introduction to Miniature Sculpting + “Making of bust Mer’hlizz ” Video )
Good Morning Jungle,
this time we got another guest article for you.
Daniele from Italy approached us with this great content and we just have to show it to you.
Thank you, Daniele for putting in such work, effort and time. This is coming from the heart and the soul and MV is proud to be able to publish it in the jungle.
Thank you, Daniele.
________________________________________________________________________________
Hello to all aspiring sculptors, amateurs and painters. :-)
I officially introduce myself to everyone, I'm Daniele, I'm a miniatures lover.
A few years ago I started to study to become a sculptor, even if it isn't a job for me,
because miniatures sculpting is one of my biggest passions.
To those would like to start sculpting professionally i will suggest tips and steps to follow.
Also, I will explain you how I sculpted a bust :-)
Important Thanks:
This article was born thanks to the contribution of some artists who taught me a lot
and who allowed me to use their images to explain some concepts on sculpture.
Probably, without them this article would not have been born!
A special thanks to:
(you will find their links at the end of the article)
Roman Lappat
Alfonso Giraldes
Romain Van De Bogaert
Lucas Pina Penichet
Jacques Alexandre Gillois
Allan Carrasco
Valentin Zak
Raffaele Picca
Raul Garcia Latorre
Raffaele Stumpo
Patrick Masson
Carmine Giugliano
Stefan Niehues-Ellermann
Maurizio Bruno
Joaquin Palacios
Tom Mason
Michael Kontraros
Pedro Fernàndez Ramos
Sang Eon-Lee
What we will talk about
Video about making of a bust
What are the main types of modeling putty used in miniatures sculpting
What tools to use to get started
Differences between traditional and digital sculpture
Specific advices for each type of putty
What clay do the masters use
How to “sketch” on sculpting
Examples of masters and professionals at work
What is a sculpture armature and how to create it
What is the step by step process to create one mini
How to manage references for sculpture
Useful Link and Resources
Who is this article for?
This article to help people who want to try at miniatures sculpting.
Miniatures sculpting is a real art that requires years of study, practice, and experience.
When I started, a few years ago, I immediately realized how little information there is
that tells you how to do something,
which material use and which techniques you need to use.
If you are a painter, a collector or an artist in general, this article will provide you the basics of
sculpture and will give you useful suggestions to continue with your passion.
And please don't forget: HAVE FUN!!!!
IMPORTANT NOTICE:
Sculpture, like any kind of art, is an infinite process.
Nobody, and I repeat "nobody", can consider himself arrived.
It's something that evolves continuously and never ends.
Consider this tutorial as a starting point. A first step that will lead you to great satisfaction,
disappointments, studies and new skills.
My experience
I started like everyone: to painting.
Painting is truly a wonderful thing.
Sculpting was a next step for me: I needed to be able to create something completely from scratch,
and sculpting gave me the opportunity to do this.
Painting, exactly like sculpting, requires experience, dedication and passion.
And often, it's not enough to do everything by yourself.
Among the various experiences, one changed my world on sculpting and painting,
I participated in a Roman Lappat Class, because in the world of miniatures they are intrinsically linked.
I luckily participate in a Roman Lappat class and this has changed my world ... not only on painting
but also on sculpting,
because, in the world of miniatures, painting and sculpture are intrinsically linked. Behind
every painter, there is a missing sculptor :-)
There is no school to learn to sculpt. You have to get yourself at work.
How to start?
I started buying all the copies of the most important masters and I analyzed them.
Surely you have some pieces sculpted by a professional artist and only by watching them,
you can learn a lot.
Traditional or Digital Sculpting?
Undoubtedly, someone could tell me: "But Daniele, in the digital age, where most of the sculpture is
done with the computer, does it make sense to dedicate myself to traditional sculpture?"
The answer is YES!
I have a Degree in Computer Science, so I'm the first that use my notebook for everything.
But for who loves miniatures, we like the "physical" aspect of our hobby.
I myself began to paint just to stay away from my laptop :-).
I felt inside me the need to create something with my hands.
There’s no satisfaction stronger than this.
Yes, of course, you can dedicate yourself to digital sculpture, and almost certainly I will do it in
the future, but right now, the satisfaction that makes me dirty my hands with turpentine,
or handles the modeling clay, is incomparable.
Another important thing is that, if you manage to sculpt traditionally, you will certainly succeed
digitally, not vice versa.
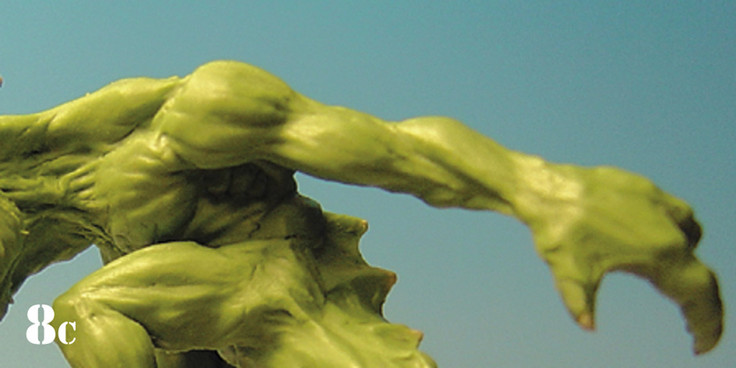
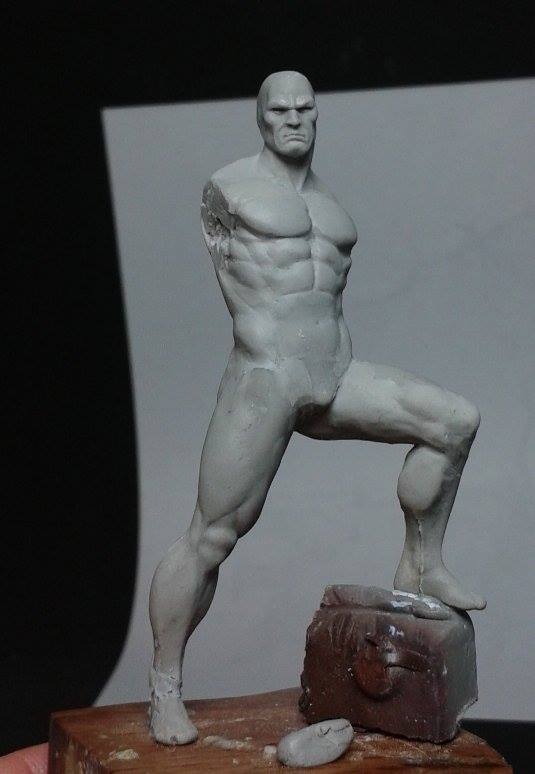
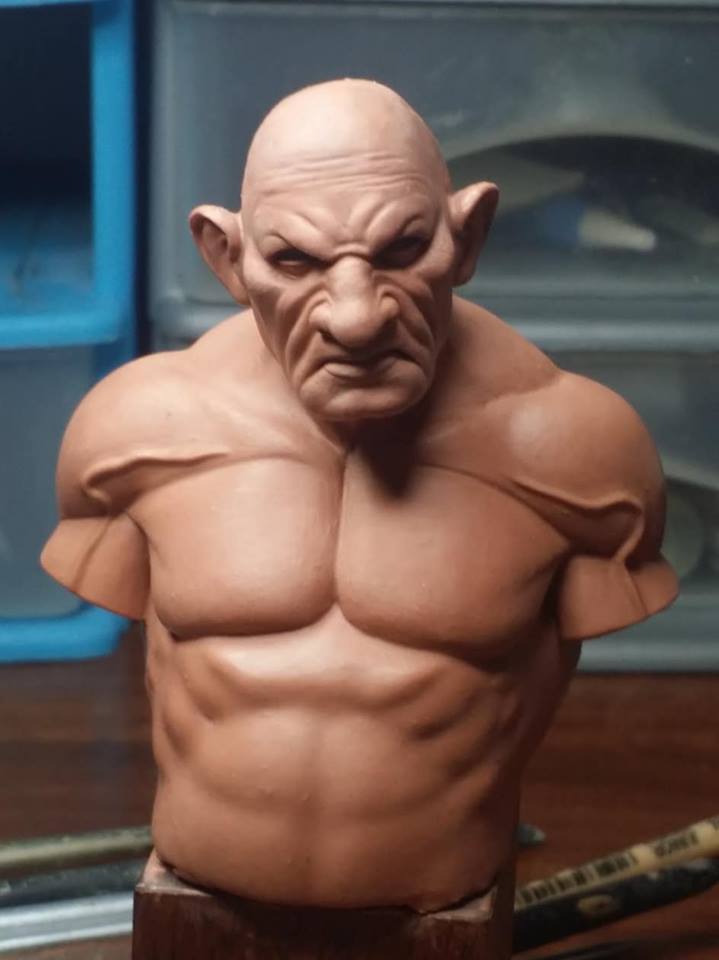
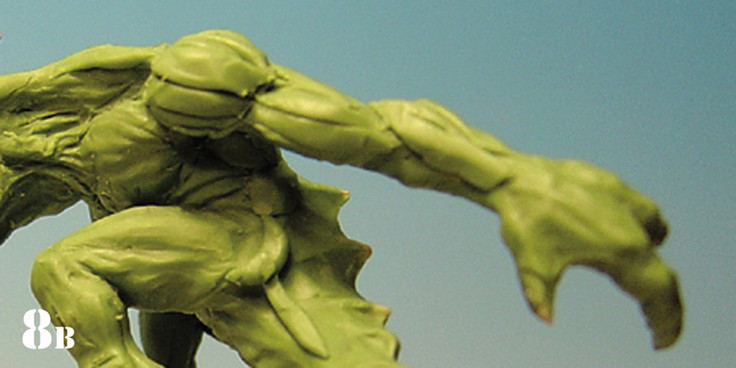
For example, you can see here some Raul Garcia Latorre works. He moved from
traditional sculpting to digital (like more others sculptors), and you can see what I said: if you are
able to sculpt traditionally, almost certainly you will do the same digitally.
But we will talk about this in a future article, I hope :-)
What will we create?
For the first time, a few months ago, I decided to try the experience of creating my own
Kickstarter Campaign (just to have fun, really), and we I’m actively working on creating
different sculptures (very exciting as an experience.)
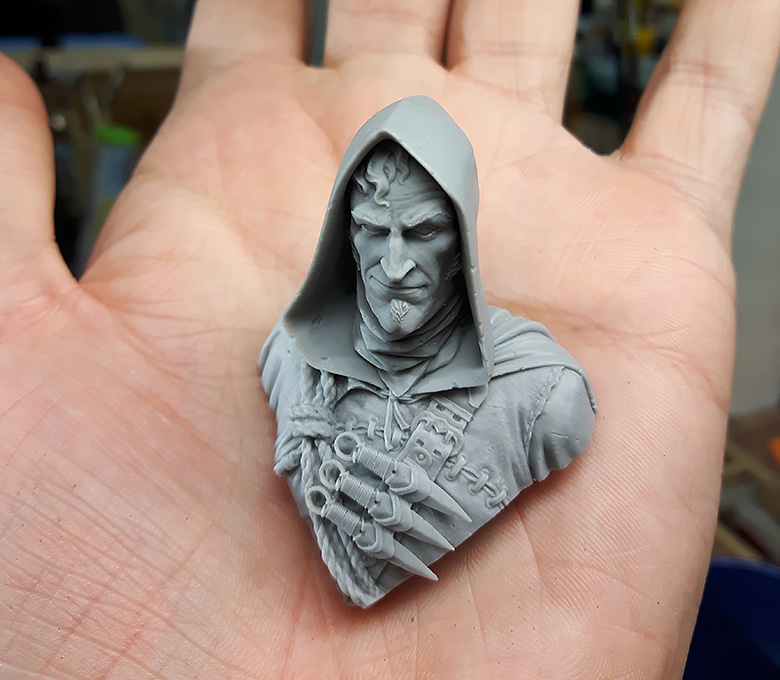
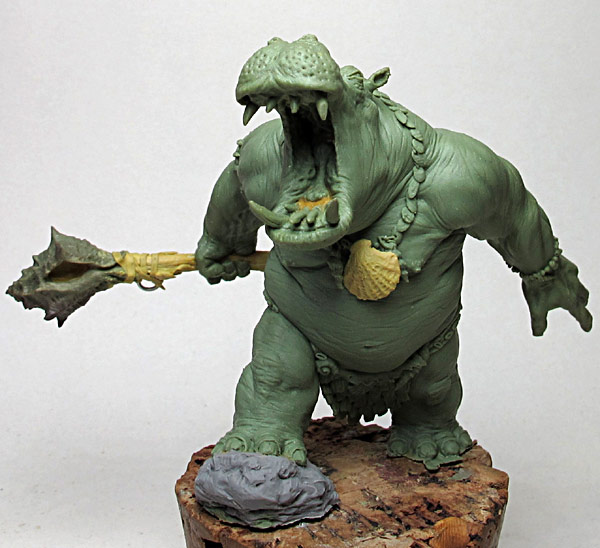
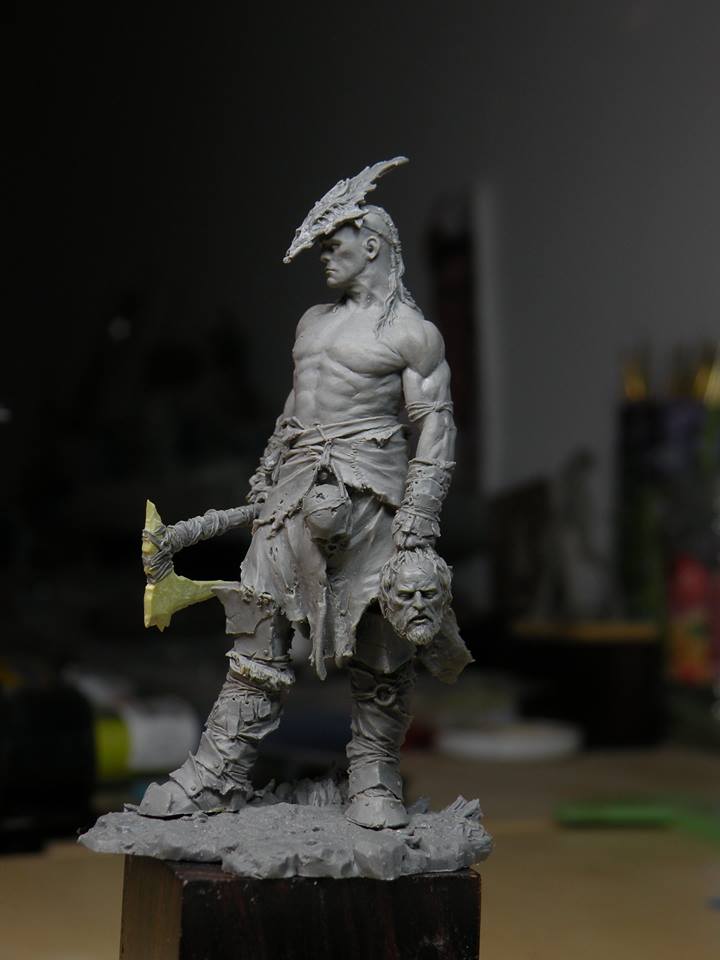
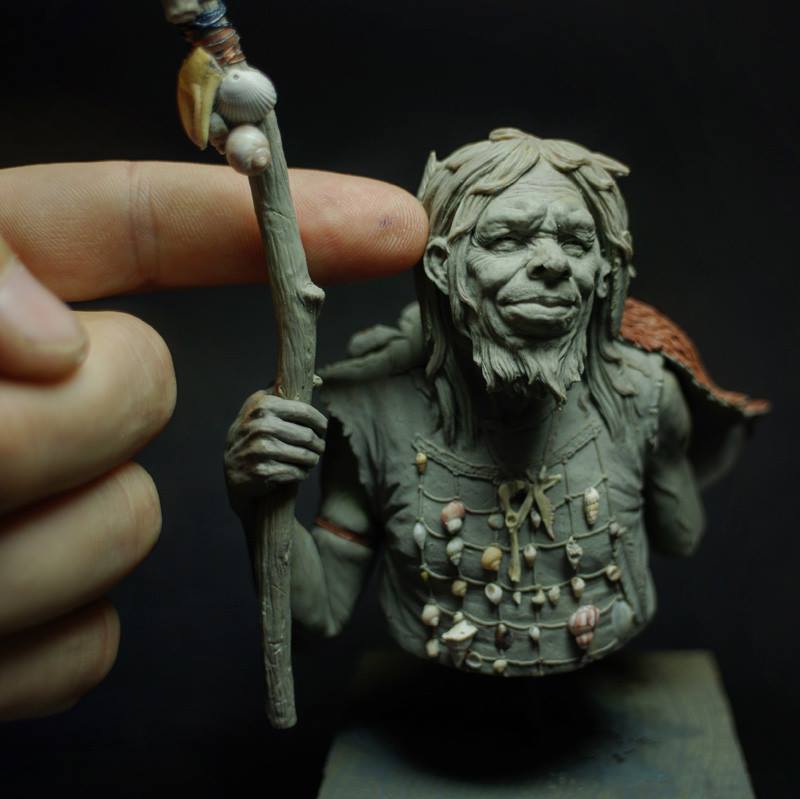
Here the bust designed by talented illustrator and Character Designer Davide Molino.
You can see the video of the making of here, please share it, if you liked it.
It is a magnificent bust, full of details and very laborious to create.
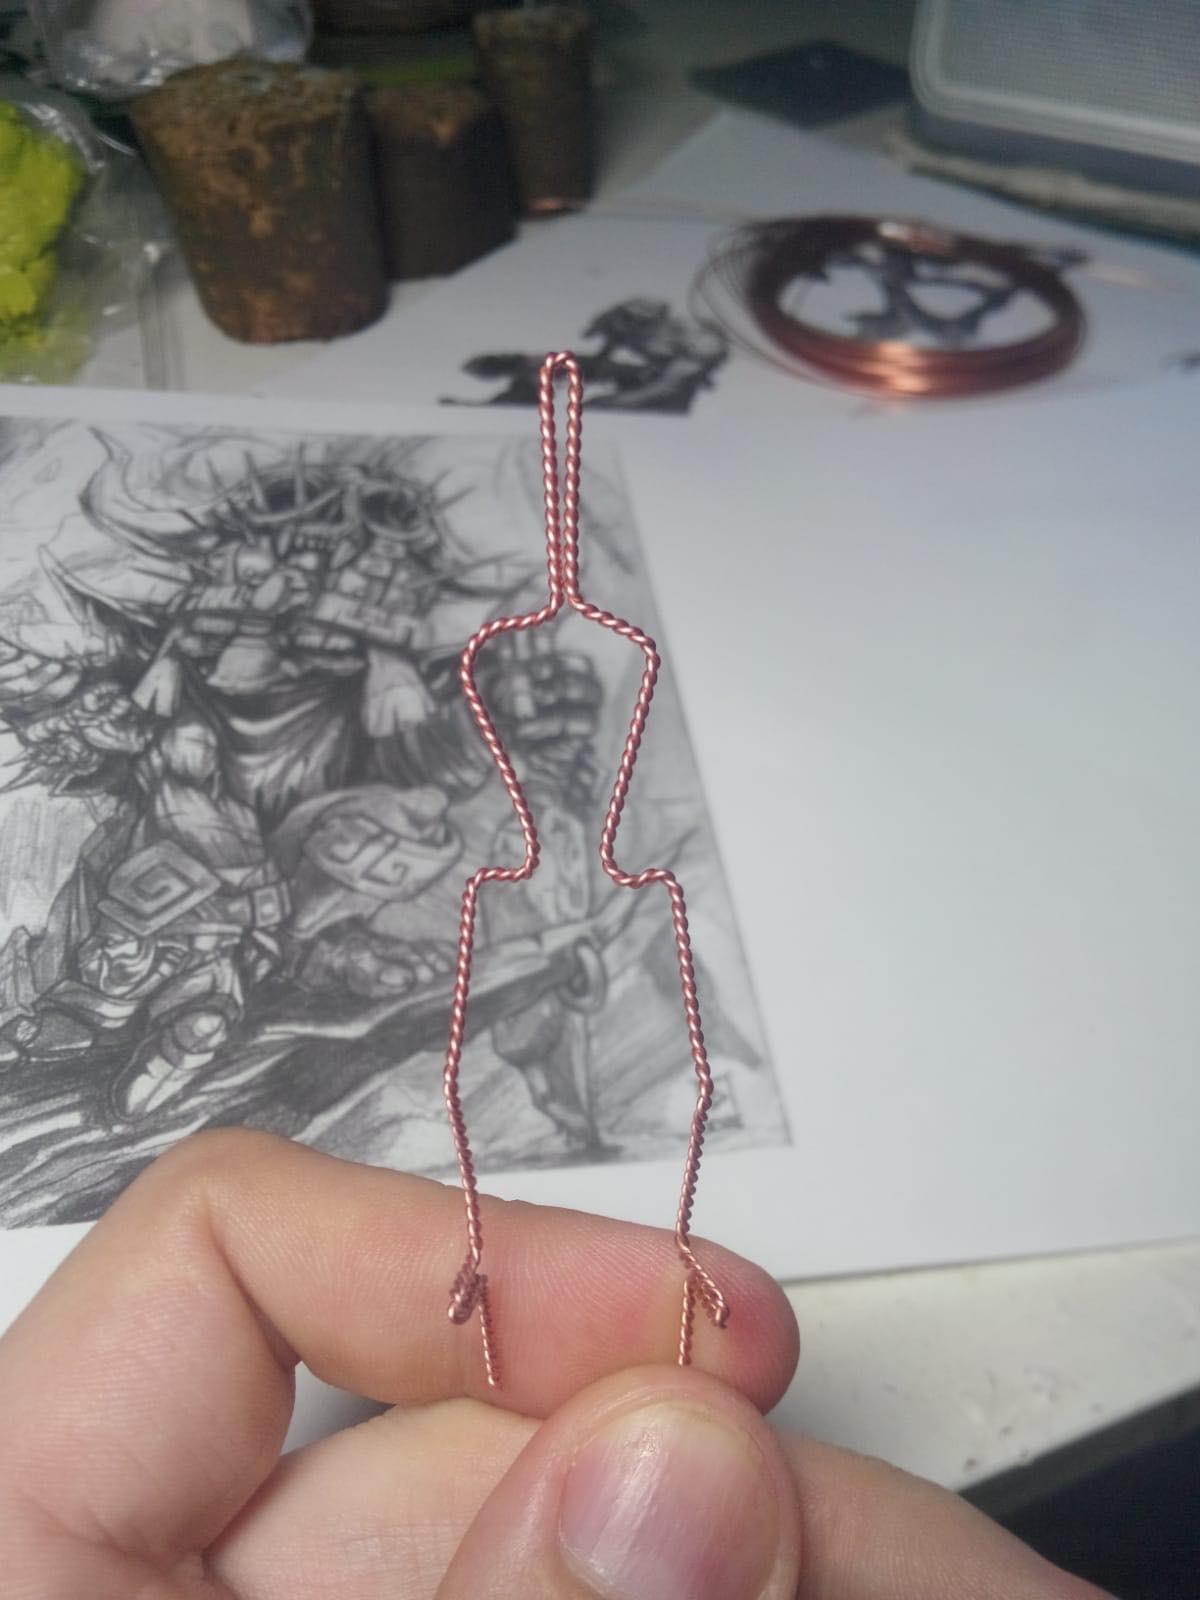
Let's talk about sculpture armature
Normally, when I have to sculpt something and I know will have to be cut into pieces
(to create the mold) I use copper aluminum (the one used to create the bonsai shape), this was suggested me
by Romain Van De Bogaert and Stefan Niehues-Ellermann

It is very flexible and easy to cut.
Copper-colored aluminum is one of the best wires to create the armature of a sculpture
Many sculptors use aluminum or copper.
Unfortunately, there is no single method: each sculpture has its own personal history.
Allan Carrasco, often uses Sculpey and FIMO, with some parts in Milliput
If you need to make a sculpture mold, sometimes the problem is to split the model.
With a good jeweler's saw, it is not difficult to cut any clay.
 My little saw: by Anderson
To avoid this unpleasant inconvenience, some sculptors (like Alan Ball) prefer not to use a metal
armature, but use the Magic Sculpt or the Milliput directly to create it.
As I said, personally, if there is something to cut off, I use aluminum, copper or brass.
Although the best solution would be to avoid cuts as much as possible.
Many sculptors plan the piece a priori, in order to avoid cuts, where possible.
Here are some examples of armatures:
Stefan Niehues-Ellermann, create his armature with metal wire
Jacques Alexandre Gillois explains very well how he makes the armature
(JAG All rights Reserved@)
You can see the full tutorial of Jacques here. It’s a great resource.
The first step to create the armature by Raffaele Stumpo
The Master Maurizio Bruno. You can see the copper wire inside the sculpture
Watching and analyzing all the images of the great masters you will learn always something.
You can see the evolution of this sculpture by Maurizio Bruno here
Lucas Pina Penichet, create the first base of his sculpture with soft Sculpey
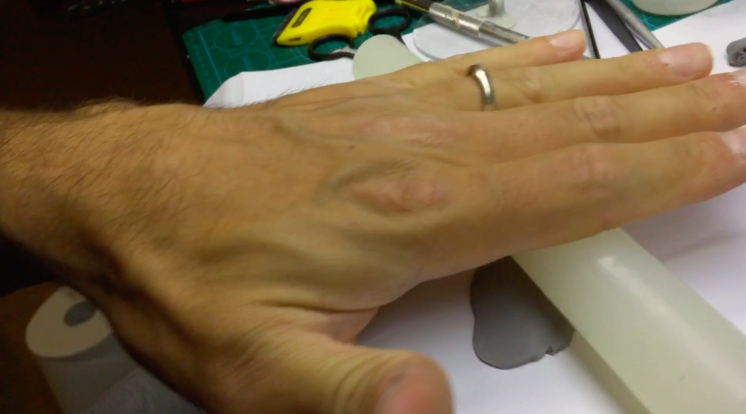
Lucas Pina Penichet often uses a welder to create his armature, for create detailed hands like here.
Magnificent talent, in my opinion.
________________________________________________________________________________
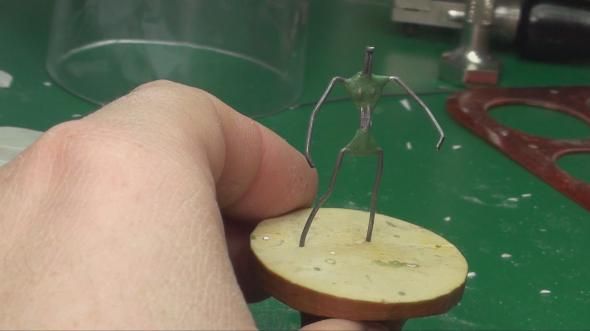
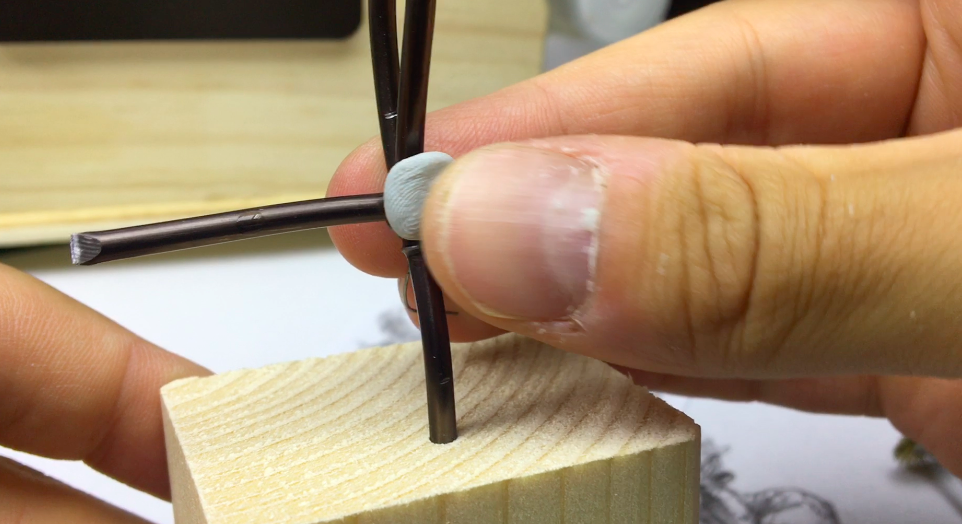
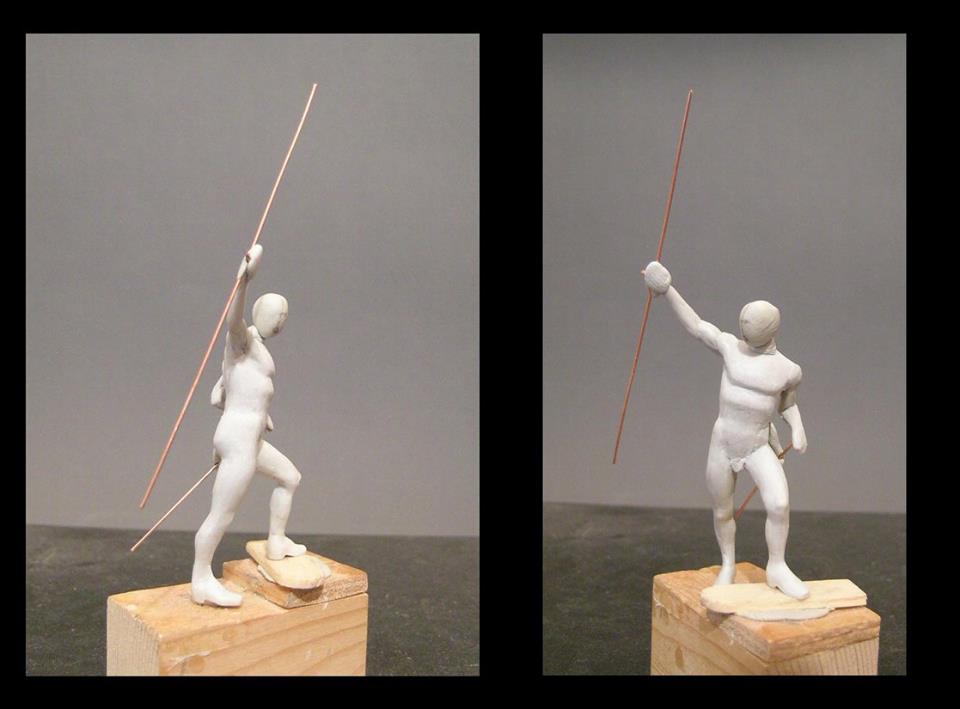
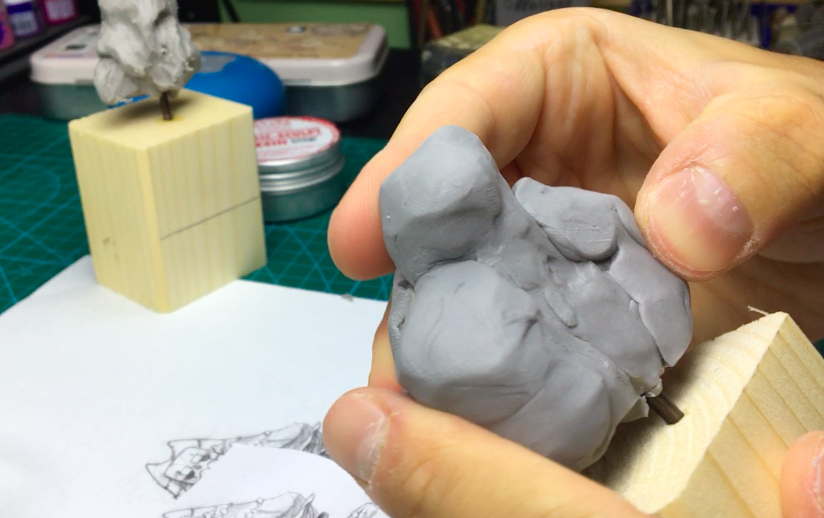
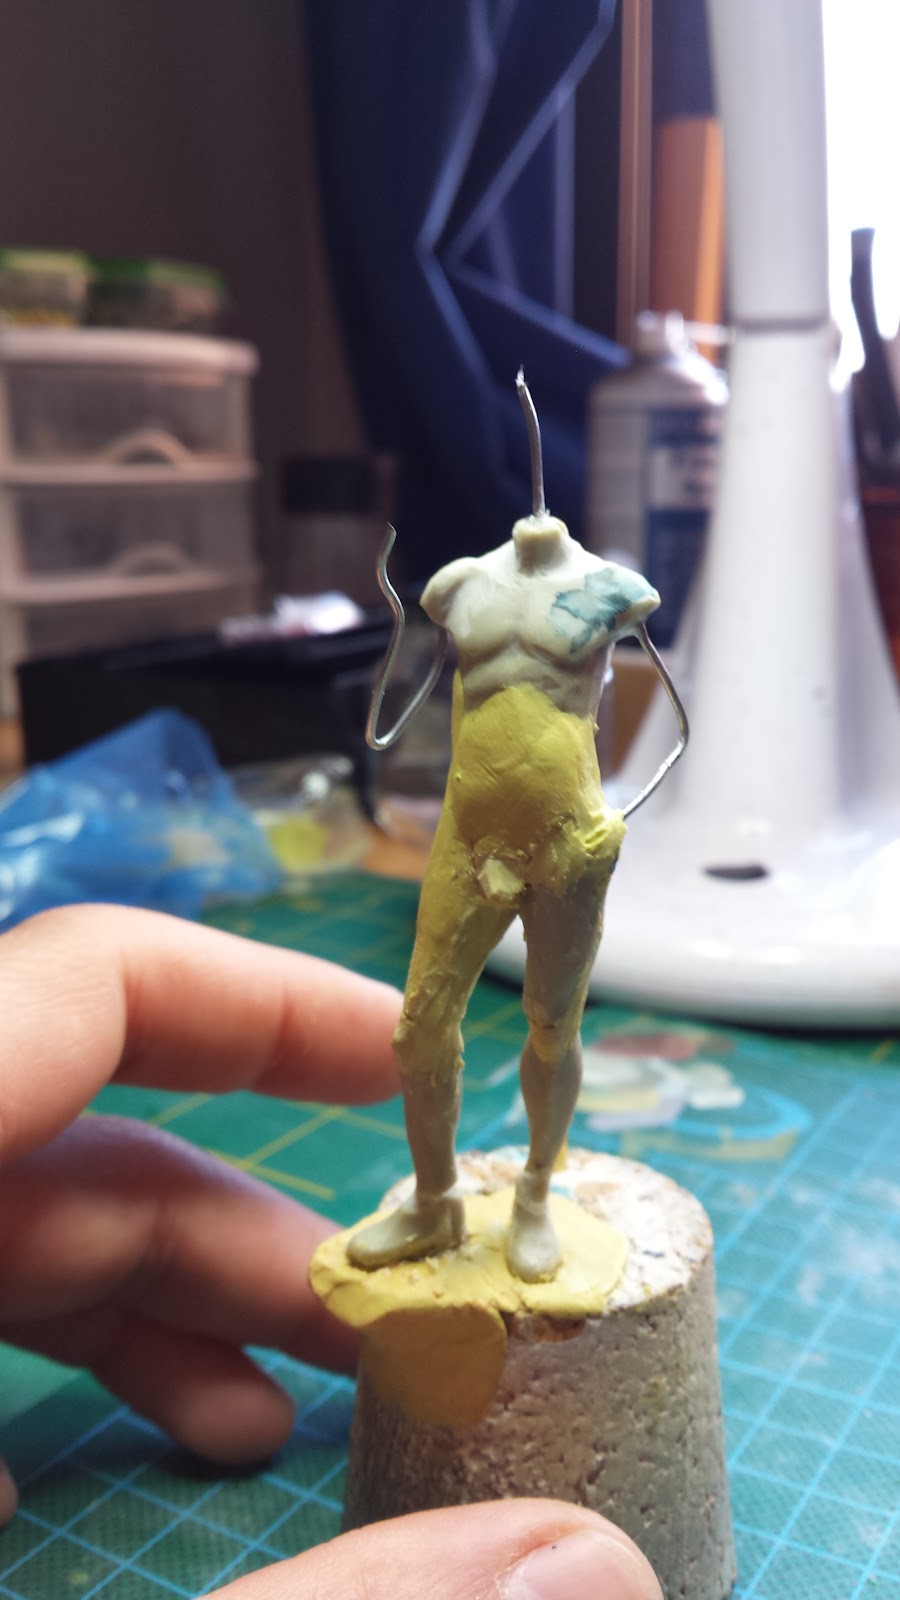
Step 1: Create an Armature

I drilled a piece of wood, and I put a single piece of 5mm copper-plated aluminum wire.
Then I took another piece of metal wire and I fixed it with very thin wire and magic sculpt,
to be very solid.
Which clay to use for sculpting?
In the last 3 years, I have tried many sculpting techniques with many materials available on the market.
It is better to use a two-component paste?
Or a polymer clay?
Bake or not?
Working on hard clay or fresh?
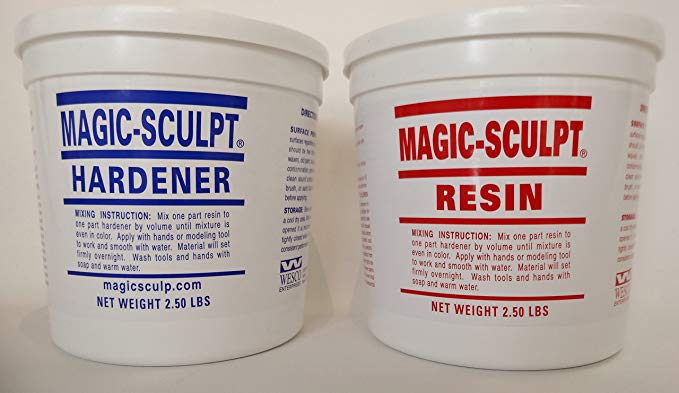
Magic Sculpt is an incredible two-component paste.
Very resistant hardened and easy to sand.
Beautiful bust by Raffaele Picca, sculpted using polymer clay
Sang-Eon Lee mainly uses polymer clay to create his busts.
Right now he moved to digital sculpting.
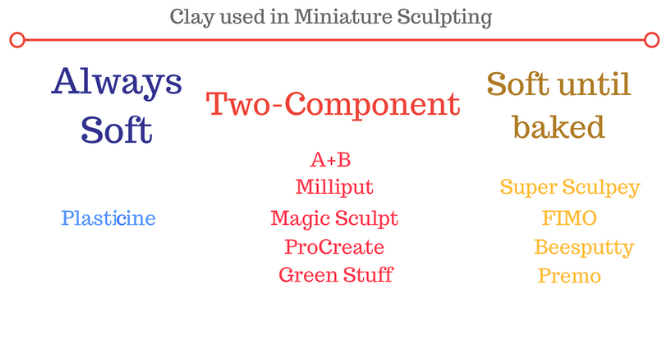
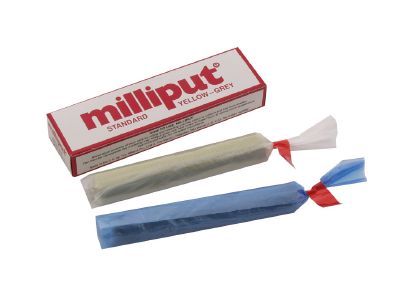
Here is a small infographic on the most widely used clays in the miniature sculpting:
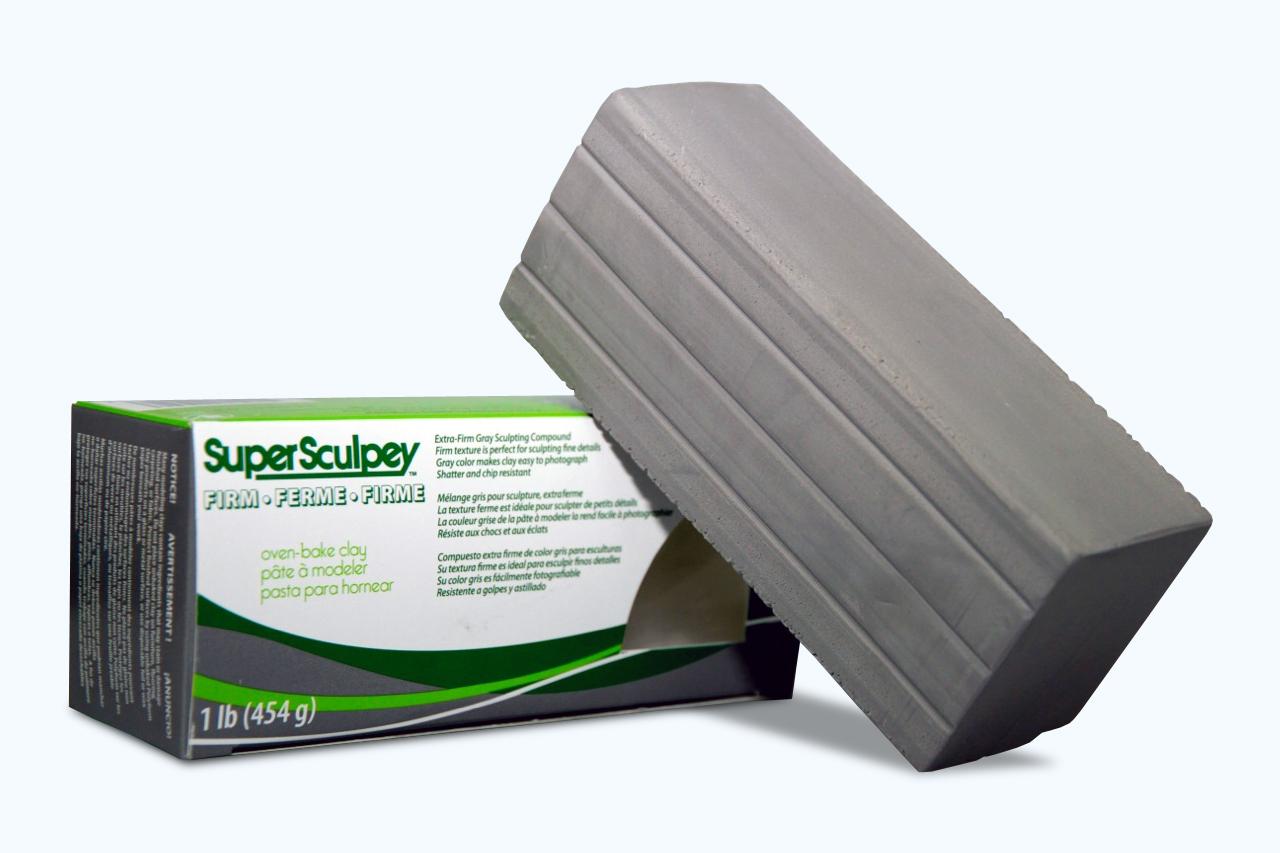
Super Sculpey Firm is a polymer clay. It remains soft until baked
Milliput is a two-component epoxy resin.
When it is hardened you can sand it, pierce it and smooth it.
Two-components resin:
These materials have many advantages and many faults.
The main problem is the time. With this you have to be fast, if you want to work calmly, this kind of
material isn’t for you.
Once hardened, you can puncture them, sand them, break them, and anything else.
Into this category, you can find the Milliput, the Magic Sculpt, and the Green Stuff.
The Green Stuff is very sticky and sticks to practically everything, so it is used to make details or
changes to existing miniatures.
Very used to make hair, or beards, because it is very flexible and plastic.
Joaquin Palacios, for example, often mixes Milliput and Green Stuff to get a combination of
both materials. Maurizio Bruno uses often Magic Sculpt. Raffaele Stumpo uses often Green Stuff.
Every sculptor love his preferred medium.
I suggest you try different materials, just to know the different properties.
Polymer Clay:
It is my favorite material.
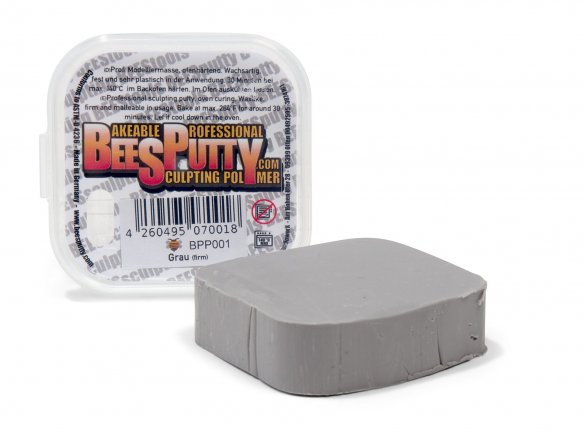
Super Sculpey, PREMO, FIMO, Beesputty.
The great thing about these clays is that they never harden, at least until you put them in the
oven at around 130 degrees (it depend on the amount of clay).
To learn, these clays are ideal, because you have plenty of time to experiment, try and test.
Plasticine:
There are also other materials that are usually used when you think of making a cast or
mass production of one's statue. The plastiline (a famous brand is the CHAVANT) does
not dry almost never and hardens with the cold and softens with the heat in a reversible way
(to make it soft it is usually kept for a few minutes under a lamp).
So, what is the best solution for sculpting miniatures?
There is no "best solution".
Many beginners are fossilized on what type of putty to use, but actually, it isn't very important.
Which clay do the masters use?
Here some examples:
Joaquin Palacios is very talented with his mix (Sculpey + FIMO soft).
Carmine Giugliano uses many materials but obtains extraordinary results with the Plasticine.
Maurizio Bruno often uses Magic Sculpt and other materials for the details (Green stuff and Milliput)
Raffaele Stumpo uses mainly Green Stuff but also Polymer Clay.
Jacques Alexandre Gillois mainly uses his FIMO mix (70% classic, 10% mixquick, 20% soft)
Patrick Masson used very often FIMO, but not only.
Raffaele Picca, Lucas Pina use polymeric pastes, but not only those.
Cauchies Benoit uses Magic Sculpt and Milliput, but not only those.
Valentin Zak also uses his own personal mix (FIMO Professional + Beesputty 50-50)
Romain Van Den Bogaert loves Super Sculpey FIRM.
Allan Carrasco uses FIMO and Sculpey, but not only those
Stefan Niehues-Ellermann uses mainly his own putty Beesputty.
Pedro Fernandéz Ramos mainly uses Super Sculpey firm + FIMO classic (50-50)
etc... etc..
Now the question is:
Do you seriously think that their talent depends on what material they're using??
I am absolutely certain, that if we gave any material to any professional sculptor, he would be able to
create something beautiful.
The material is important? Sure.
But there are more important things you need to work on: anatomical studies,
drawings, tests, tests, and experiences.
Sculpting is a time-consuming process. You need practice in order to
get sufficient results.
The type of medium is a personal choice. There are no rules.
You have to test and find the material with you are best.
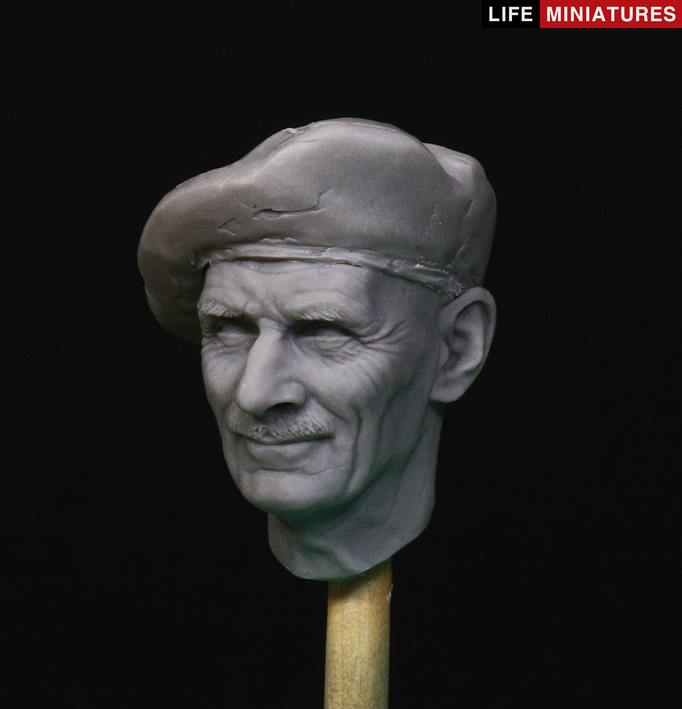
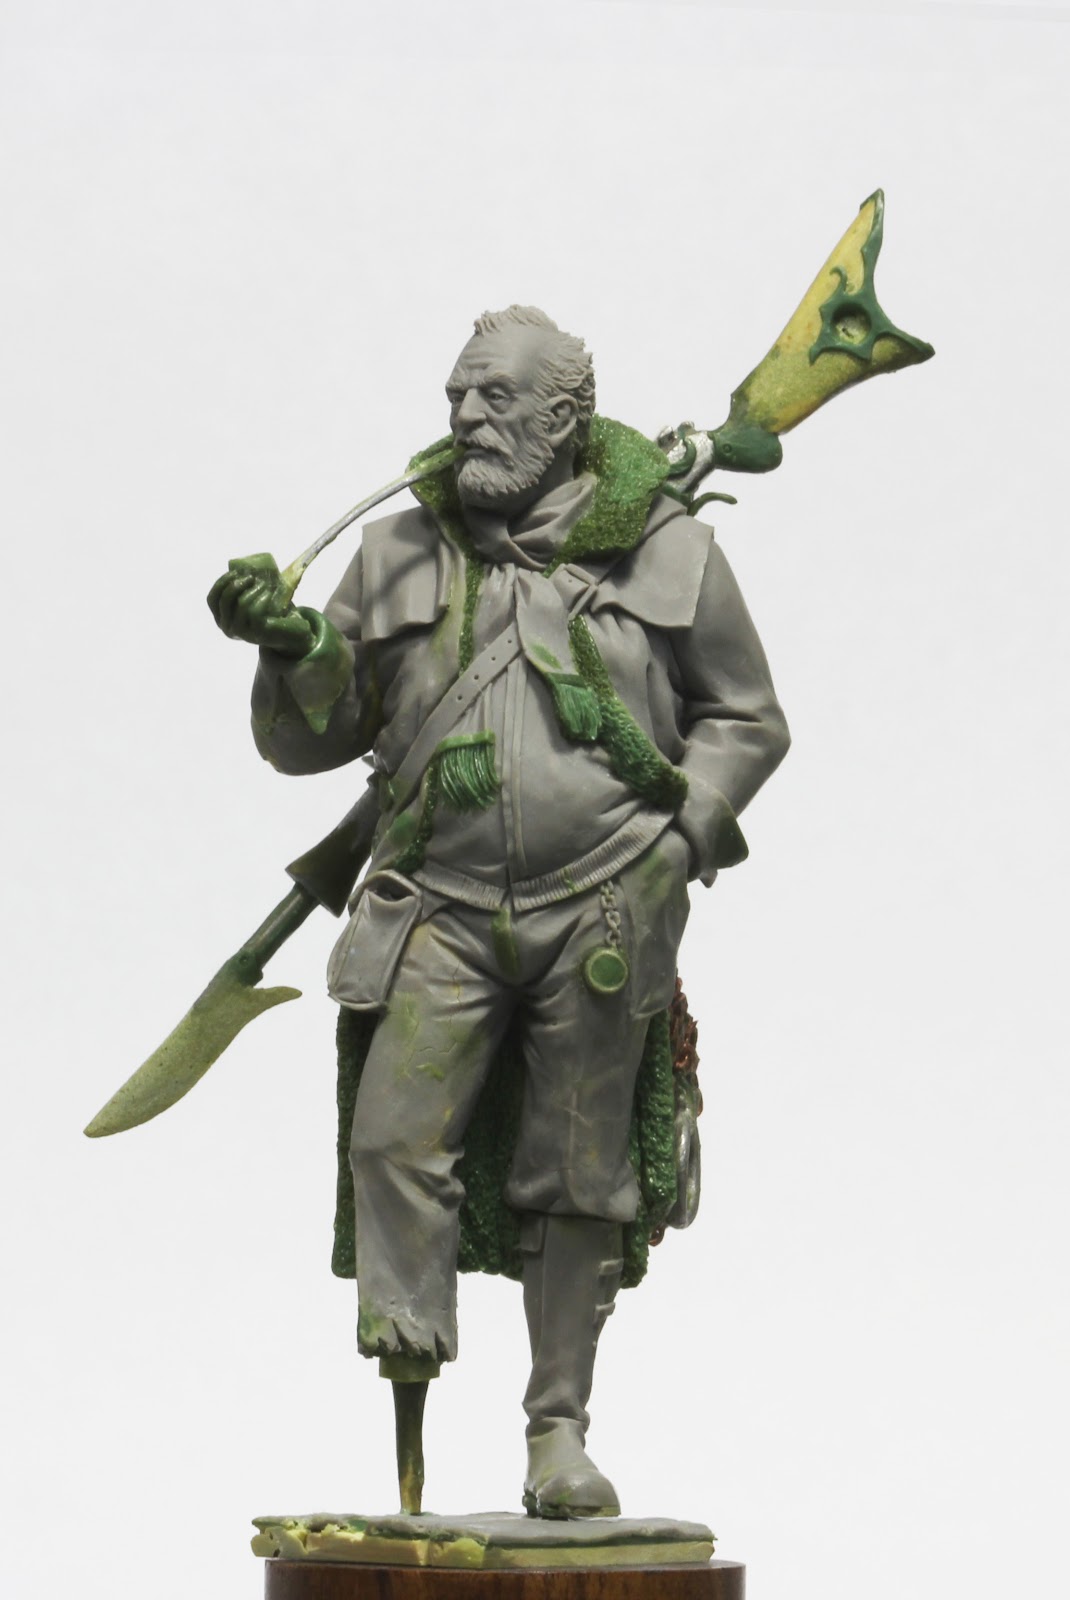
A demonstration of what I said.
Here is a beautiful bust sculpted by Roman Lappat.
Did you think that Roman was just a painter?
This shows that behind every painter, there’s a sculptor inside!
You can follow Roman’s interesting process here.
Here I used Beesputty and Magic Sculpt for the hat and the sword.
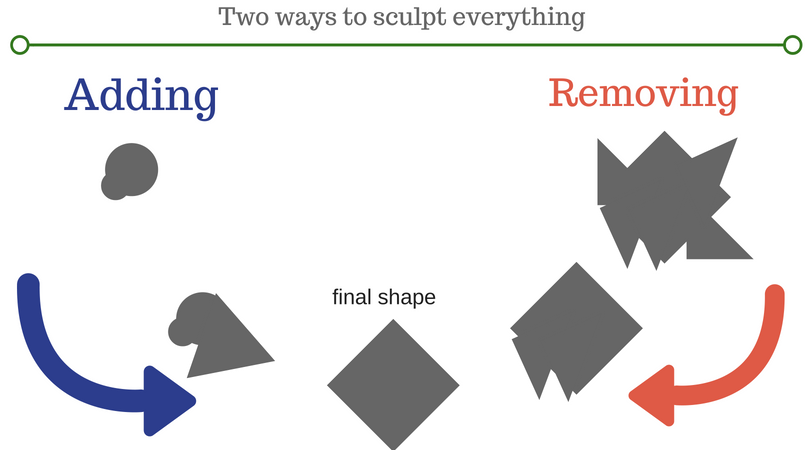
How a sculpture is born
I would like to deepen into a concept that I consider fundamental, which is the basis of the
sculpting process.
Every sculpture, every form, can be obtained in two opposite ways.
Two different ways but the same result.
In miniatures sculpting these two methods are used alternately.
Sculpture by subtraction
(you remove material until you get to the desired shape)
And of course, every sculptor has his own way …
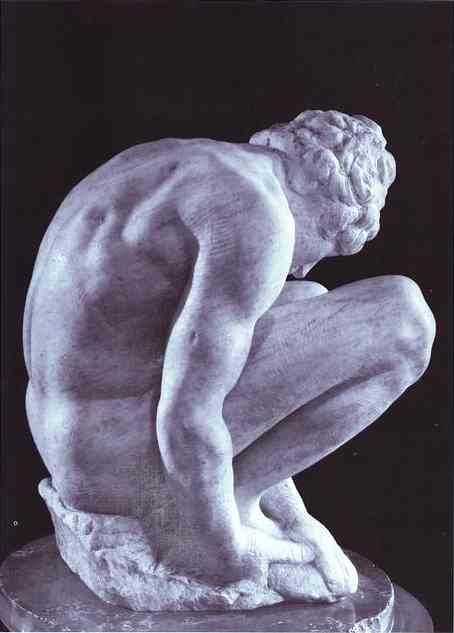
Example: sculpting marble, is only a subtraction process (as Michelangelo here)
Creating a miniature is an addition and subtraction process
here a great masterpiece by Raul Garcia Latorre
Some sculptors put the clay on the armature and work there until it gets a fair result, and then bake it
(Allan Carrasco, Joaquin Palacios, Valentin Zak, Romain Van Den Bogaert etc ... etc ....)
A good example by the Master Joaquin Palacios.
In this example, he did multiple bake to create his sculpture with Sculpey.

Master Joaquin Palacios
Valentin Zak, and his incredible Ferret.
He uses a mix of Beesputty and FIMO Professional (about 50/50).
If you have at least once sculpted something, you can understand what hard work is behind it!
Look how Romain Van Den Bogaert are using different materials on his own sculptures
Spectacular bust by Pedro Fernandéz Ramos
You can find a great resource and step-by-step Pedro’s FB page.
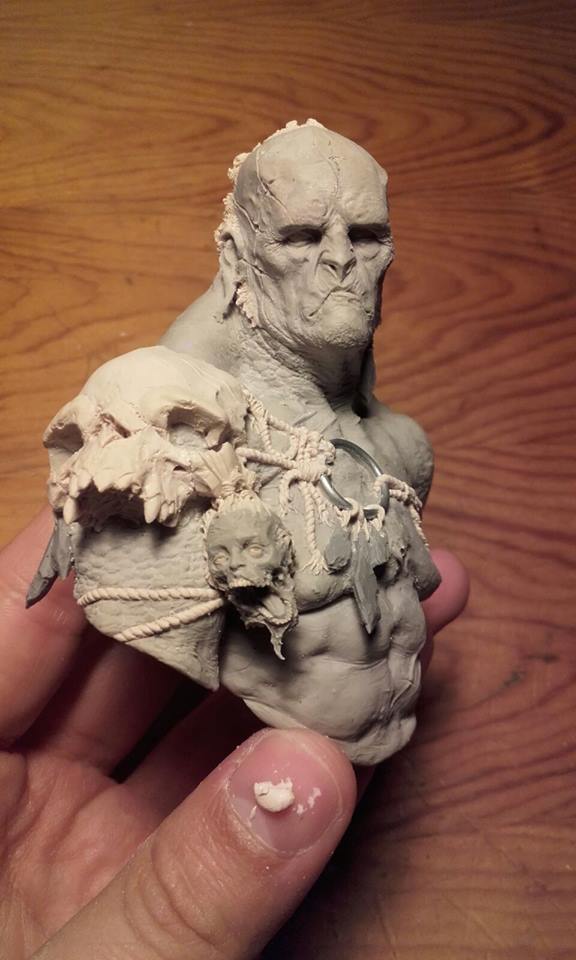
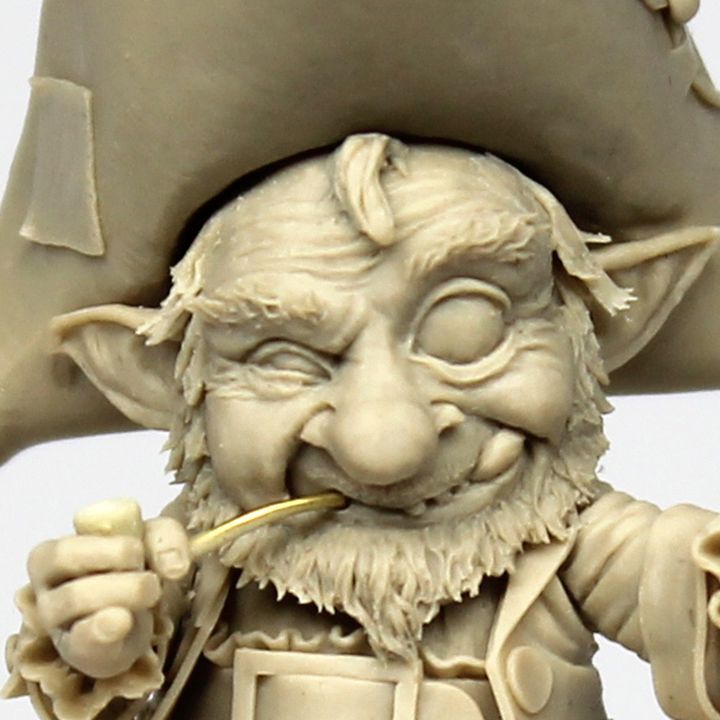
Lovely Goblin sculpted by Michael Kontraros
Incredible details by Antonio Leveque
The talented Patrick Masson used FIMO to create this magnificent piece
Iconic bust by Romain Van Den Bogaert (please look real detail s “unsculpted”)
The talent of Carmine Giugliano. He uses Plasticine with spectacular result
Carmine Giugliano often creates the mold of his plasticine sculpture, so he works on it with
other materials. You can see, there’s no only one way to create something!
Carmine prove it continuously. :-)
This face was sculpted by the talented Valentin Zak.
The face is reaaaaally small (under 1 cm)
He uses a personal mix clay: FIMO+Beesputty (50-50)
If you have the opportunity to see the sculpture live, believe me, it is very tiny! Great talent by Zak!
Some sculptors instead work mainly directly using two-component clay
and then works when the clay is hard (Benoit Cauchies, Maurizio Bruno,
Bill Horan, Andrea Jula, etc ... etc ...).
It’s a step-by-step job.
The Master Maurizio Bruno process
A Masterpiece by Maurizio Bruno.
The master Bruno uses mainly Magic Sculpt, Milliput e Green Stuff. Thi is pure art my mates.
Maurizio’s talent is incredible in my opinion.
Actually, you never work only by addition, or only by subtraction, but it is almost always a mix of
the two processes. Only Michelangelo could remove something to obtain the wanted shape :-)
There are also those who prefer to work completely in Green Stuff and I couldn’t mention
Raffaele Stumpo (the magician of Green Stuff, in my opinion)
Raffaele Stumpo uses mainly Green Stuff
Expressive bust by Alfonso Giraldes - he used Sculpey
Alfonso is a 360° artist skilled in both painting and sculpting. I suggest you to follow him!
Let's get back to the tutorial ...
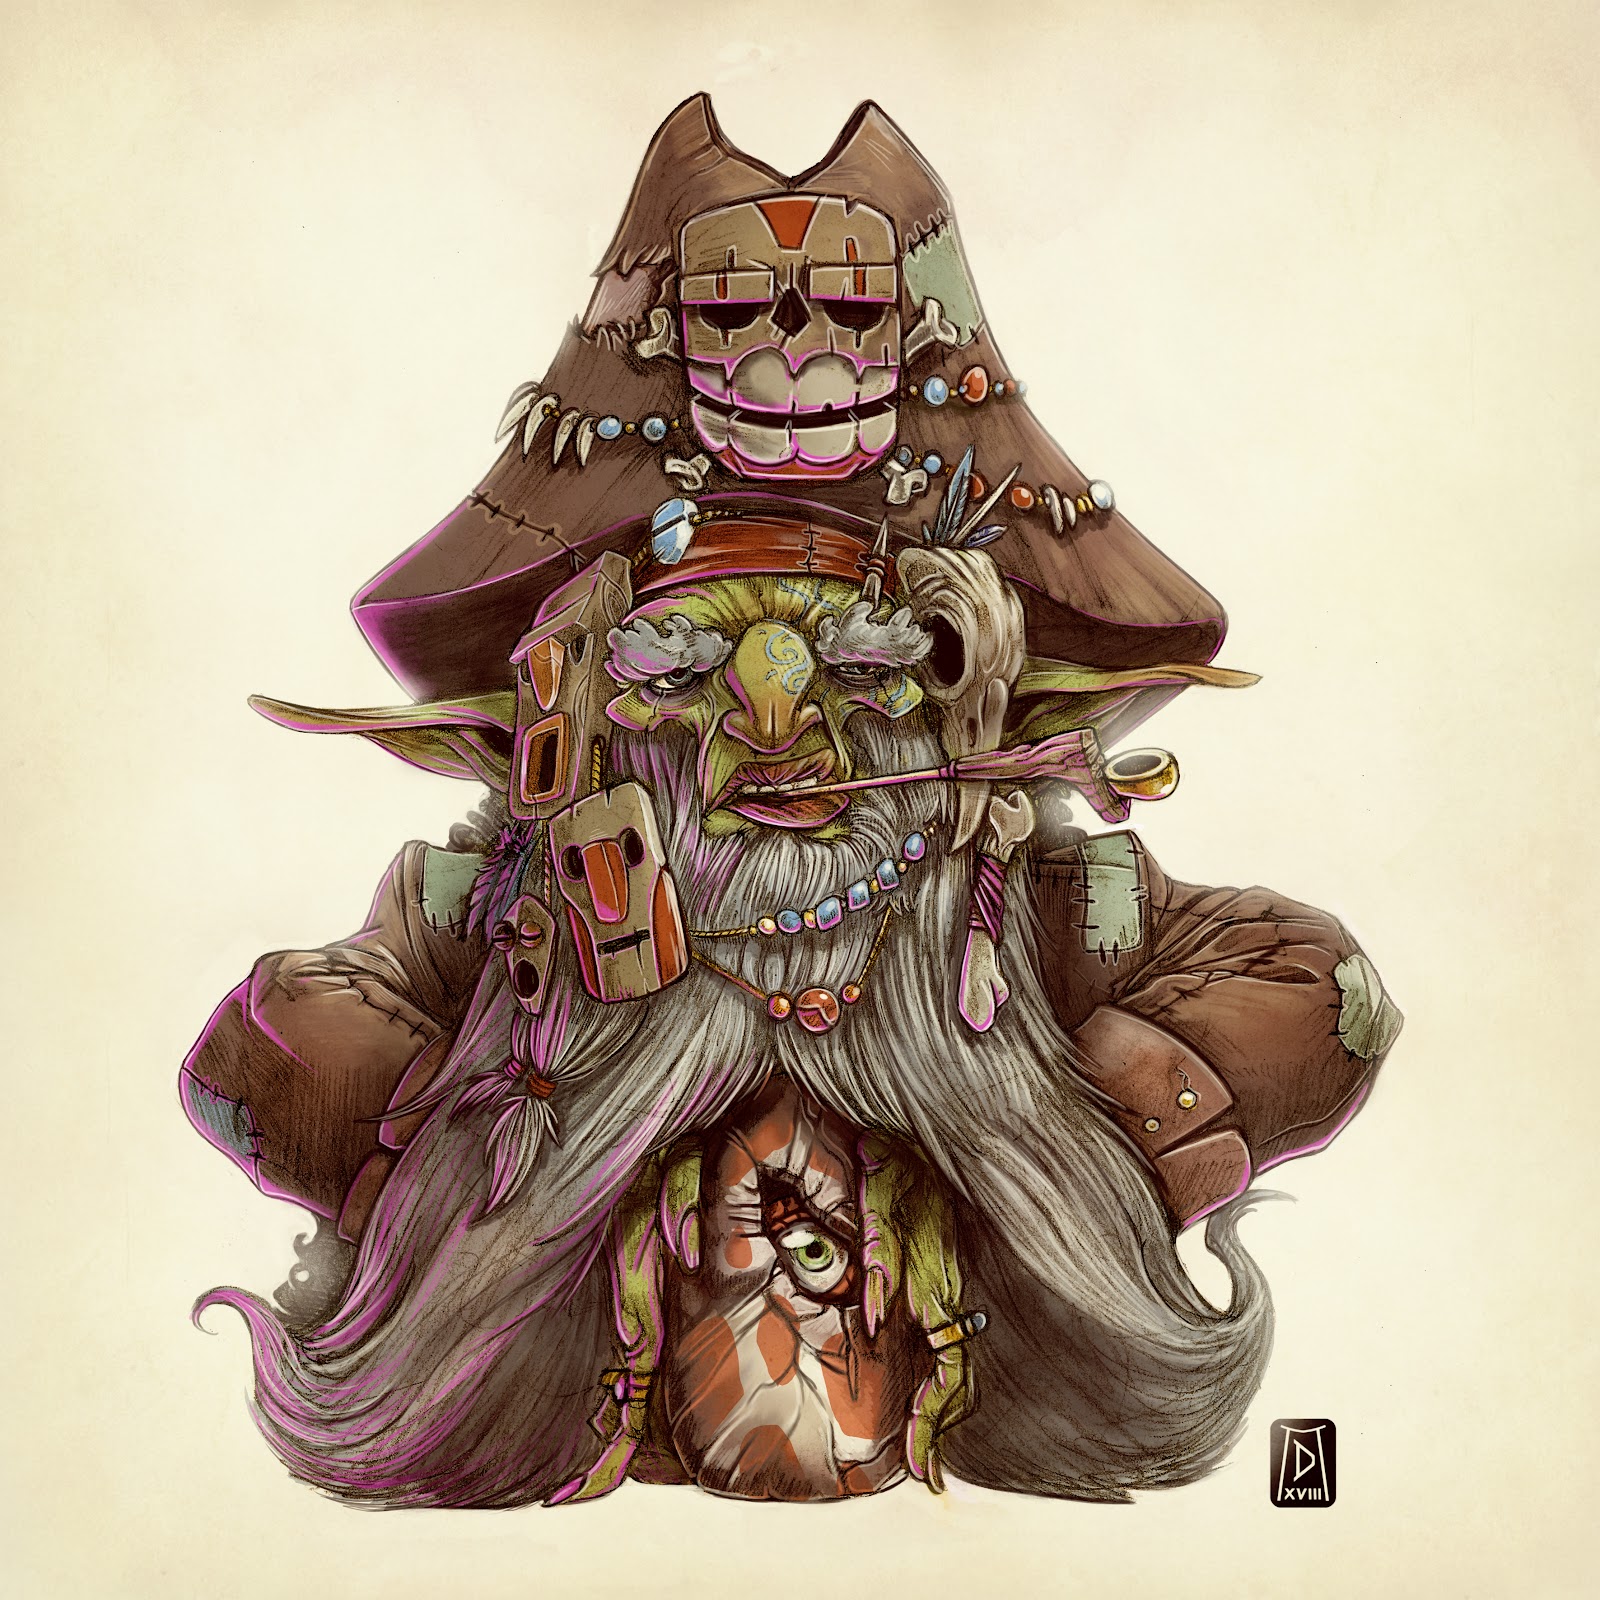
Regarding the piece that I have to sculpt, here is the concept designed by Davide:
first sketch by Davide Molino
The nice thing about sculpting is that every sculpture is different :-)
There is no way well with everything.
You need to adapt.
It needs experience, tests, and attempts.
In this case, I decided to sculpt everything in a single block, just because the concept allows me.
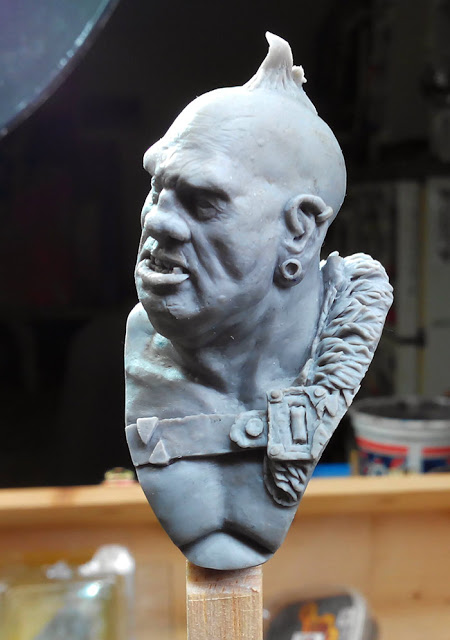
How to create a goblin's bust
So here we are at the important question: which modeling paste to use?
Lately, I'm getting great results with Beesputty, both the plastic version and the tripplefirm version.
I feel it much more plastic than other polymer clay, and this is a good thing, especially when you have
to cut your sculpture after cooking it.
I will use la Beesputty TrippleFirm to sculpting my bust
However, The bust is a very large piece (compared to what I usually sculpt), I decided to use mainly
Beesputty for the first part of the sculpture (the one that sticks to the metal wire) and then Beesputty
Tripplefirm for details, face, and hands.
The idea behind this is simple: the more the clay is hard, the more is easy to create tiny details
Previously, I always used only Super Sculpey FIRM and Super Sculpey Medium Blend.
It is a great clay for modeling miniatures.
The only problem is that both are too little sticky. So,
I needed to use glue to attach the clay to the armature.
Medium Blend is softer compared to FIRM version, but I don’t recommend it for details
The first problem of the Super Sculpey, compared to Beesputty, is that it is much less sticky,
and this makes it very difficult to adhere to the wire metal/armature.
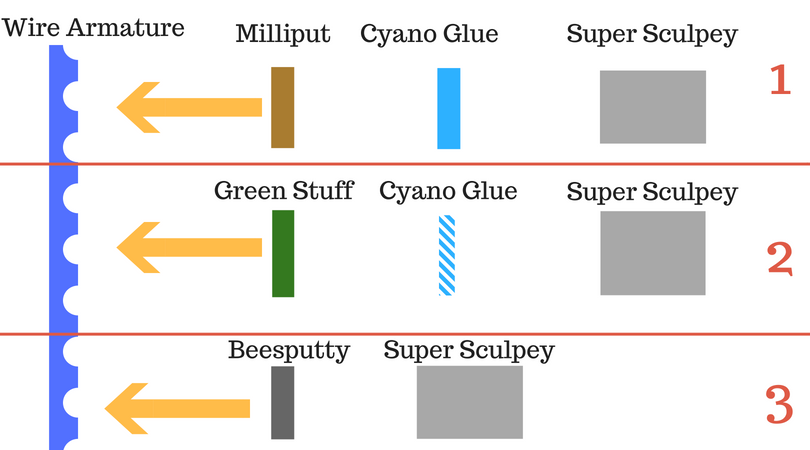
Most sculptors use a layer of Milliput / Green Stuff directly on the armature, followed by a layer
of Super Sculpey attached with quick glue.
Others sculptors use Green Stuff because it sticks easily to any surface.
Tom Mason, use Green Stuff on the armature
TIP: I recommend everyone to watch Tom Mason videos on YouTube. They are highly educational.
So I used the advantage of the magnificent properties of Beesputty (very sticky material),
using it directly on the armature and then adding it after any polymer clay I want.
Here we are a little infographic:
All three solutions are valid, but personally, I prefer to use the number 3 for two simple reasons:
In this case, I used only Beesputty Tripplefirm, as I felt it very comfortable to create details.
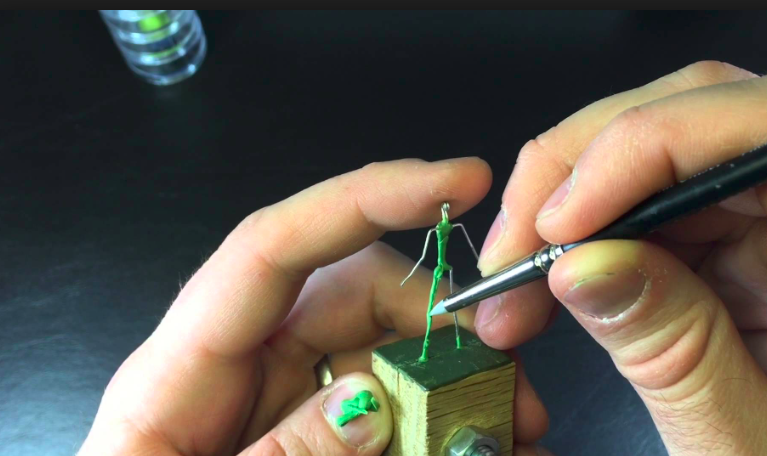
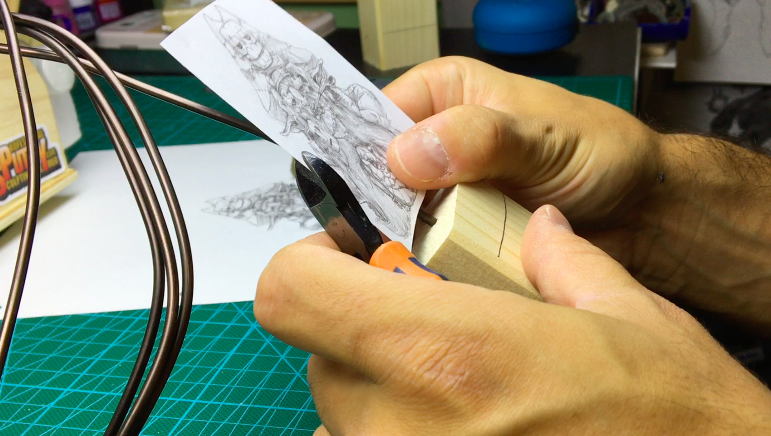
Step Two: Sculpting Sketching
I hung a print of the concept in order to always watch it during the sculpture
and I printed a copy of the concept with the same dimensions as the sculpture, in order to have
a reference to the real size of the bust.
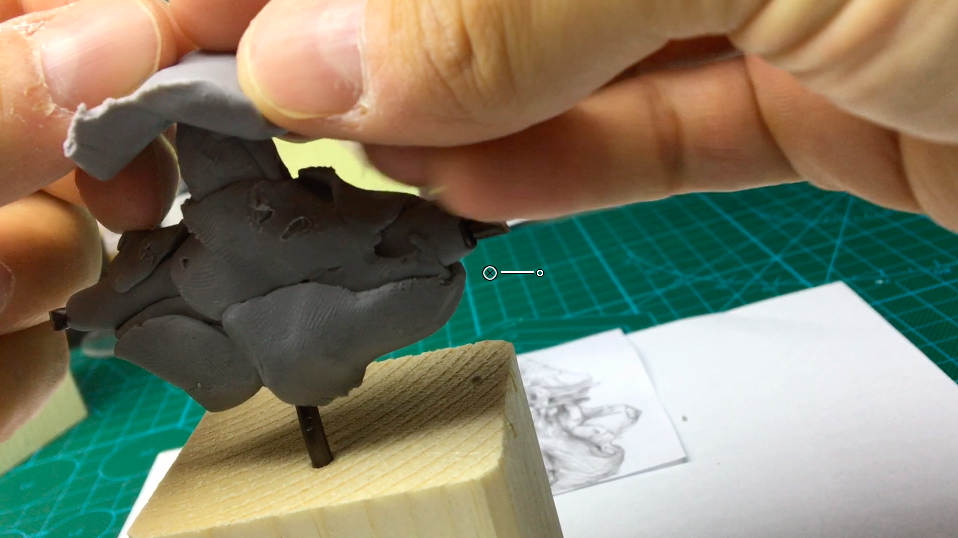
So I started putting the first clay balls, directly on the wire.
As I said, I used Beesputty Plastic, because it is very sticky and easy to attach to the armature.
No glue.
The process by great Master Allan Carrasco.
He used milliput on the metal wire than clay attached with some cyanoacrylate glue.
At this stage, we are in the phase of addition, I rarely remove something.
My favorite tool at this stage? THE HANDS!
Example by Raul Garcia Latorre. Raul used Milliput as a first layer, followed by polymer clay.
It’s really important thinking “where you have to put your clay”, instead of thinking
“what kind of clay I need to use” :-)
Alfonso Giraldes shows me He uses Monster Clay to sketch his sculpture and
to teach on his classes.
How to use your references
When you sculpt something my advice is to focus on the overall vision, thinking of the individual
masses of putty you add and thinking about the general shape, rather than the details.
Try to add mass, in order to arrive at a form that satisfies you.
Do not think about the details, you will add them later.
During the sculpture process, is better to have different reference images.
Romain Van Den Bogaert, whom I thank so much,
(thanks to him i discovered) a very useful software: PureRef, where I collect images of
references for sculpting.
PureRef: a really useful software for collecting your references
If you are lucky enough to work with a Character Designer, there are no more important references
than him: you have to follow him because the creature came out of his mind :-)
Fortunately, I have my friend, Davide Molino, in this case!
And that's what I did, I followed his directives.
As used instruments, at this stage, I normally use my hands a lot.
Some wood tool to smooth when you need the surface, but I never go further with the details,
those come later.The process I normally use is something like that
(which is the same as any sculptor I think).
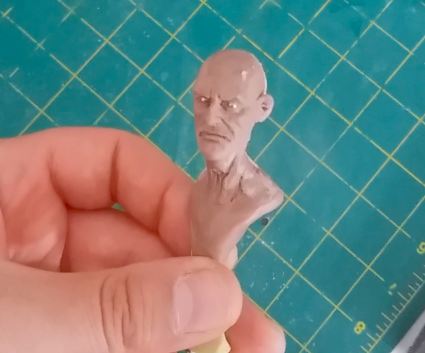
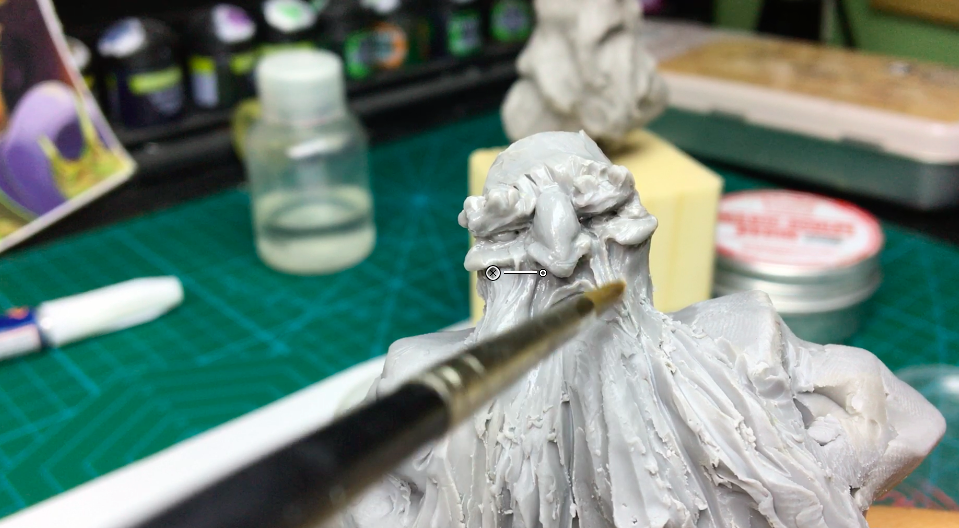
STEP Three: Clean up your sketch
I begin to remove with a cutter some clay that seems too protruding, outlining the features of the bust.
In this phase, I start to create the shape of the face.
Your face is the most important part of everything!
It's the part where I spend most of my time on.
It's useless to sculpt a good coat, a good jacket, or crazy doodles: if the face is ugly the sculpture is ugly,
so take your time to create a good face.
Tools to sculpt
This is the moment to talk about which tools to use to sculpt something.
Actually, the instruments are very personal, and many sculptors (myself included)
prefer to build the instruments themselves.
One mistake I made too is buying too many tools in the beginning.
And this can confuse ideas.
The more tools you have, the more possibilities you have, and for a beginner,
this can be confusing!
Actually, most professionals do not use many tools.
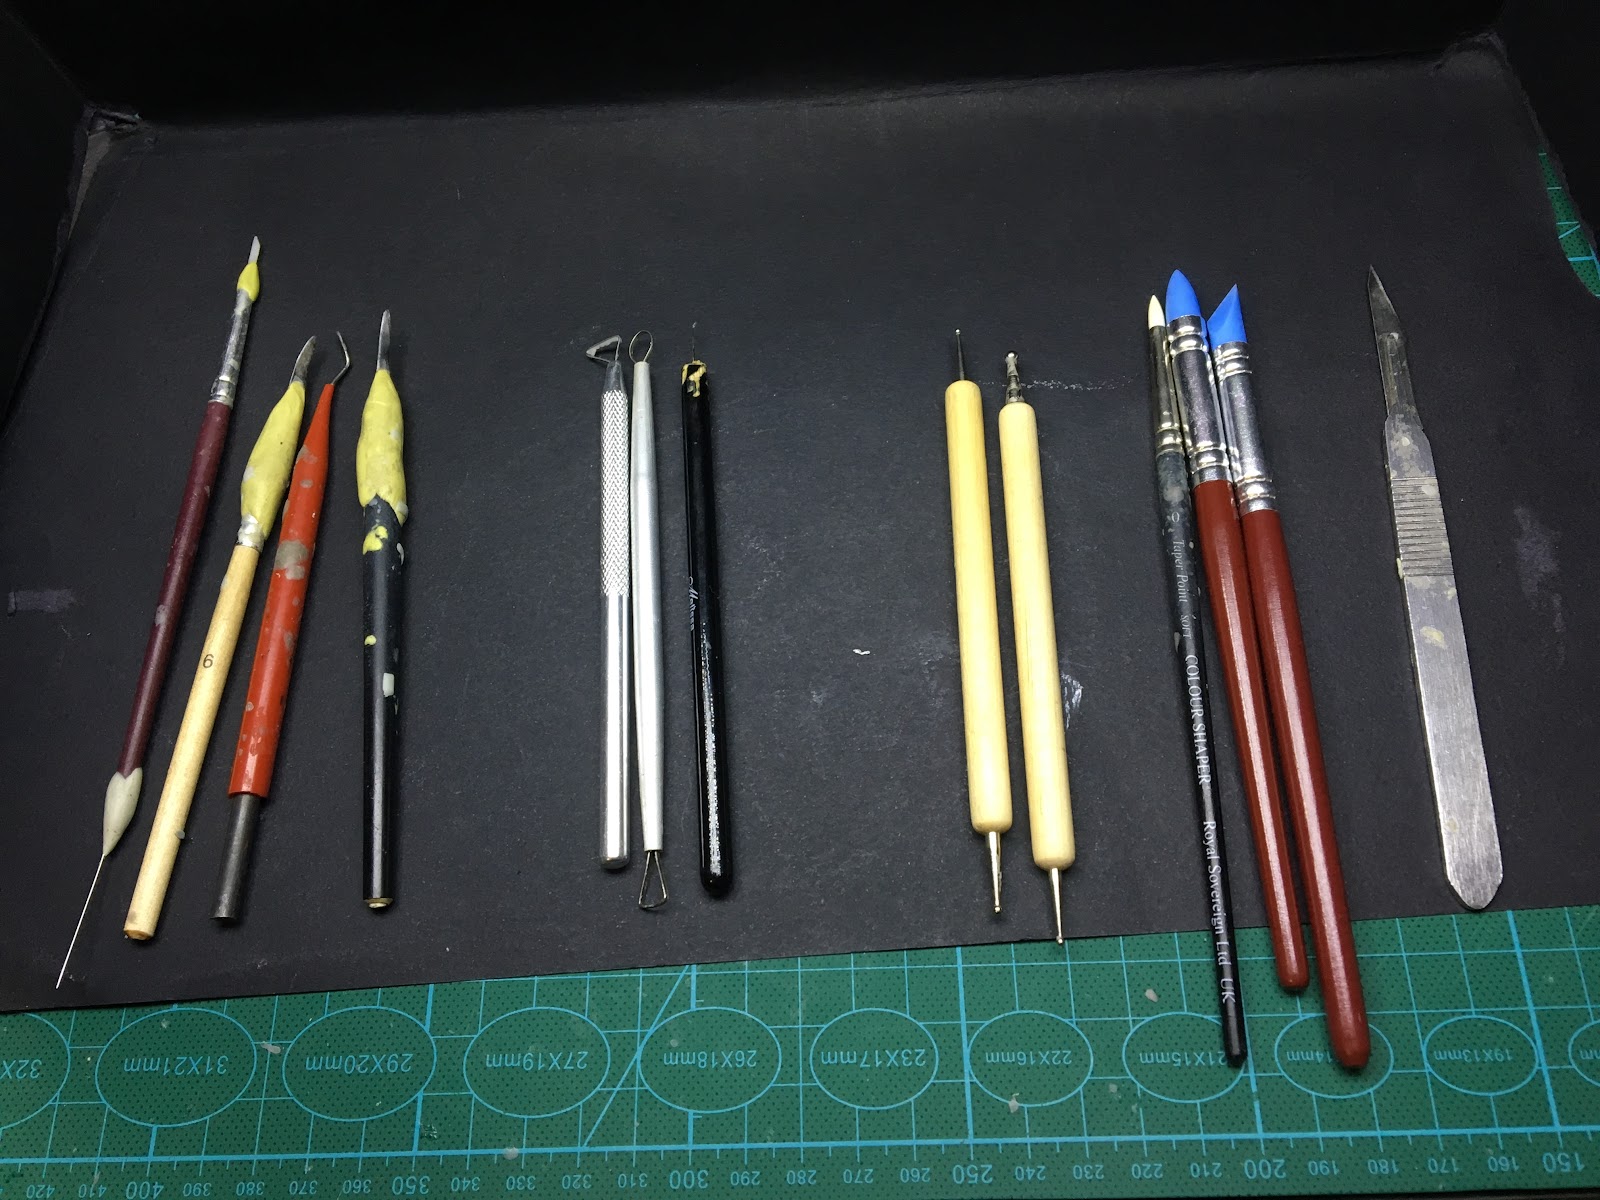
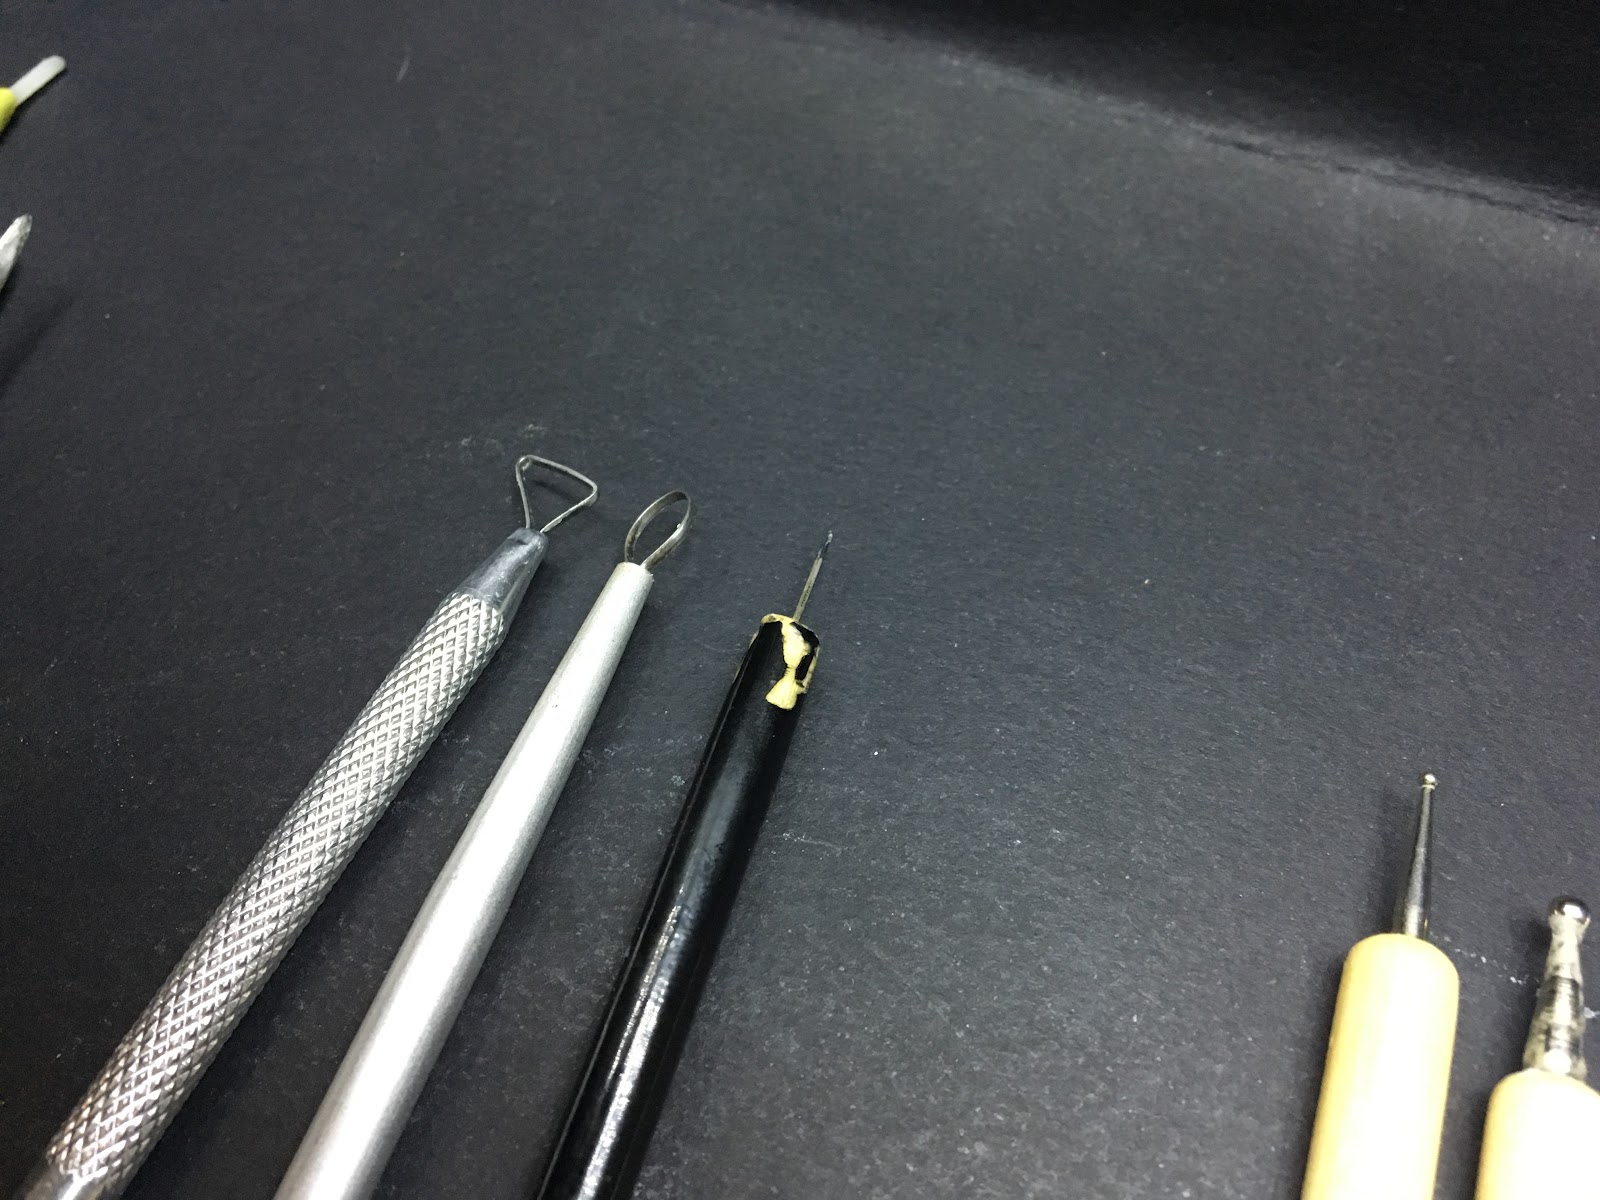
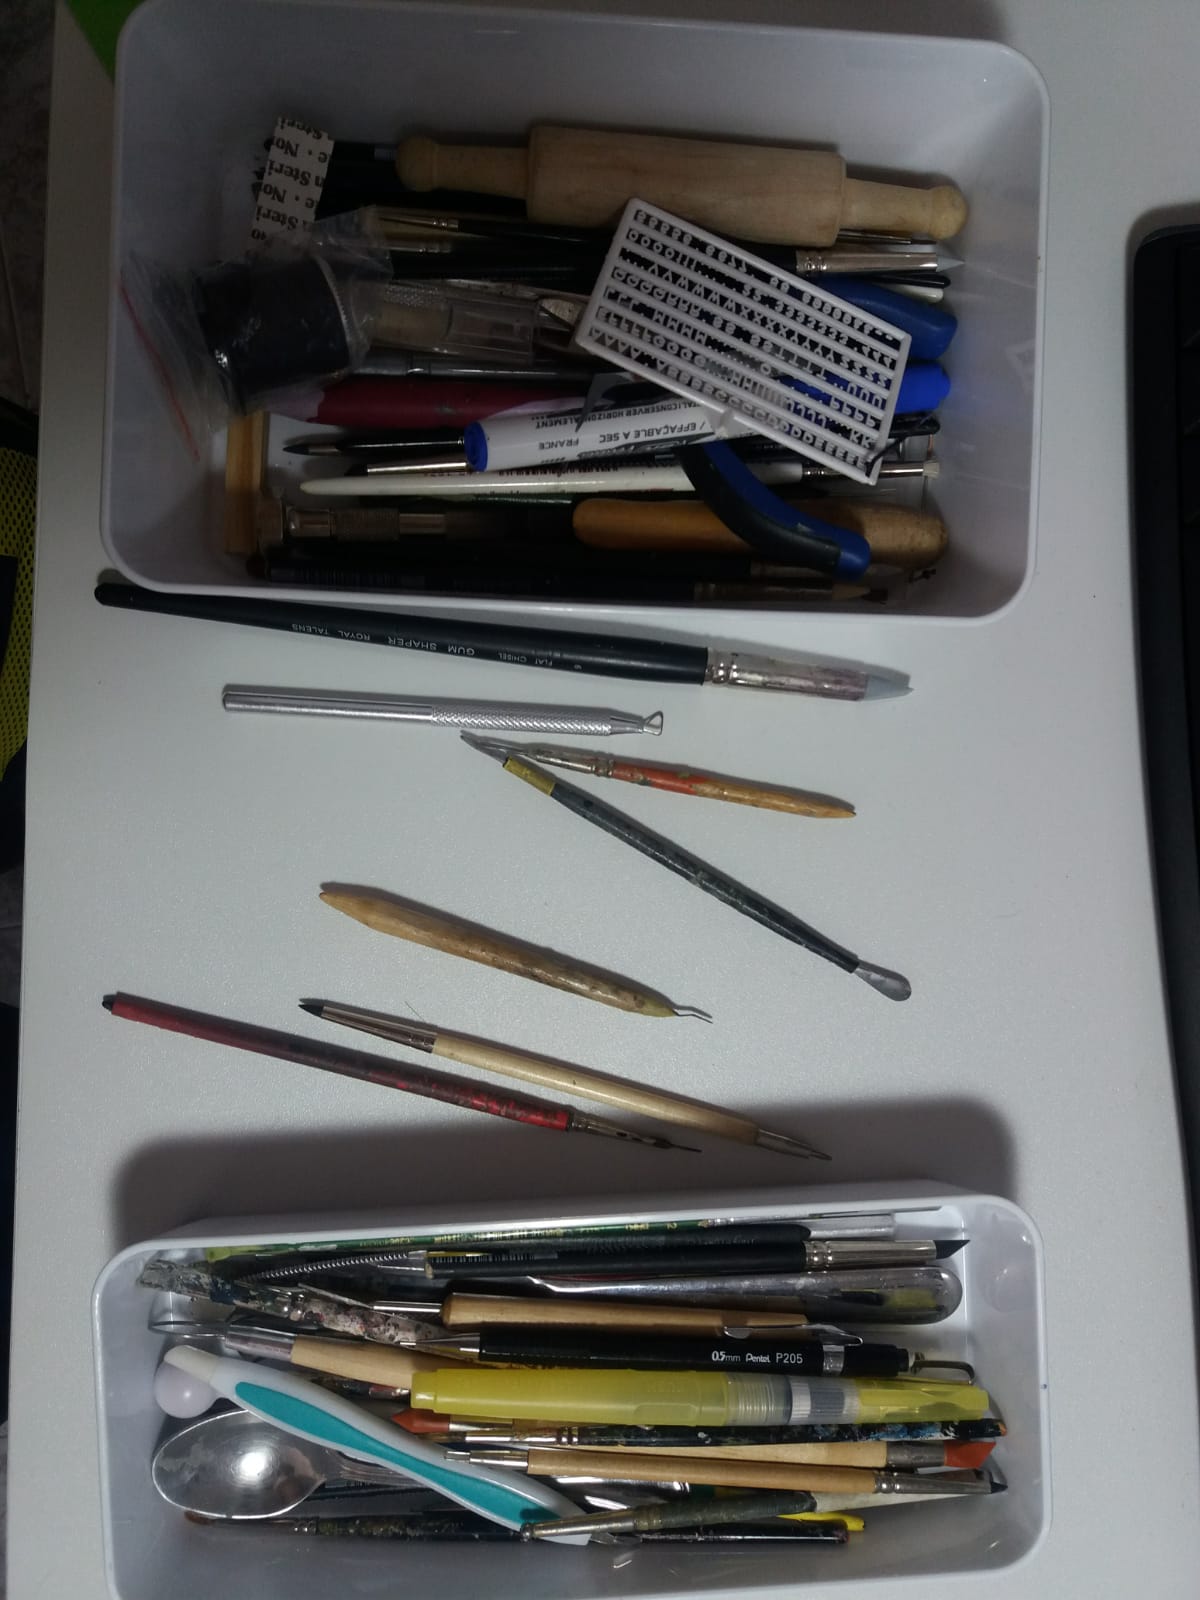
Here are the ones I use most:
Most of tools I use
From left:
4 spatulas
3 Loop tool
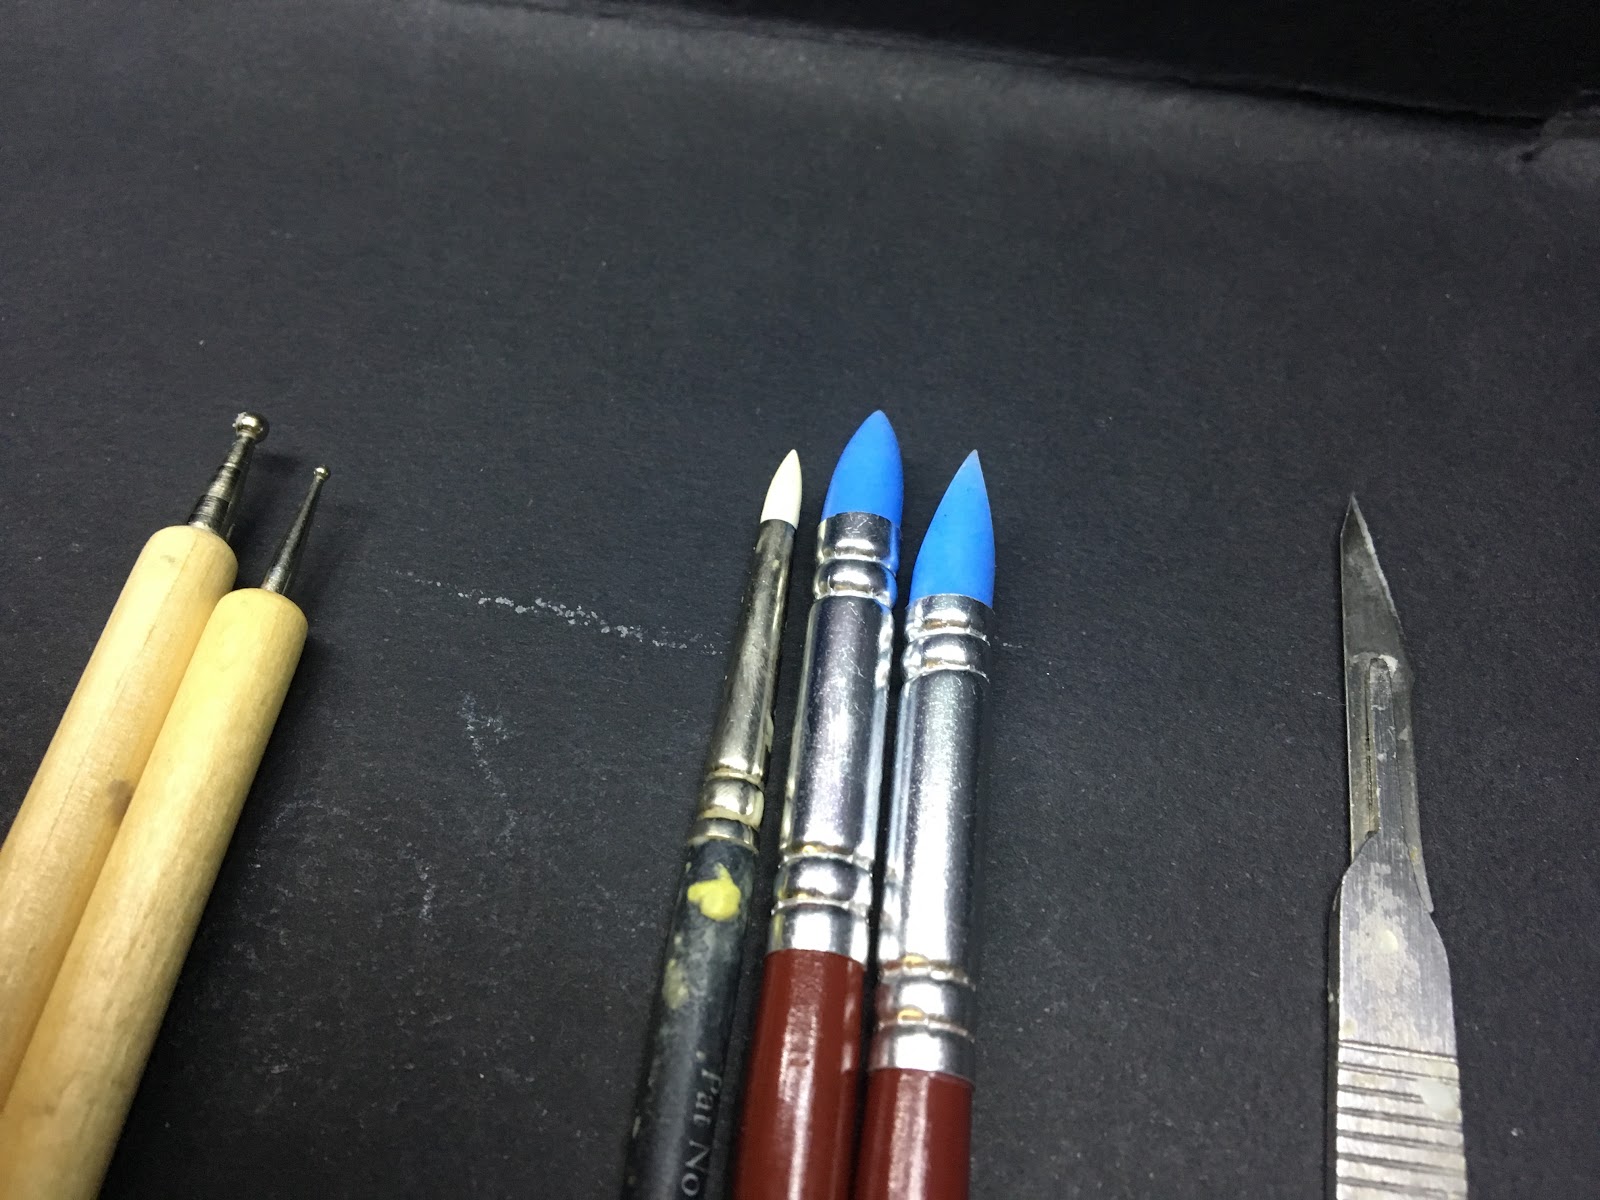
2 round graver
3 clay shaper
1 cutter
I use them for everything.
They go well with both polymer clay and two-component putty.
To made them, I took pieces of steel, appropriately polished, cut, and sanded.
The one on the left is a simple piece of plastic that I found.
I use it for the details of the face and hands.
I use round gravers especially when I work with polymeric clay and they're perfect for sculpting
anatomical parts. 3 clay shapers are perfect for smoothing and making details.
The loop tools are essential to accurately remove the clay from the sculpture.
The one on the right is the smallest I have.
I made it by bending the blade of a fretsaw heating the metal with one methane flame.
Special Thanks:
I would like to thank in particular Alfonso Giraldes very much. He was kind enough to send
me more pictures and a personal video of the tools he uses mostly.
He uses tools built by himself or by other fellow sculptors, too. He often uses polymer clay and
Wax / Monster Clay for sketching.
Some Alfonso’s Tools
Some Alfonso’s Tools
As you can see, Alfonso uses many tools.
It depends on what kind of work you have to do.
STEP Four: Smoothing Process
I begin to smooth the structure using different solvents.
This is an operation I usually do at the end of each sculpture session.
The polishing depends on the type of putty you used:
For MILLIPUT AND MAGIC SCULPT:
I prefer to use fresh Alcohol Ethyl or water, even if much of the sanding work I do in hardened stucco,
helping me with a cutter, Dremel, abrasive paper, and iron straw.
For POLYMER CLAY:
We use liquid solutions to be put with the brush on the model.
1) WHITE SPIRIT very strong, to be used only to dissolve the clay well.
2) TURPENTINE More delicate than White Spirit and also suitable for details, it takes time to
completely evaporate
3) ISOPROPYL ALCOHOL is the one I use most of all. Absolutely an exceptional discovery
for me, especially thanks to my friend Stefan Niehues-Ellermann
(sculptor and creator of Beesputty). It gently dissolves the clay and evaporates almost immediately.
In my opinion It's the best smoothing tool ever.
Also, Alfonso Giraldes uses ISOPROPYL ALCOHOL inside a watercolor pen
(I saw a watercolor pen used in sculpting for the first time by Joaquin Palacios, too).
4) ETHYL ALCOHOL, you can use it for really fine details but with great care, because it tends to
cool so quickly the clay that stiffens it and makes it fragile.
Tip: both white spirit and turpentine tend to "stay" in clay making it difficult to handle, unless you wait
until it evaporates completely, which usually takes a couple of hours, depending by how much you
use it.
So, I advise you to put the white spirit or turpentine only at the end of the sculpting session
otherwise it will be difficult to work on it again.
At the end of each work session, I put turpentine or white spirit, because they are very
aggressive and tend to amalgamate the pasta.
I will use isopropyl alcohol for the final details and for the final part.
Maurizio Bruno helps with a drill to eliminate the large masses after the
Magic Sculpt has hardened
You can find a great tutorial by Maurizio Here
The smooth process example by Jacques Alexandre Gillois (@ JAG All Rights Reserved)
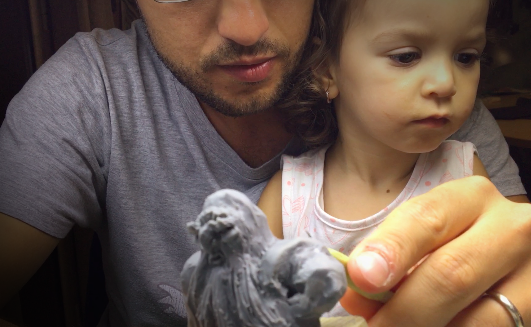
Let’s check the dimensions
My little assistant: Anastasia, my daughter. She loves to sculpt with me :-) :-)
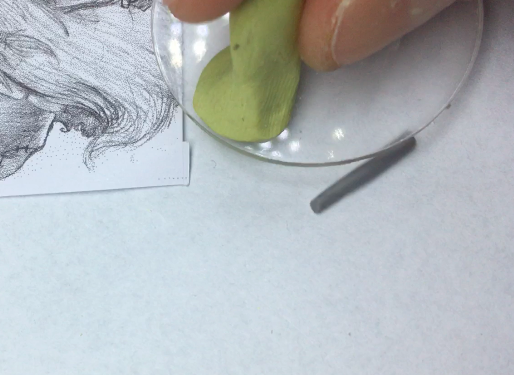
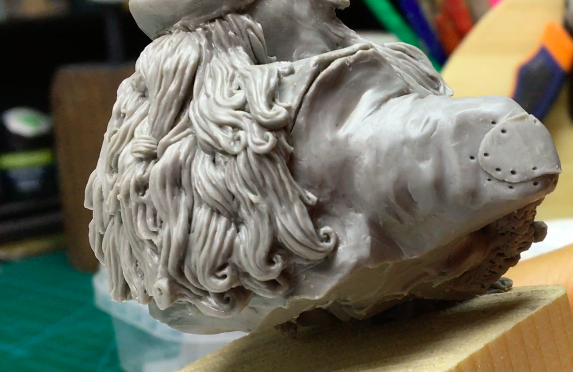
Step Five: Hair and Beard
I use a piece of plexiglass to create clay sausages
I wanted to create a smooth beard, exactly like the design, and also curly hair.
To do this I created some sausages with the help of a piece of plexiglass and I placed the
various pieces here and there, trying to create the "movement" of the hair.
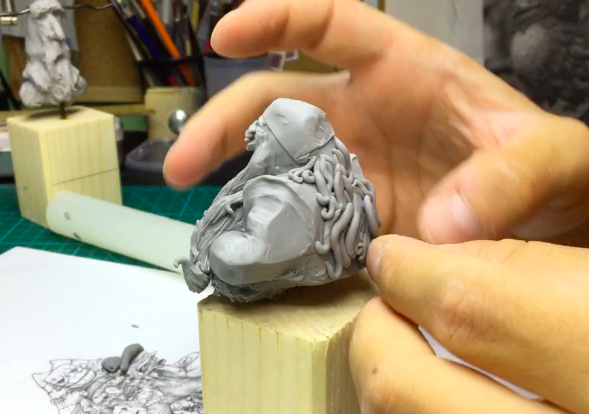
In this phase I suggest you don’t focus to the details. You have to think to the general shape
you want. Often, I half-close my eyes, in order to blur my view and hide the details.
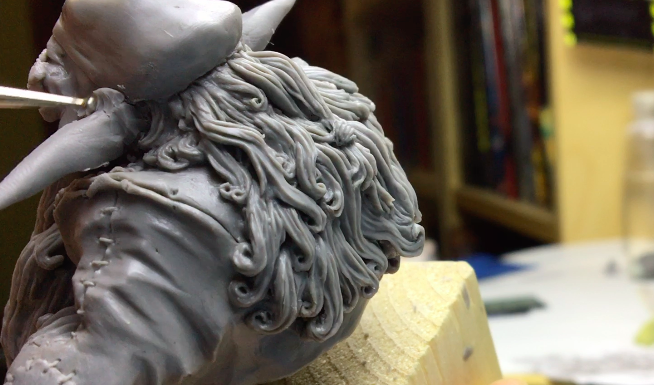
I place the putty sausages one by one so I will smooth them
with white spirit and spatula tool
Work in progress on the hair using a clay shaper to create the shapes
to be continued...
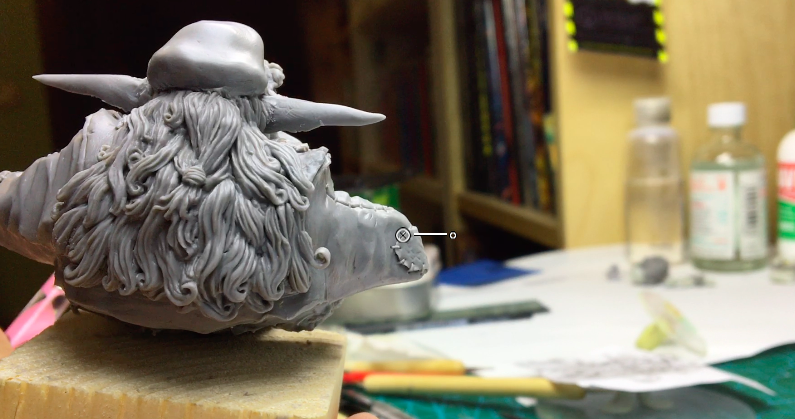
Almost finished (it needs only to clean up process)
Only the final cleaning is missing...
STEP Six: Mask and Details
For us painters, details are fundamental.
That's why I asked Davide, before drawing the bust, one thing: YOU HAVE TO EXAGGERATE!
For the masks, I created them separately and placed them on the sculpture later.
Then I placed them on the sculpture with calm and patience
Placing carefully every mask and every detail
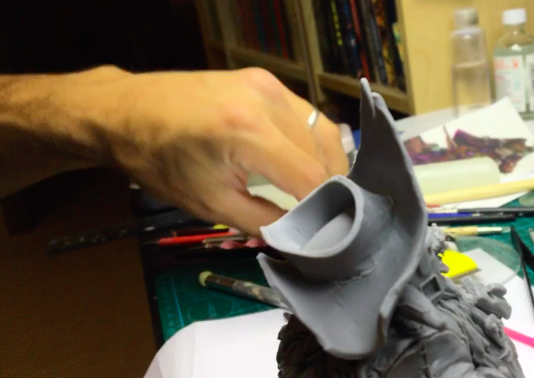
STEP Seven: The Goblin Hat
For the hat, I spread the beesputty with a rolling pin to create a sheet about
2-3 millimeters thick. I strongly recommend you to see the Making of Video
to better understand the process.
Then I shaped the hat with a cutter:
Then I created a rectangle of clay to create the upper part of the hat and I placed it
I added the top to cover the hat.
I smoothed with bulbs and spatulas, and the lower part of the hat in order to create the hole
where he puts his head (in the video you can see the process very well):
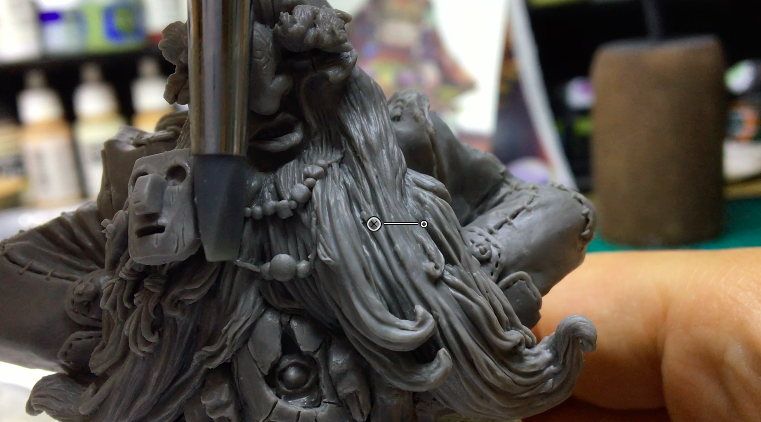
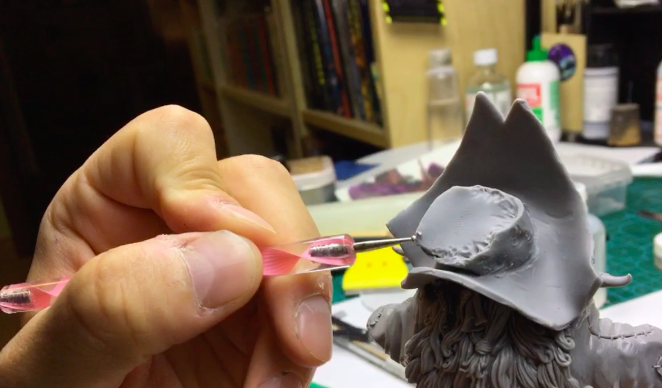
Finally, I polished everything first with turpentine and then, once evaporated, I created the
details and polished again with isopropyl alcohol
Creating last details and cleaning imperfection
The first process by Alfonso Giraldes
Finished Sculpture. Alfonso uses many materials.
Here you can see Milliput, Sculpey, and Green Stuff
Final STEP
This is a very important advice:
when you have almost completed the sculpture, take it and put it aside for a day or two,
without looking at it!
Then on the third day, take it and watch it carefully and you will immediately
notice some mistakes you have made.
If you've ever drawn, you know very well this thing.
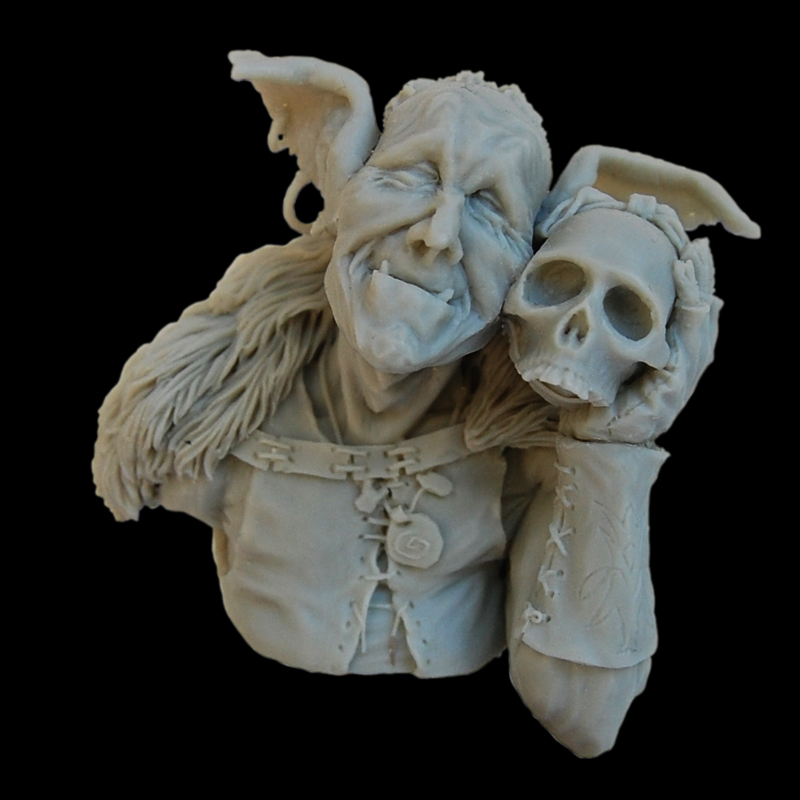
The Finished Sculpture (almost)
If you want, you can subscribe to the mailing list for the future Kickstarter that we will launch later
this year (2018), in this way you will be notified immediately when we launch the project.
Davide and I are doing everything by ourselves, so we will create only a few copies.
They are limited edition miniatures, “really” limited :-)
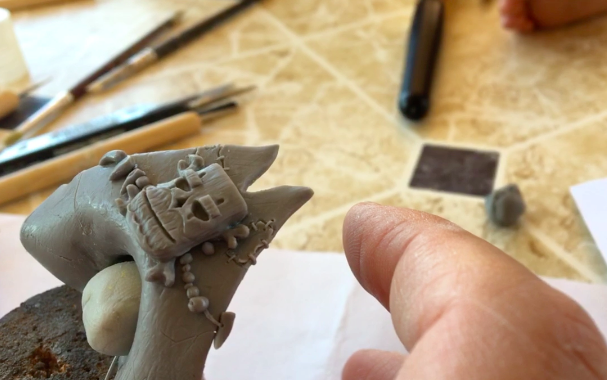
Actually, the bust is not really finished. In the final version I added some rings to the hands and
arranged some details of the beard and necklaces.
____________________________________________________________________________
Useful Links and resource
Massive Voodoo
We need people like Roman in the Miniature World :-)
Tutofig
A lot of tutorials, guides and how-tos
Volomir’s Blog
Important blog for every miniature painter, sculptor, and collector.
You can find everything!
PureRef Software
Software that help you to collect your references
Anatomy4Sculptors
I think this is the best book for every sculptor!
It isn’t cheap, but it worth every penny spent
Artist
Romain Van Den Bogaert
This are the sites by Roman Van Den Bogaert.You can find very
useful images on his blog, to understand what he’s doing, and also info about
his sculpting class.
Valentin Zak
Very talented sculptor Valentin Zak
Patrick Masson
https://www.deviantart.com/the-small
Patrick “Tha Small” is a great artist! In my opinion, not very small as a sculptor :-) :-)
Carmine Giugliano
Carmine is an incredible artist and sculptor, i really recommend you to follow him.
This is a personal account on FB, be free to ask him friendship
Stefan Niehues-Ellermann
Stefan is the creator of the clay for miniature Beesputty.
I highly recommend to follow his FB page. Stefan often publish wonderful video tutorial on FB.
Maurizio Bruno
Maurizio is a professional sculptor with over 20 years of experience.
You can learn a lot from him, simply from seeing his works.
This is a personal account on FB, be free to ask him friendship.
Joaquin Palacios
Joaquin is a professional knowledgeable and talented sculptor. You can learn so much
stuff from him.
Tom Mason
Tom is the owner of a very useful YouTube Channel specific for Miniature Sculpting.
I highly recommend to see his videos. Very good stuff!
He has also a Patreon Project.
Michael Kontraros
Michael is a creator and producer of many incredible sculpture.
Pedro Fernàndez Ramos
One of the best known and talented sculptors
Raffaele Stumpo
Great Italian sculptor, winner of many awards.
Alfonso Giraldes
If you don’t know Alfonso, probably you have a problem :-) :-)
Raffaele Picca
Very talented sculptor and painter.
At the beginning, he was a Roman Lappat apprentice.
Has Raffaele passed the teacher? :-)
Raul Garcia Latorre
Incredible artist with over 25 years of experience. You have to follow him. Absolutely!
Allan Carrasco
Incredible Sculptor well knowledgeable all over the world.
I highly recommend to see his portfolio in his website: you will certainly learn something!
Jacques Alexandre Gillois
Jacques is considered perhaps the best miniatures sculptor all over the world.
And there's a reason for this: look his sculptures!
Lucas Pina Penichet
Is there anyone who doesn’t know Lucas?
Absolutely brilliant Spanish sculptor. I love his works!
Sang Eon-Lee
Great talented artist. Well known for his historic bust.
About the Author and our Project
Daniele Found Miniatures
This is my FB page. Please follow him, and you always receive all my news
and updates for my sculpting and painting project :-) Thank you!
Daniele Trovato
This is my personal account on FB.
Be free to ask me friendship! I always accept any request from every miniatures lover!
Goblin Dragon Raiders Kickstarter Project
Here you can subscribe to our project to receive the invitation when
we launch before the others! (follow the #goblinTherapy)
Davide Molino Art
My favourite illustrator and Character Designer
Stay in Touch
My biggest dream is to create my own sculpture class in order to teach everything
I know to those who are starting in miniature sculpting and want to have fun.
Maybe someday if someone gives me the chance, I will.
But there is always something to learn. Always.
I decided to film myself while I was sculpting this bust, and this allowed me to create the video
you can see here. I Hope you like it.
Final Recommendations
My advice with the sculpture (as for painting) is one: ENJOY !!
It's essential to have fun while doing things.
I never work on a model that doesn't fun me. Have Fun is at the base.
Both painters and sculptors are the same: we love the process above all, not just the finished product.
So you have to experiment, and always do new things, both with painting and with sculpture.
I leave you with a sentence that I use often, which well simplifies my philosophy:
"if you always do what you are already able to do, you won't be more than what you're right now"
Very Special Thank
There is one important thing I want to say: Thank you ROMAN!
Thanks to the mythical Roman Lappat, who allowed me to write this article and show my
art to everyone. I wish you the best, my friend.
Me and Roman :-) :-) (sorry for blurred pic)
Keep Sculpting and enjoy your life :-)
Daniele “Found” Trovato


