


posted by Mati/Badsmile/lil orangutan
Hey there folks,
noeste had asked me via mail if I could do a sculpting jam similar to Romis painting jams. So this is what noeste wanted to know:
You see, I am trying to resculpt the cloaks on some Chaos Warriors for WarhammerFantasy; I've repositioned their legs and arms, so it looks like they're charging into combat, but in the process I have cut off most of their cloaks, and I'm having trouble recreating them, so it looks like the cloak is flapping in the wind behind them. I have trouble making the putty cure fast enough; the curves I sculpt flatten out, if you know what I mean; I have trouble making the cloth stand on its own, if I don't let it hug the body of the warriors.
Any clues, hints or tips to how I should do this? I have normal greenstuff, yellow milliput, brownstuff (not tested) and ProCreate (not tested) available, and I have read somewhere a long time ago that you can mix green and brownstuff to make it harder than greenstuff, but stilll look organic? Not tried it myself, and I can't find back to where I read it (if it wasn't a dream..)
Help would be greatly appreciated!
So here is the answer with a few pics to make it easier to understand:
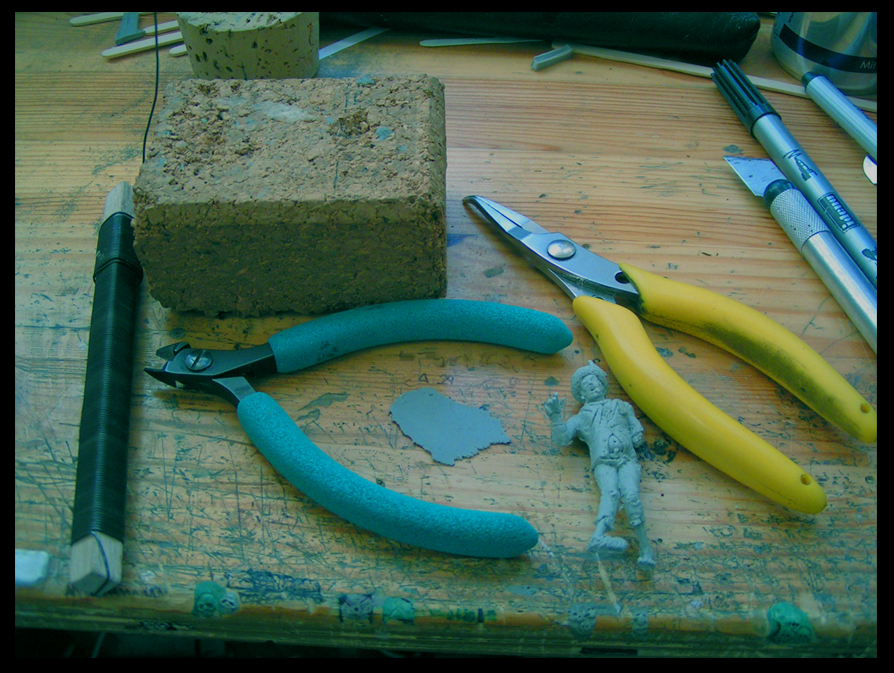
The process itself is quite easy, let's start wit the basic materials needed to do this...

List:
- Mini ( I chose the Zombie Raffa made during one of my workshops )
- Wire cutters
- Pliers
- Wire
- Cork
- Superglue (not shown on the pic, but you know what it looks like)
- Flattened sculpting putty ( can be done with quite every sculpting putty )

The first step would be to cut a few wires long enough to build a supporting structure with them. As a measurement I suggest cutting them about twice the length/height of the mini.
The next step would be to drill some holes in the minis' feet to pin wires in it, glue them with superglue, just how you would normally pin minis.

The next step is to bend some bendy shapes into the wire that will be used as supportive structure for our cape. Try a few different shapes if you like. Stuck the mini in the cork !
 After the wires are bent, just stuck em in the cork right on the back of the mini. They don't have to be all at the same height, try out a few positions and readjust if needed.

Fix the flattened out putty to the mini with the coat just gently lying on the "wire support system". Next start to attach the cloak in the front, where it is fixed to the mini. Make sure to be gentle and not ripping it off or making holes in the cloak. Various soft strokes are better than one with too much energy. It is not important which putty you use, this technique basically works in every medium.

With just little pressure start pushing in the putty with your favourite sculpting tool inbetween the wires, though be sure to stay gentle again, you don't want to break the cloak now that you fixed it to your mini. The wire armature will act as a supportive structure from below and make sure your cape keeps a nice windy flow to it.

As soon as you achieved the desired form for your claok and are satisfied with its swing in the wind let it rest and cure/bake it (if using polyclays). You can go quite crazy with the folds by just letting the cloak overlay in different places. I didn't do it here to better explain how to build the support structure. After the putty is cured, you can even add another thin layer of putty onto the claok and sculpt fur on it or chainmail or dragon scales or sewn on hobbit feet or banana peels. That's really up to you.
I hope I could help you with this short explanation and sorry for the crappy pics. Bazooom, eat bananas !
cheers, Mati
EDIT: Do you have questions concerning sculpting ? Don't hesitate to ask, if we have the time we'll answer in a little sculpting jam again.
Hey there folks,
noeste had asked me via mail if I could do a sculpting jam similar to Romis painting jams. So this is what noeste wanted to know:
You see, I am trying to resculpt the cloaks on some Chaos Warriors for WarhammerFantasy; I've repositioned their legs and arms, so it looks like they're charging into combat, but in the process I have cut off most of their cloaks, and I'm having trouble recreating them, so it looks like the cloak is flapping in the wind behind them. I have trouble making the putty cure fast enough; the curves I sculpt flatten out, if you know what I mean; I have trouble making the cloth stand on its own, if I don't let it hug the body of the warriors.
Any clues, hints or tips to how I should do this? I have normal greenstuff, yellow milliput, brownstuff (not tested) and ProCreate (not tested) available, and I have read somewhere a long time ago that you can mix green and brownstuff to make it harder than greenstuff, but stilll look organic? Not tried it myself, and I can't find back to where I read it (if it wasn't a dream..)
Help would be greatly appreciated!
So here is the answer with a few pics to make it easier to understand:
The process itself is quite easy, let's start wit the basic materials needed to do this...
List:
- Mini ( I chose the Zombie Raffa made during one of my workshops )
- Wire cutters
- Pliers
- Wire
- Cork
- Superglue (not shown on the pic, but you know what it looks like)
- Flattened sculpting putty ( can be done with quite every sculpting putty )
First things first, wires and pinning
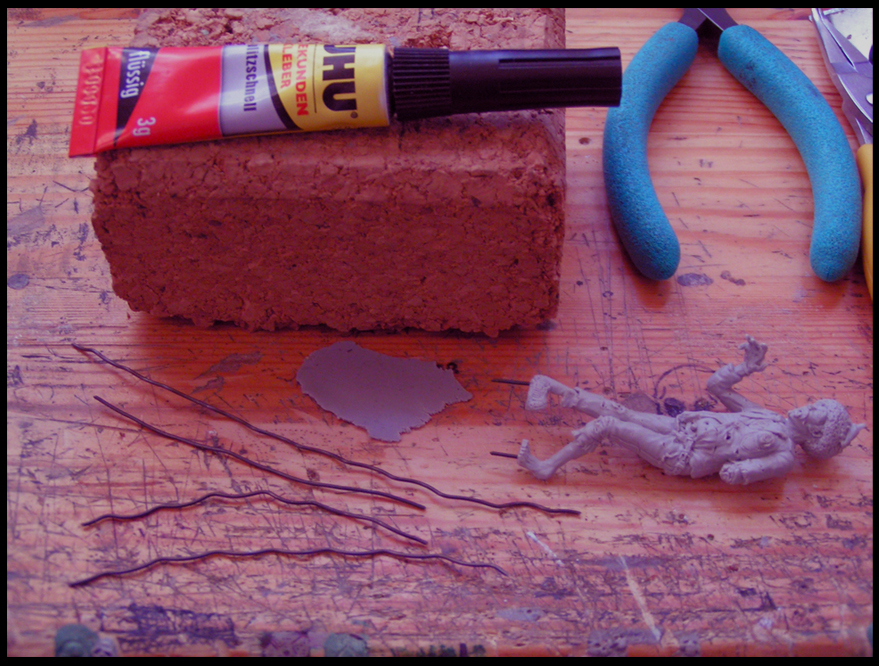
The first step would be to cut a few wires long enough to build a supporting structure with them. As a measurement I suggest cutting them about twice the length/height of the mini.
The next step would be to drill some holes in the minis' feet to pin wires in it, glue them with superglue, just how you would normally pin minis.

The next step is to bend some bendy shapes into the wire that will be used as supportive structure for our cape. Try a few different shapes if you like. Stuck the mini in the cork !
 After the wires are bent, just stuck em in the cork right on the back of the mini. They don't have to be all at the same height, try out a few positions and readjust if needed.
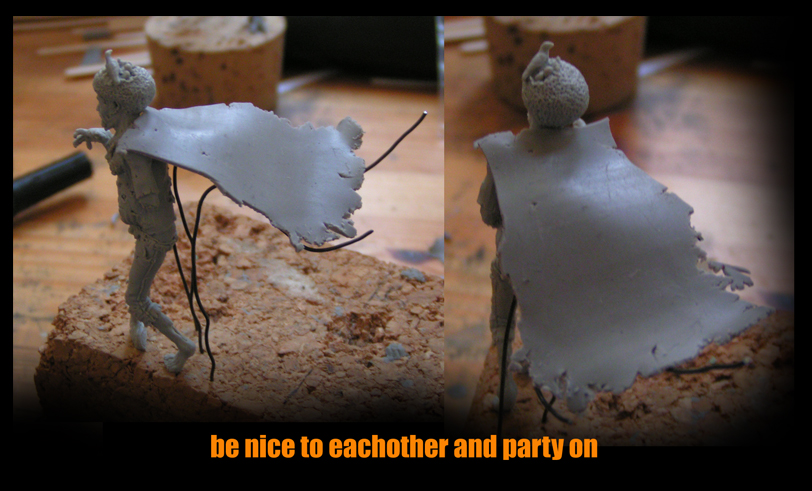
Fix the flattened out putty to the mini with the coat just gently lying on the "wire support system". Next start to attach the cloak in the front, where it is fixed to the mini. Make sure to be gentle and not ripping it off or making holes in the cloak. Various soft strokes are better than one with too much energy. It is not important which putty you use, this technique basically works in every medium.

With just little pressure start pushing in the putty with your favourite sculpting tool inbetween the wires, though be sure to stay gentle again, you don't want to break the cloak now that you fixed it to your mini. The wire armature will act as a supportive structure from below and make sure your cape keeps a nice windy flow to it.
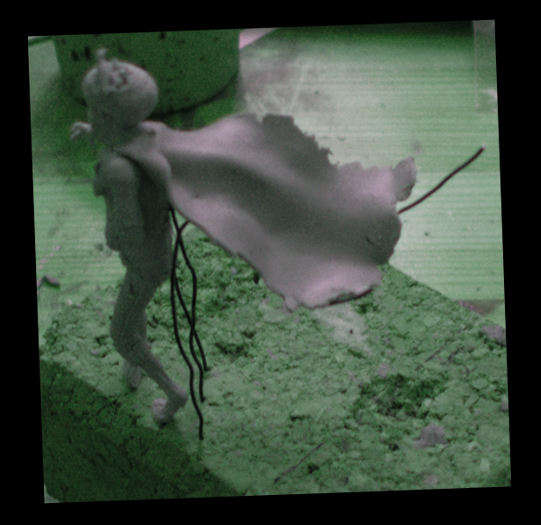
As soon as you achieved the desired form for your claok and are satisfied with its swing in the wind let it rest and cure/bake it (if using polyclays). You can go quite crazy with the folds by just letting the cloak overlay in different places. I didn't do it here to better explain how to build the support structure. After the putty is cured, you can even add another thin layer of putty onto the claok and sculpt fur on it or chainmail or dragon scales or sewn on hobbit feet or banana peels. That's really up to you.
I hope I could help you with this short explanation and sorry for the crappy pics. Bazooom, eat bananas !
cheers, Mati
EDIT: Do you have questions concerning sculpting ? Don't hesitate to ask, if we have the time we'll answer in a little sculpting jam again.


Just what I needed..
Thx a lot mate!
BÄÄÄÄBBBBÄÄÄMMMM!!
AHAAHAAHAH,
Good job, simply thing rule the world :)
Thanks a lot Mati! <3
You're welcome !
Wow, that is some fast moving zombie!
No seriously, thank you so much for making it look so easy :)
Yeah, sry for the choice of mini, but I myself don't own even a sixteenth part of minis the average painter has. So I chose the zombie as it is 54mm and would be pretty useful for the pics. :D
So easy to do...why I didnt acquire it by my self...