


posted by Peter aka Baphomet
Hey my friends,
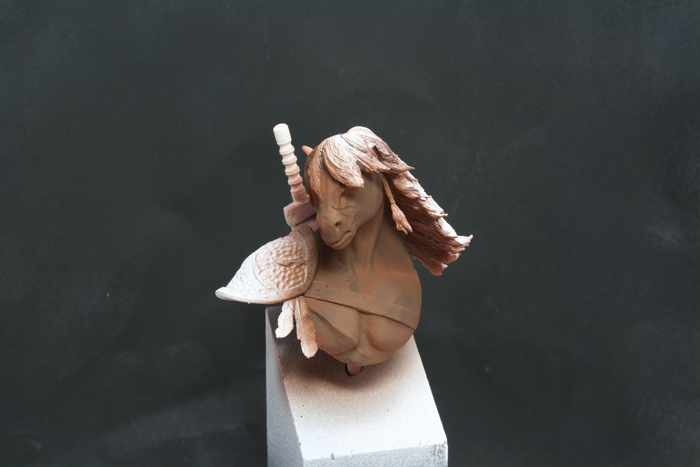
after I finished the Saracen some days before Christmas I was looking for a new and quite "simple" project to start 2012 properly. After a short time I found the right model in my box: the Sagitario-bust from Yedharo Models (sculpted by Fausto Gutiérrez). It was a small present from Roman after his return from Monte San Savino.
Right before Christmas I was in Berlin for a qualification test and stayed two days at Mati´s place. Here I wanted to prepare the bust for painting. I just thought to make some minor improvements, but Mati had a much better vision and simply resculpted big parts of the bust. The result was a completly new version of a horseman... a battleproved horseman warrior... a version I liked even more than the prior Indian influenced version and I was eager to start the paintjob... so at this point a special thanks to Mati for his big influence!

Basic Thoughts
I thought the small bust would be the right opportunity to try my new airbrush and to get some important experiences in handling it.
After priming the bust in white, I had two two possible ways to start the bust:
1) to begin with the brighter colours and do the shades afterwards
2) to begin with the shades and do the brighter colours afterwards
Raffa once told me to start with the bright colours and at first I wanted to follow his advice, especially as Roman was very succesful with this way. But while thinking about this point I was curious what would happen if I choose the second way (begin with the shades)? As there is no wrong way in painting I just started my small "experiment"...
I thought quite a lot about the colourchoice, but in the end I wanted to keep the colour-sheme quite easy. So I choose to make a simple brown horse, perhaps with some with dots :)
Airbrush:
1) First shade in Scorched Brown (GW)

2) Getting brighter with Scorched Brown (GW) & Bestial Brown (GW) --> 1:1

3) Bestial Brown (GW)

4) Bestial Brown (GW) & Snakebite Leather (GW) --> 1:1

5) Snakebite Leather (GW)

6) Bestial Brown (GW) & Bronzed Flesh (GW)

Some thoughts:
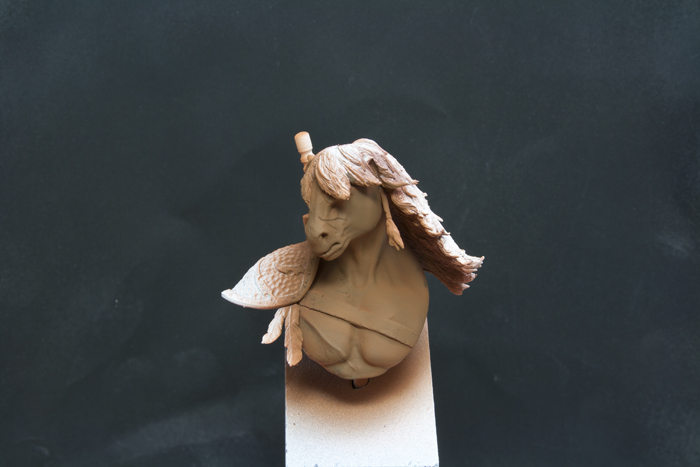
Doing the shades/darkest colours with the airbrush first is not the best way to start the miniature. As you see on the last picture the basic shade-colour is hardly to be seen on the bust anymore. In real you can see it still a little bit, but in fact I could also had skipped all the steps and started right with the last colour... well I tried and learned ;-) next time I will do it the other way!
After cleaning the airbush, it was time to use the good old brush!
Brushwork:
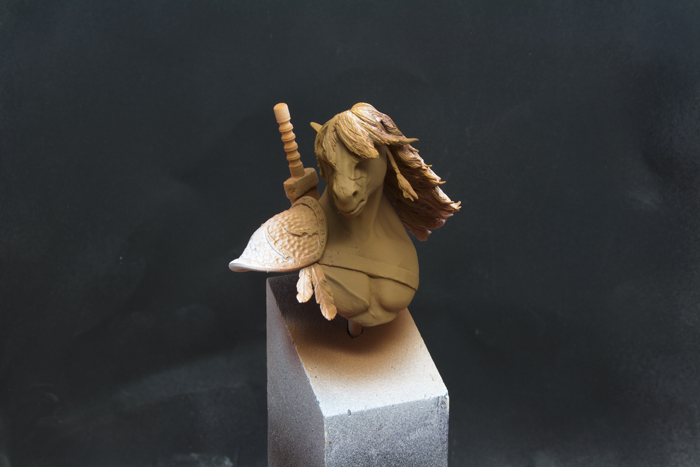
1) Basic work
As you already see on the last picture I started by giving every part of the bust its basic colours. As I learned from Roman in the last years, it´s very assistant for further painting to have the basic colours everywhere on your miniature before you continue. It helps you to get an idea in which direction your miniature is developing and how the different colours work together (hope you understand what I mean).
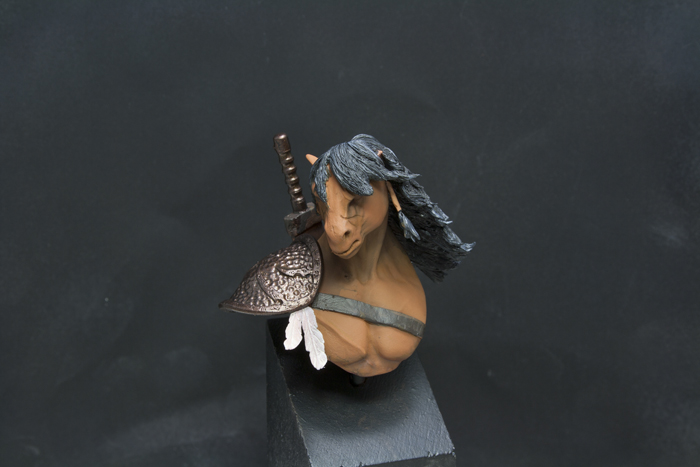
The metal-parts were painted in black (as a basic), the leather parts in a mixture of Dark Angels Green (GW) and Scorched Brown (GW), the hair was painted "wet in wet" with black and grey. While painting the hair I tried to highlight the more dominant streaks while the rest should stay darker.
2) Focus: Skin - 1

After doing the basic work on the miniature, I focused on the skin. The most important thought here was to give the skin some more intensive colour, as it has gone quite pale during the last step with the airbrush.
So I used layers of Bestial Brown (GW) to intensify the skin-colour.
The metal-parts were painted with Tin Bitz (GW).
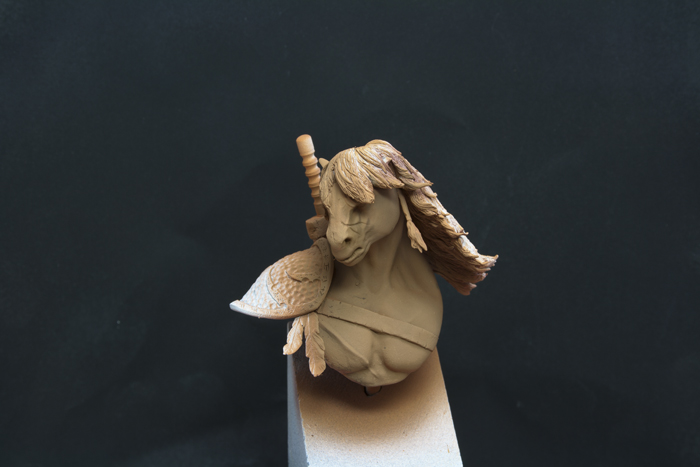
3) Focus: Skin - 2

At this step I have to say sorry. I was at Roman´s place for a painting evening and totally forgot to take any pictures. I´m deeply sorry, but I will try to explain the steps I took:
If you compare the last two pictures you see that a lot happend with the skin-colour. After the last step the skin was quite orange, without any highlights or intense shadows.
To give the horseman a more natural skin-tone I used Bestial Brown (GW) and added Dwarf Flesh (GW) in smaller portions to work out the brighter parts of the bust (you can still see some orange on the cheek). As soons as there appeared any "unclean parts" in the blending, I used layers of the middle-tone to smooth these parts. For the snout and the forehead (brightest parts) I added a tiny amount of yellow to my colour. If you would only use Dwarf Flesh (GW) and white for the highlights the bust would look "chalky" and unnatual (thanks to Roman for the hint). To prevent this, add some yellow and afterwards (if needed) some white.
The shades here are quite rough as I focused primarily on the brighter parts. I mixed Bestial Brown (GW) and Scorched Brown (GW) to define the shades and added some Dark Sea Blue (Vallejo) to intesify them. In the next steps I will smooth these parts.
The scars are quite simple: I painted the basics with Dark Flesh (GW), added some Scab Red (GW), Dwarf Flesh (GW) and finally Elf Flesh (GW) to make them look like on the picture.
The leather changed just a little bit: I painted some small scratches with Ivory (Vallejo) and used some Inks (Devlan Mud (GW), Smoke (Vallejo), Sepia (Vallejo)) to make it look like old, used leather... but there is still a lot to do till it is finished. Click here for Roman´s tutorial for leather!
I hope I was able to explain you all the steps I took. If you have any questions please feel free to ask. Either here per comment or via email:
baphomet[ a t ]massivevoodoo[ d o t ]com
Final:

Today Roman and Raffa will be here at my place and we will surely have a nice Monday-painting-evening. So I´m sure it won´t take too long till I will write Part 2 of this step-by-step...
Best wishes,
Peter
Hey my friends,
after I finished the Saracen some days before Christmas I was looking for a new and quite "simple" project to start 2012 properly. After a short time I found the right model in my box: the Sagitario-bust from Yedharo Models (sculpted by Fausto Gutiérrez). It was a small present from Roman after his return from Monte San Savino.
Right before Christmas I was in Berlin for a qualification test and stayed two days at Mati´s place. Here I wanted to prepare the bust for painting. I just thought to make some minor improvements, but Mati had a much better vision and simply resculpted big parts of the bust. The result was a completly new version of a horseman... a battleproved horseman warrior... a version I liked even more than the prior Indian influenced version and I was eager to start the paintjob... so at this point a special thanks to Mati for his big influence!

Basic Thoughts
I thought the small bust would be the right opportunity to try my new airbrush and to get some important experiences in handling it.
After priming the bust in white, I had two two possible ways to start the bust:
1) to begin with the brighter colours and do the shades afterwards
2) to begin with the shades and do the brighter colours afterwards
Raffa once told me to start with the bright colours and at first I wanted to follow his advice, especially as Roman was very succesful with this way. But while thinking about this point I was curious what would happen if I choose the second way (begin with the shades)? As there is no wrong way in painting I just started my small "experiment"...
I thought quite a lot about the colourchoice, but in the end I wanted to keep the colour-sheme quite easy. So I choose to make a simple brown horse, perhaps with some with dots :)
Airbrush:
1) First shade in Scorched Brown (GW)

2) Getting brighter with Scorched Brown (GW) & Bestial Brown (GW) --> 1:1
3) Bestial Brown (GW)
4) Bestial Brown (GW) & Snakebite Leather (GW) --> 1:1
5) Snakebite Leather (GW)
6) Bestial Brown (GW) & Bronzed Flesh (GW)

Some thoughts:
Doing the shades/darkest colours with the airbrush first is not the best way to start the miniature. As you see on the last picture the basic shade-colour is hardly to be seen on the bust anymore. In real you can see it still a little bit, but in fact I could also had skipped all the steps and started right with the last colour... well I tried and learned ;-) next time I will do it the other way!
After cleaning the airbush, it was time to use the good old brush!
Brushwork:
1) Basic work
As you already see on the last picture I started by giving every part of the bust its basic colours. As I learned from Roman in the last years, it´s very assistant for further painting to have the basic colours everywhere on your miniature before you continue. It helps you to get an idea in which direction your miniature is developing and how the different colours work together (hope you understand what I mean).
The metal-parts were painted in black (as a basic), the leather parts in a mixture of Dark Angels Green (GW) and Scorched Brown (GW), the hair was painted "wet in wet" with black and grey. While painting the hair I tried to highlight the more dominant streaks while the rest should stay darker.
2) Focus: Skin - 1
After doing the basic work on the miniature, I focused on the skin. The most important thought here was to give the skin some more intensive colour, as it has gone quite pale during the last step with the airbrush.
So I used layers of Bestial Brown (GW) to intensify the skin-colour.
The metal-parts were painted with Tin Bitz (GW).
3) Focus: Skin - 2
At this step I have to say sorry. I was at Roman´s place for a painting evening and totally forgot to take any pictures. I´m deeply sorry, but I will try to explain the steps I took:
If you compare the last two pictures you see that a lot happend with the skin-colour. After the last step the skin was quite orange, without any highlights or intense shadows.
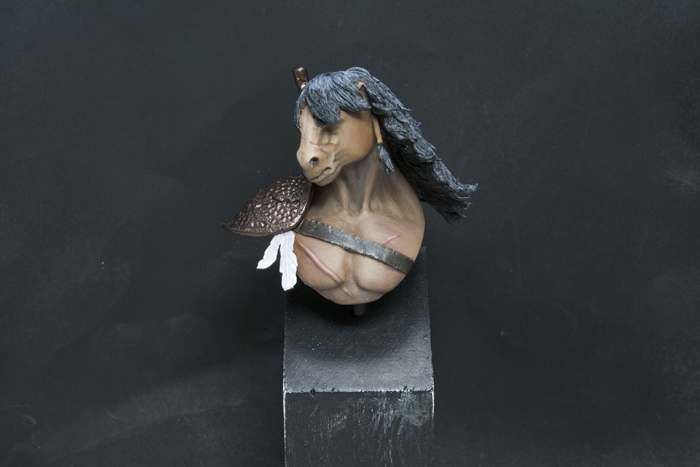
To give the horseman a more natural skin-tone I used Bestial Brown (GW) and added Dwarf Flesh (GW) in smaller portions to work out the brighter parts of the bust (you can still see some orange on the cheek). As soons as there appeared any "unclean parts" in the blending, I used layers of the middle-tone to smooth these parts. For the snout and the forehead (brightest parts) I added a tiny amount of yellow to my colour. If you would only use Dwarf Flesh (GW) and white for the highlights the bust would look "chalky" and unnatual (thanks to Roman for the hint). To prevent this, add some yellow and afterwards (if needed) some white.
The shades here are quite rough as I focused primarily on the brighter parts. I mixed Bestial Brown (GW) and Scorched Brown (GW) to define the shades and added some Dark Sea Blue (Vallejo) to intesify them. In the next steps I will smooth these parts.
The scars are quite simple: I painted the basics with Dark Flesh (GW), added some Scab Red (GW), Dwarf Flesh (GW) and finally Elf Flesh (GW) to make them look like on the picture.
The leather changed just a little bit: I painted some small scratches with Ivory (Vallejo) and used some Inks (Devlan Mud (GW), Smoke (Vallejo), Sepia (Vallejo)) to make it look like old, used leather... but there is still a lot to do till it is finished. Click here for Roman´s tutorial for leather!
I hope I was able to explain you all the steps I took. If you have any questions please feel free to ask. Either here per comment or via email:
Final:

Today Roman and Raffa will be here at my place and we will surely have a nice Monday-painting-evening. So I´m sure it won´t take too long till I will write Part 2 of this step-by-step...
Best wishes,
Peter


I am new with an airbrush, but I have found the same. It's best to actually start with the base color, Highlight with airbrush, then shade, then clean up with traditional brush. I'm only doing vehicles, interesting to see airbrushes at work on creatures with skin and muscle...
Danke dir Peter für den tolles post. Und natürlich danke an Kaiser Roman und König Raffa.
"...it´s very assistant for further painting to have the basic colours everywhere on your miniature before you continue.It helps you to get an idea in which direction your miniature is developing and how the different colours work together(hope you understand what I mean)."
Thank`s a lot Peter. Very helpful for me!!!
Best Regards
abu
Bravestarr! But seriously great job and excellent W.I.P! Thank you.
so you managed to paint a horseman-bust before I did :D , turned out great.
As for airbrush: I think you were too heavy handed with it(too much color even at the first pass) and you tried to use the traditional brush-way (dark->light), while the airbrush is best if going toward the shades and being more and more careful. The other way around it's not really the best.
great conversion!
Many thanks to you, Peter!
I really enjoyed the read on your bust so far - some very good hints and experiences in the article. As I told you I will be looking forward to part II and when it is done completly it will be listed as one in the article section! Nice work so far and the conversion by mati is just sick :)