


Posted by Raffaele "Picster" Picca
Hey everyone!
As I just bought a new compact camera, a Sony HX20V... why you may ask? Just to make more step by step photos and work in progress photos! :)
I already own a DSLR camera with several lenses that I use to take miniature photos and all kind of other "more professional" stuff but it's very annoying using that camera to take step by step photos.
So here you enjoy the first step by step photographed with the new camera... more to come!

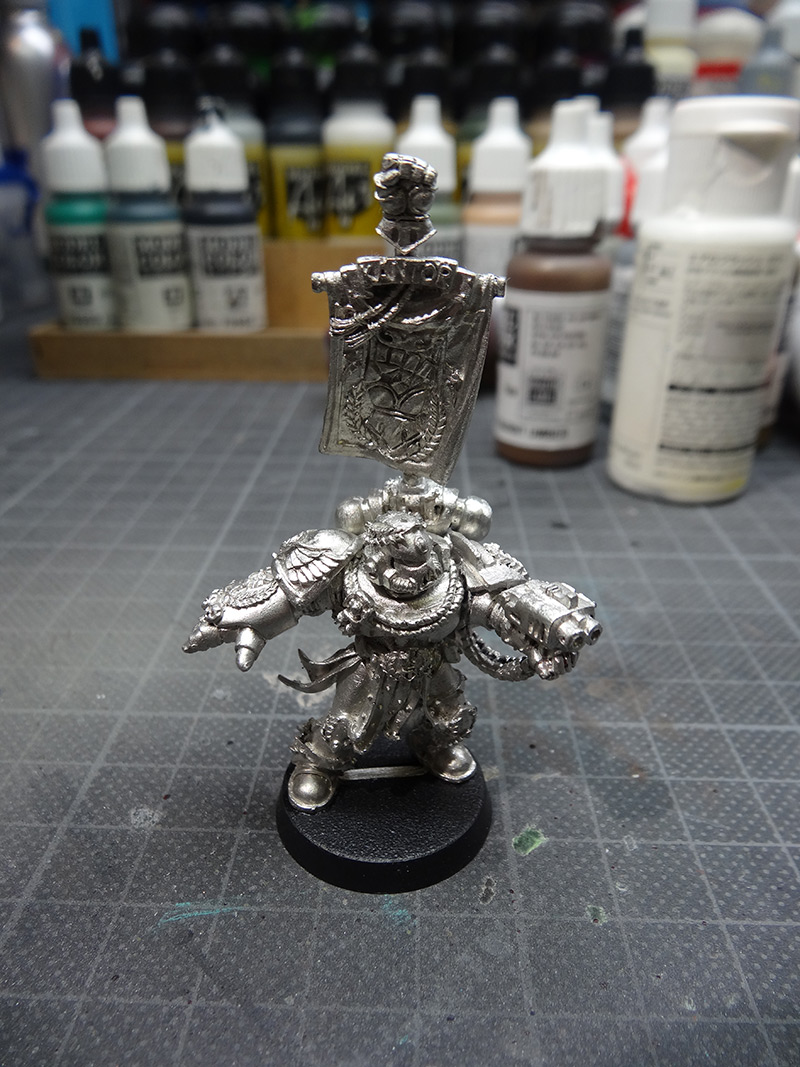
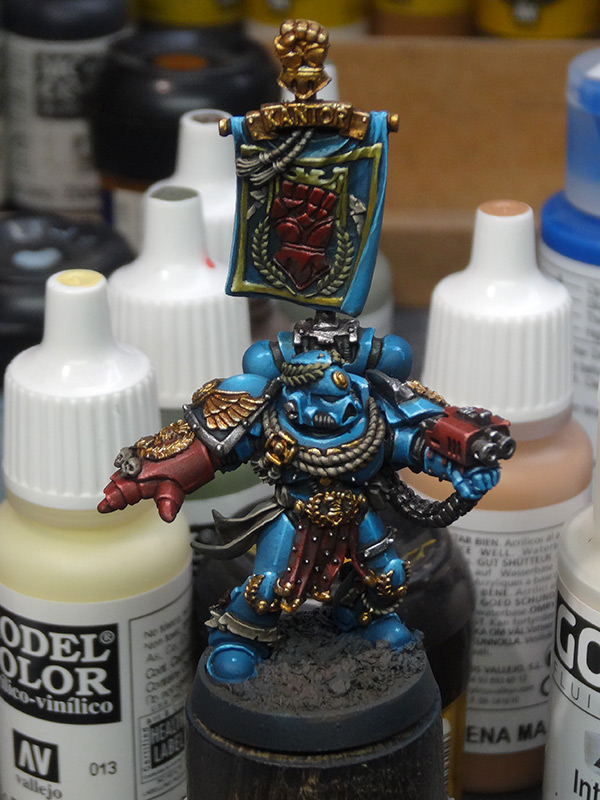
The miniature that I paint in this step by step is Pedro Kantor by Games Workshop. I'm not so much into fluff, but he seems to be some kick-ass pimp of the Crimson Fists chapter.
The paintjob will be a very basic and fast one, good for a unique character model, but still not at competition level. Please keep that in mind, some of the techniques used on this model are different from my normal "display level" workflow... mostly to save time!
Let's start!
 I prepared the figure by removing some of the remaining color with a toothbrush and acetone (the figure was sent to me in a pretty poor shape, some color in the recesses and too much superglue everywhere).
I also removed all the parts as nothing was pinned and peeled off all of the old super glue.
After pinning and glueing the figure together, everything was prepared.
Normally I don't glue everything together because it's hard to reach every spot afterwards... but for this model a very fast paintjob was planned, so I just painted everything assembled.
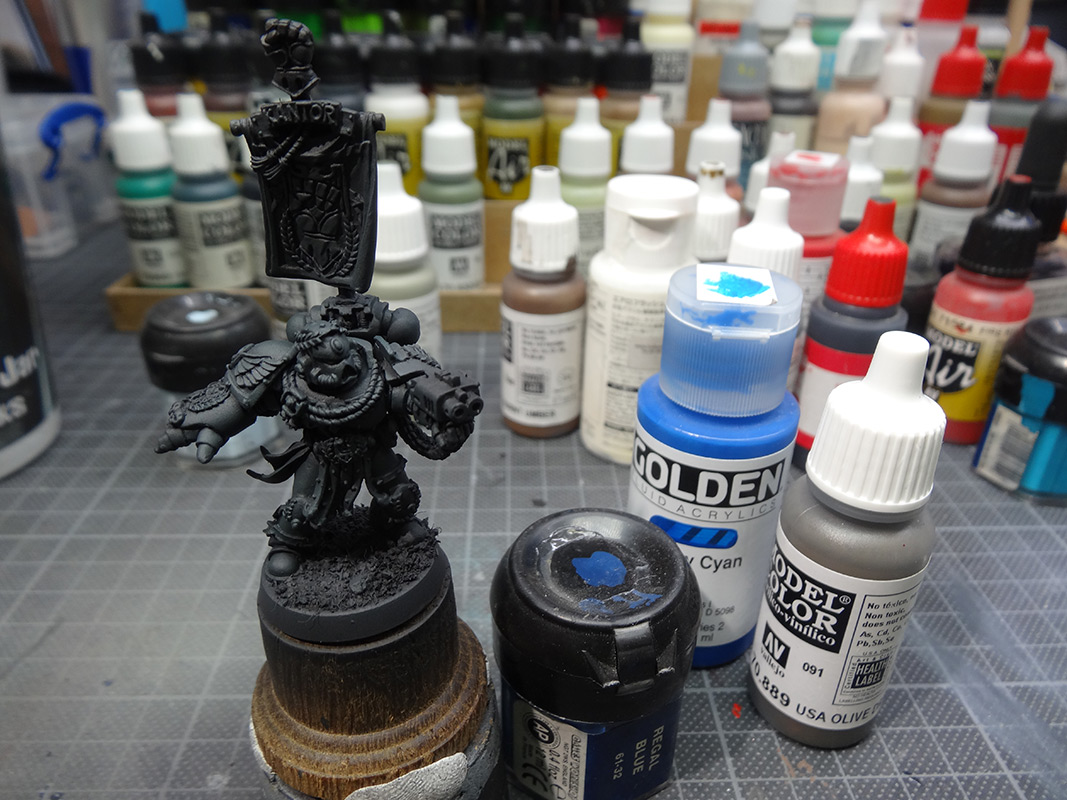
 Using superglue and common earth, I made a very simple base. The figure was basecoated with a thin layer of Games Workshop Chaos Black priming spray.
To get a nice, even, flat black and to get the basecoat into every small recess without using the spray can (it will get very thick) I used the airbrush and Vallejo's Black Primer to give the figure a second basecoat.
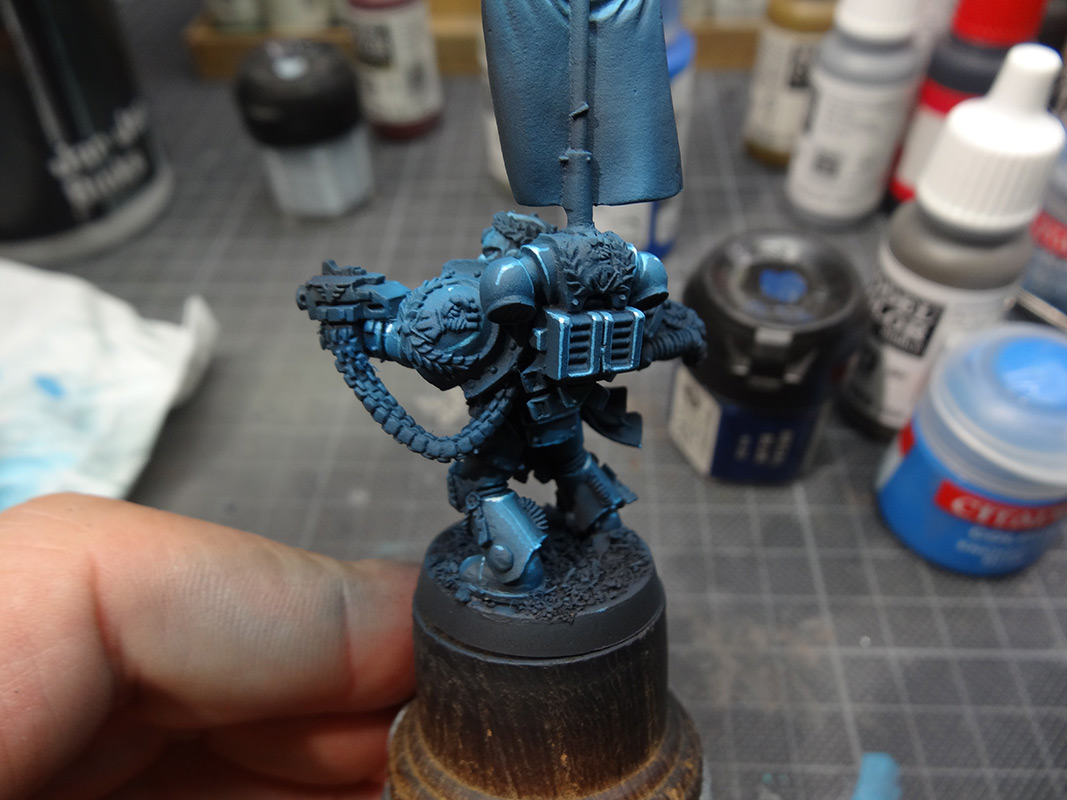
 Now it's time for the airbrush... I used a mix of 4 parts Sidolin, 1 part Golden Fluid Acrylics (GFA) Primary Cyan, 3 parts Vallejo Model Color (VMC) USA Olive Drab and 1 part Games Workshop Regal Blue to give the figure a desaturated blue/turquoise base for the shadows.
On this figure I started with the dark areas and progressed to the brighter ones. I feel this is a faster approach, but a little less clean...
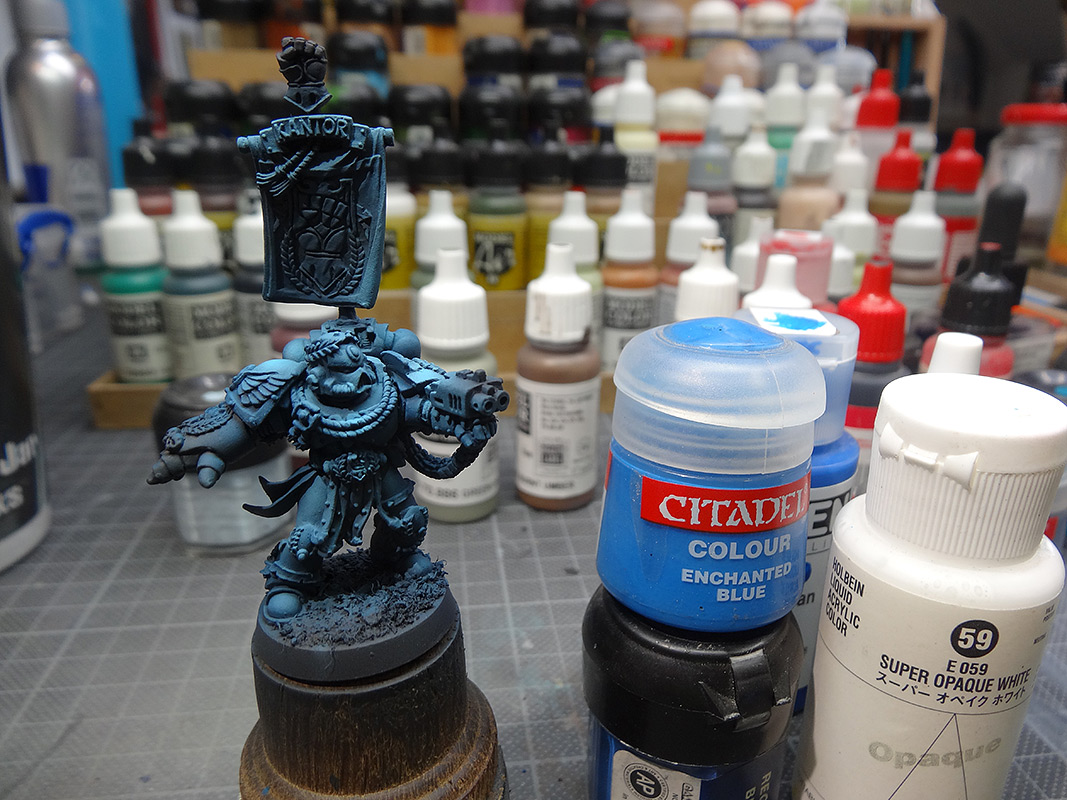
 The next step was to add a brushload of Citadel Enchanted Blue to the mix to make it more intense.
 Adding more Enchanted Blue to the mix and continuing to spray some highlights onto the blue armor.
 Now I added some airbrush white to the mix and some more Sidolin to thin the mix down again.
Around 3 drops of Sidolin and 2 drops of white. My favorite white for airbrushing is Holbein Aeroflash (HA) Super Opaque White. With this mix I airbrushed the last lights.
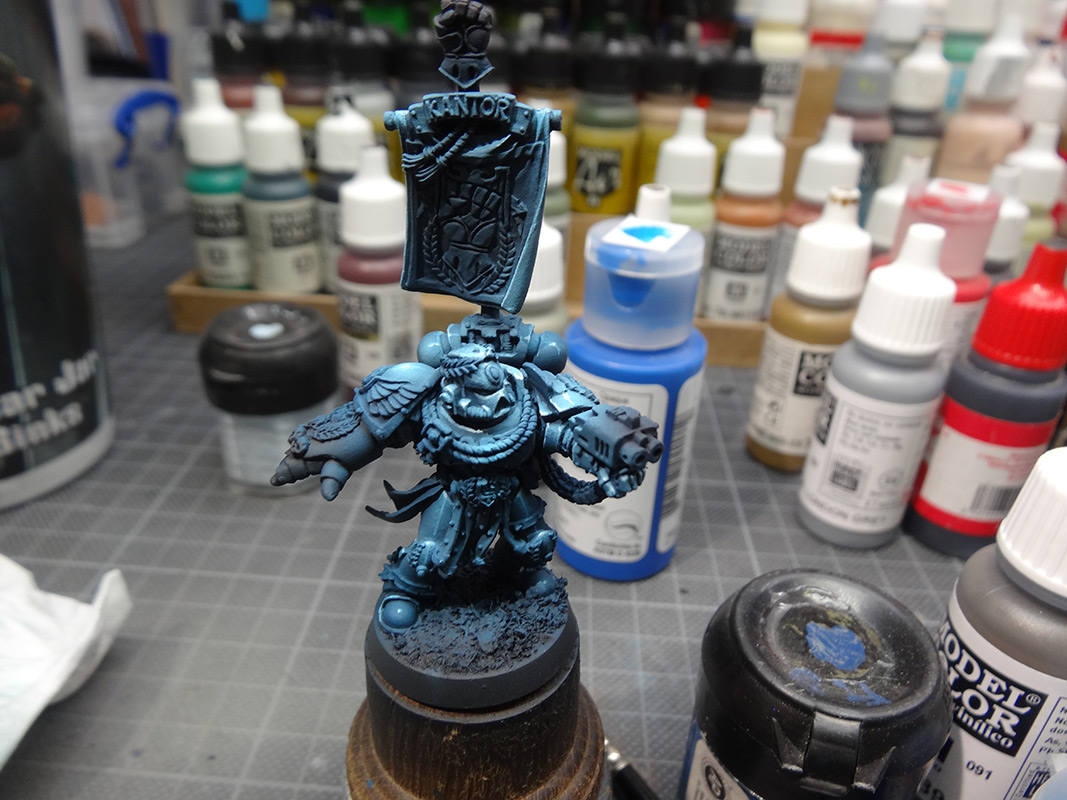
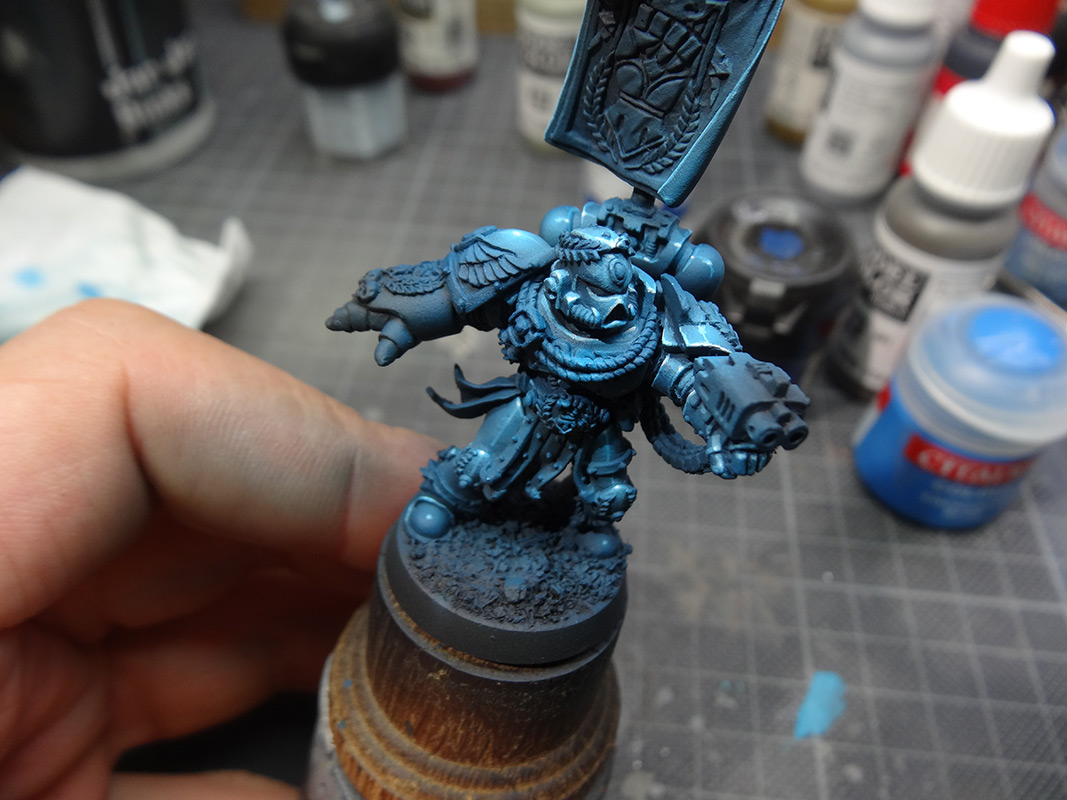
 Now let's switch to the brush! I started brushing some very strong highlights onto the armor. Using the zenithal light theory to guide me for their placement. A mix of Citadel Enchanted Blue, VMC USA Olive Drab and HA Super Opaque White was used for the light.
I didn't care much about blending the highlights. A careful placement takes care for a good effect and the rest will be fixed later.


 The next step was airbrushing a very, very thinned down layer of GFA Primary Cyan over the whole armor to tone down the highlights and unite all the lights and other parts. The armor gets a very strong effect from this layer.
 The next step was to paint all the different colored areas in fitting colors.
Red basecoat: VMC Hull Red mixed + GW Blood Red + VMC USA Olive Drab
Green basecoat: VMC Ger. Fieldgrey WWII
Beige basecoat: VMC Brown Sand + VMC USA Olive Drab
Yellow basecoat: GW Bubonic Brown + VMC USA Olive Drab
Dark grey (armor joints): GW Charadon Granite
 I started with the next big area, the red parts. I did a quick masking job to protect the blue areas and airbrushed GW Blood Red to the areas where I wanted the hightlights to be.
 Now using some more GW Blood Red and a brush, I slowly started to work out the highlights on the red parts. Adding some GW Dwarf Flesh to the mix, the highlights were getting smaller and more intense. I even added a little bit of white to the mix for the last small light spot.
 Using a color that I can't remember... (A very dark brown by Vallejo...) I basecoated all the metal parts. This will help bringing out all the shine in the metallic colors. I also painted the base in the same color to remove the blue, airbrushed area from the ground as it irritates me while painting...
 Now all the remaining parts received their basecolor.
Gold basecoat: Vallejo Game Color - Glorious Gold + GFA Interference Gold (Fine)
Silver basecoat: Games Workshop Chainmail Silver + GFA Carbon black
Skulls: VMC Brown Sand + GW Codex Grey
 Let's get dirty ;-) ... a controlled (!) wash of GW Athrax Earthshade was applied to all the parts EXCEPT the red and blue parts (they were already finished and don't need any further wash).
Try to be as controlled as possible, not painting over the blue or red areas.
 I started working on all the beige areas. The ropes, the useless pieces of carpet on his belt, the purity seals.... I just used the basecoat color again starting to define some lights. By mixing in more white and VMC Brown Sand I made the highlight areas brighter and brighter, always using small steps.
 The next step was working on all the green areas: the laurels. Again I started with the basecolor, VMC Ger. Fieldgrey WWII, adding more GW Gretchin Green and white to the mix as I got brighter and brighter. The small skulls on the power fist, that I forgot at the last step, were also painted with some bleached bone.
 The yellow on the banner still needed some work. I used pure GW bubonic brown to slowly work on the highlights. Some VMC Ice Yellow was added to the mix to make the highlights brighter and brighter. In the end, pure VMC Ice Yellow was used for some very small highlights.
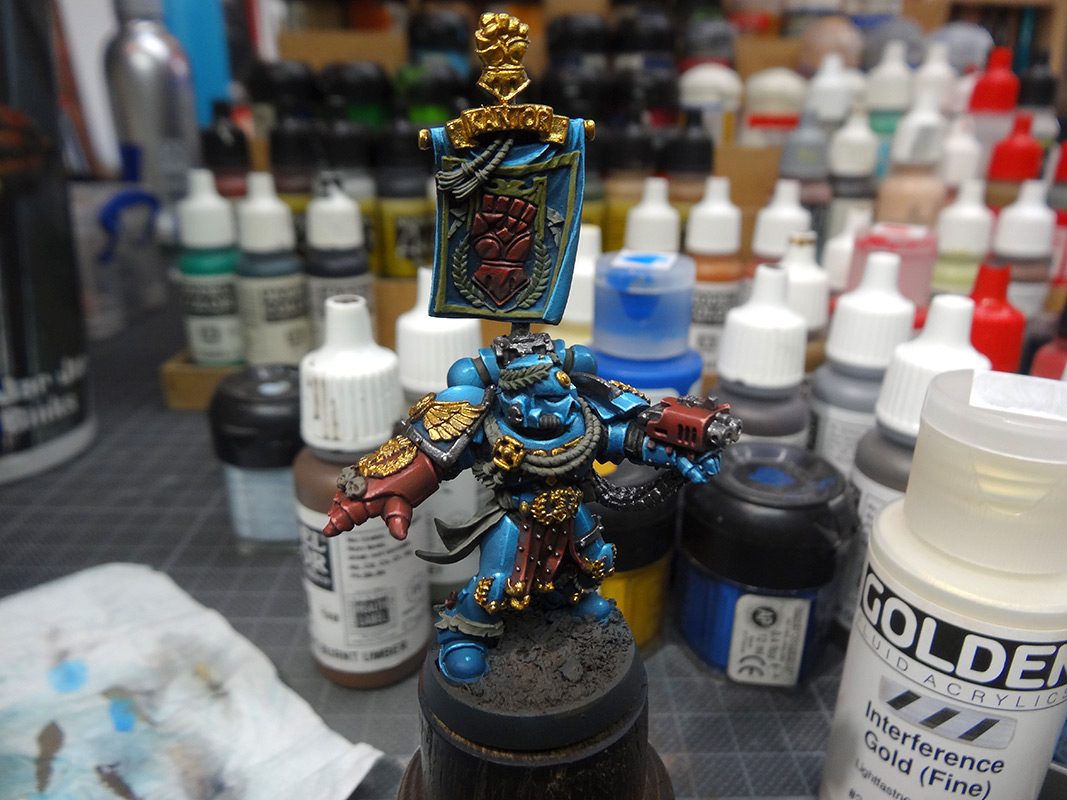
 Let's start to give this guy some power to be the golden pimp on the battlefield! The gold was highlighted using the basecolor mix in the first application. To make the gold even brighter, I used some Vallejo Model Air Silver that was added to the basecolor mix to bring some attention to all the small highlights.
 The silver colored metallics were the next step, to highlight those, I used two steps:
first I applied some GW Chainmail Silver to the highlight areas and second I painted some very small highlights with Vallejo Model Air Silver. Ok, we are slowly getting somewhere!
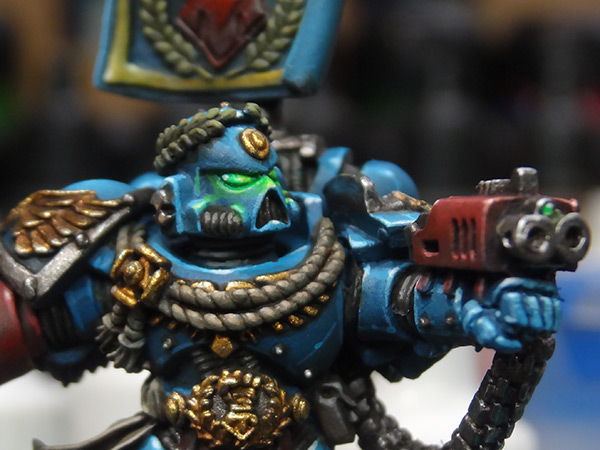
 Let's paint the eyes! He will get some green, glowing eyes. This will bring some focus to his head!
First step is to paint the "glowing" area white, I recommend GW white. Take your time and do this step carefully with a small brush.
 Ok, here I forgot to take one photo in between: After painting the glowing area white, I used some Forged Monkey Acid Green, mixed with a little bit of GW Scorpion Green to glaze the eye and the areas around it that receive some light from the glow.
Use very thin glazes and do this step multiple times until you are happy with it.
After this step I used some GFA Phtalogreen to give the back of the eye another very thin glaze to make it a little bit darker.
Now all that's missing is a very small light reflex in the back (the darker part). I used white and a small brush to paint this small spot.
A small and optional step is to paint some kind of "laser aiming device" into the front of his bolter to give this part some sense. You can use the same steps that were used for the eye.
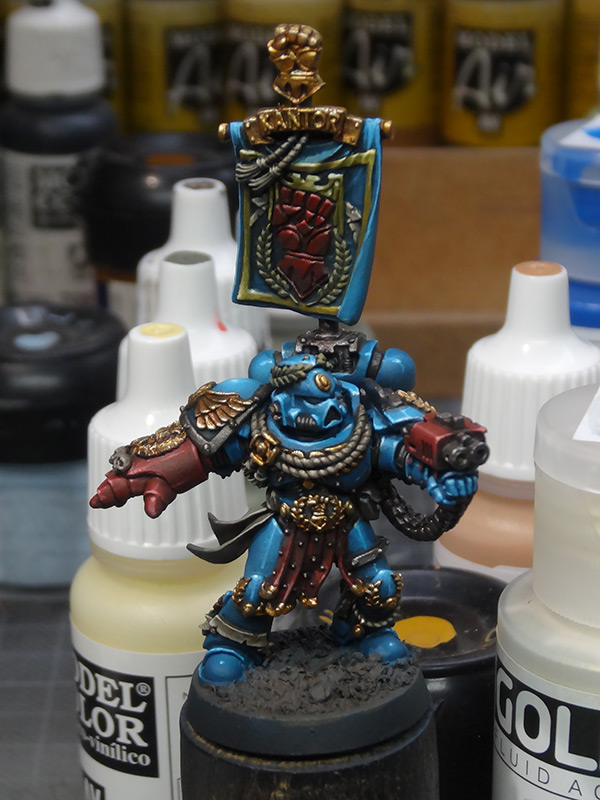
 Phew, almost done, that's how he looks now with eyes.... so what's missing now? Yes, gems!
 To paint the gems I first basecoated them with a very dark red (1 part GW Blood Red, 3 parts GFA Carbon Black).
The highlights were placed in the lower corner of the gem... it's hard to explain but visible on the photo.
Continuing with brighter and brighter lights (add more GW Blood Red and finally a small spot of Dwarf Flesh) the gems are finally finished by a small light reflex of white color in the upper corner.
If you like to, you can add gloss varnish to the gems.
I recommend Vallejo Model Color gloss varnish, but anything will do. I skipped this step.
 Finally the base got some colors, light and shadow in a quick, wet in wet application of different browns. Not show on this photo, but on the final photos is a application of Sienna colored pigments and the use of some MiniNatur grass patches.... and that's it! May your miniature be glorious on the battlefield!
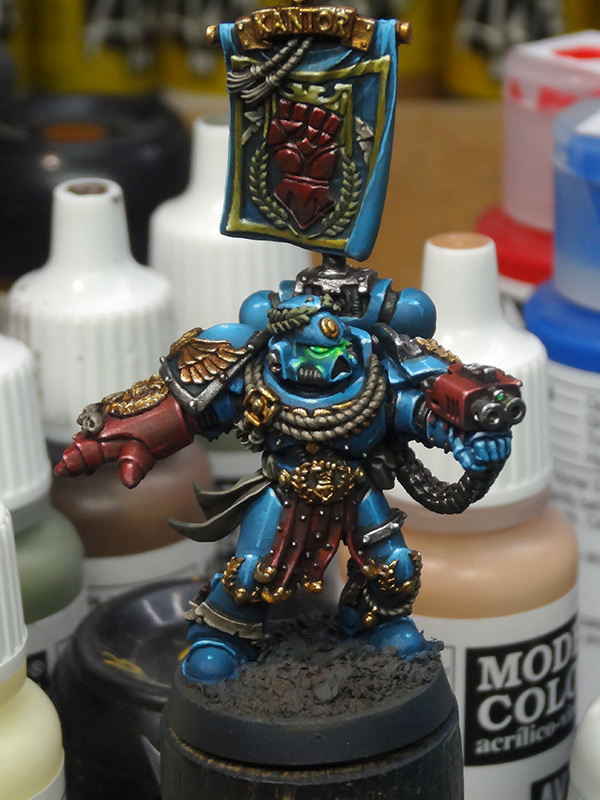
Here are some final photos of this figure:

I hope you liked this tutorial and the photos of my new camera :)
Best wishes,
Raffa
Hey everyone!
As I just bought a new compact camera, a Sony HX20V... why you may ask? Just to make more step by step photos and work in progress photos! :)
I already own a DSLR camera with several lenses that I use to take miniature photos and all kind of other "more professional" stuff but it's very annoying using that camera to take step by step photos.
So here you enjoy the first step by step photographed with the new camera... more to come!
The miniature that I paint in this step by step is Pedro Kantor by Games Workshop. I'm not so much into fluff, but he seems to be some kick-ass pimp of the Crimson Fists chapter.
The paintjob will be a very basic and fast one, good for a unique character model, but still not at competition level. Please keep that in mind, some of the techniques used on this model are different from my normal "display level" workflow... mostly to save time!
Let's start!
I also removed all the parts as nothing was pinned and peeled off all of the old super glue.
After pinning and glueing the figure together, everything was prepared.
Normally I don't glue everything together because it's hard to reach every spot afterwards... but for this model a very fast paintjob was planned, so I just painted everything assembled.

To get a nice, even, flat black and to get the basecoat into every small recess without using the spray can (it will get very thick) I used the airbrush and Vallejo's Black Primer to give the figure a second basecoat.
On this figure I started with the dark areas and progressed to the brighter ones. I feel this is a faster approach, but a little less clean...


Around 3 drops of Sidolin and 2 drops of white. My favorite white for airbrushing is Holbein Aeroflash (HA) Super Opaque White. With this mix I airbrushed the last lights.
I didn't care much about blending the highlights. A careful placement takes care for a good effect and the rest will be fixed later.


Red basecoat: VMC Hull Red mixed + GW Blood Red + VMC USA Olive Drab
Green basecoat: VMC Ger. Fieldgrey WWII
Beige basecoat: VMC Brown Sand + VMC USA Olive Drab
Yellow basecoat: GW Bubonic Brown + VMC USA Olive Drab
Dark grey (armor joints): GW Charadon Granite


Gold basecoat: Vallejo Game Color - Glorious Gold + GFA Interference Gold (Fine)
Silver basecoat: Games Workshop Chainmail Silver + GFA Carbon black
Skulls: VMC Brown Sand + GW Codex Grey

Try to be as controlled as possible, not painting over the blue or red areas.


first I applied some GW Chainmail Silver to the highlight areas and second I painted some very small highlights with Vallejo Model Air Silver. Ok, we are slowly getting somewhere!

First step is to paint the "glowing" area white, I recommend GW white. Take your time and do this step carefully with a small brush.
Use very thin glazes and do this step multiple times until you are happy with it.
After this step I used some GFA Phtalogreen to give the back of the eye another very thin glaze to make it a little bit darker.
Now all that's missing is a very small light reflex in the back (the darker part). I used white and a small brush to paint this small spot.
A small and optional step is to paint some kind of "laser aiming device" into the front of his bolter to give this part some sense. You can use the same steps that were used for the eye.

The highlights were placed in the lower corner of the gem... it's hard to explain but visible on the photo.
Continuing with brighter and brighter lights (add more GW Blood Red and finally a small spot of Dwarf Flesh) the gems are finally finished by a small light reflex of white color in the upper corner.
If you like to, you can add gloss varnish to the gems.
I recommend Vallejo Model Color gloss varnish, but anything will do. I skipped this step.
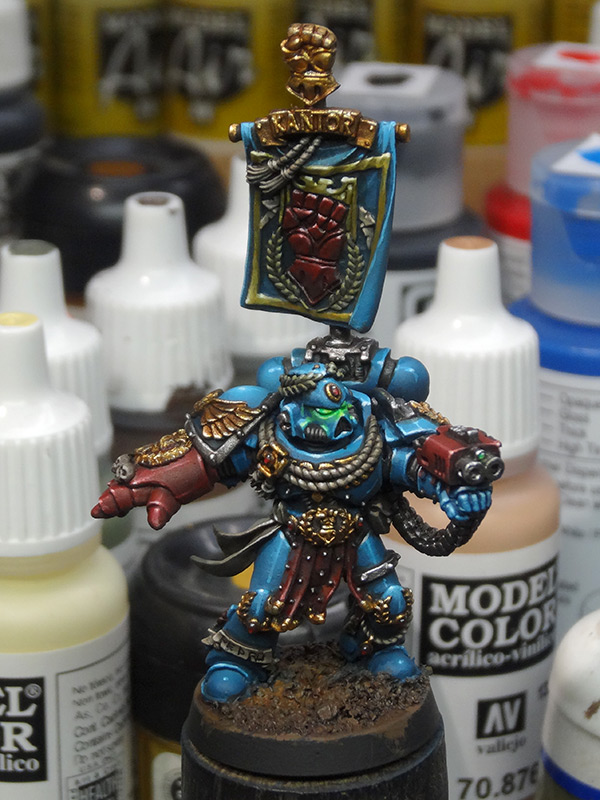
Here are some final photos of this figure:
Pedro Kantor

I hope you liked this tutorial and the photos of my new camera :)
If you like content, you maybe want to support us to keep improving the quality of this blog.
You can do so by sending us a donation, you can find all the details you need to know here!
You can do so by sending us a donation, you can find all the details you need to know here!
Best wishes,
Raffa


Excellent step-by-step, and really helpful, especially viz your use of the airbrush. What was the total real time from start to finish, including drying time?
Wow, thank you for this insight. I never thought, that you use so much airbrushing...
and I had to read the part with the Sidolin (a window cleaning detergent !) thrice ^^
regards
Zaku
Thanks for that great and helpful. tuorial.
As I also have that miniature on my workbench I try to stay at close to your tut as possible.
I think it will help me a lot to master the AB
Very good work, and a very clear tutorial and of great help, thank you very much. A greeting.
Very impressive tutorial! Which needle-size did you use for the airbrush action?
Cheers
Jan
Nice "quick" paintjob.. loved the step by step here, and also like how that new Sony is working out for you :) Just out of curiosity.. how long was quick? :D
Good Work
Great job, USA Olive Drab rules! ;)
Very nice results, especially for a "fast" paintjob. How long did it take?
Thanks for all the nice comments :)
@Pretinct Omega, David, M R Lee: It was around 6-7 hours from start to finish.
@Androsch: Yay!
@Jan: At the moment I'm using a 0.4 nozzle. I would love to use 0.2 sometimes, but I destroyed my 0.2 and so im stuck with the 0.4 ....
@Drache Zaku: Airbrushing is a very fast way of receiving a nice result, but it is very visible that it was airbrushed if done fast or wrong. Normally I avoid using it in this way, but for a fast figure, it's just to tempting :)
Best wishes,
Raffa
Do you plan to ebay this? I would like to buy it!
Do you mind my asking, but do know (or even remember for that matter), how you painted the recesses of his power armor? Was it thinned paint, or a watered down ink? I'm painting a Space Marine army of my own and I don't like how the ink looks on my minis, but love how his armor turned out! Any advice in general is appreciated! Thank you
Hey Nate, I recommend writing this question to Raffa directly, I am not sure if he will see your comment. Go with: Picster(at)massivevoodoo.com