


Aloa Voodoo People,
this week's tutorial voting results look like this - winner was kinda obvious, 12 of 15 votes went for:
Thanks for voting.
Roman will now take care of the article.
If you want to keep track with an overview on what has happened so far in MV's year of the painter 2
please check this link!
_______________________________________________________________________________
You want to support Massive Voodoo?
If you like to support or say thanks the monkeys of Massive Voodoo in what they do, please feel invited to drop a jungle donation in their direction via paypal or check their miniatures they got on sale here.
_______________________________________________________________________________
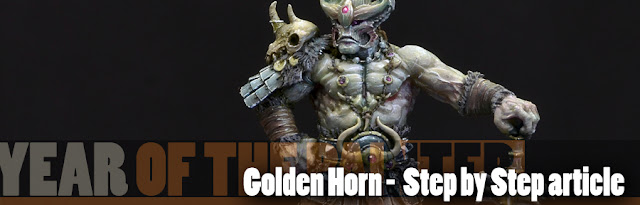
Step by Step: Golden Horn
by Marrow Productions, sculpted by Allan Carrasco, 54 mm
INTRODUCTION
Well, this tutorial will be different.
It starts where some other of my tutorials end. No talking about priming or basecolors. We directly dive in into this. Basic colors applied everywhere and a little highlight work done here and there.

It is not that I forgot to do other photos, right?
I took plenty of photos of this miniature by Marrow Productions during its process, but I failed on doing the first ones. Yes. Fialed. Everything happens for a reason, that is why we start this article from this stage of the model.

I would consider this basic work,
when looking on my process. I decided for my main colors on each surface, place them rather quickly so everything is blocked, add a highlight here and there or a gentle color hue here and there.
In this stage I do not mind too much if some areas are hard to decide, for example the fur or the soil on the groundwork. These do not matter for me right now and I did not decide yet. I just blocked them with some color.

Allright. Are you with me?
What always helps me is to look at the model after the sketch without a brush in hand. And I think. What do I want to change or add next to make it look more like I want it to look.
From this stage on I wanted to increase highlights.
Therefore I decided for a yellow/white color that I mixeed up from... yes, yellow and white. It should be way more white than yellow as this is the color I want to use to mix in all of my alreaday applied and appearing base colors to increase highlights. One highlight color for all. Makes it atmospheric.

Have a close look on all different parts/areas of the model, even the base. The color I mix in for highlights is the same everywhere. Keeps it atmospheric.

Excuse me: What about the fur now?
In the first sketch these parts were rather bright (see above), but they distracted my eyes so hard that a dark brown/black color was needed there. Slap! Slap! Very quick! Change what you do not like.
A beautiful back ...

This article might be confusing as its photos were done with so many different cameras, you wouldn't think.
I did put the miniature under the big photo box in the MV studio, still same stage. Again please observe the highlight color when I start to increase the zenithal light.

Also check the planned NMM metal areas, blueish dark grey something but slowly mixing in the yellowish highlights. Not pure white, as this would look off in a second.

In this stage I slowly jump in detail work, checking back with all the areas, increasing contrast here and there. In this stage I also learned that one the one hand I love Allan Carraso's sculpts and on the other hand I slowly saw that this guy will be a pain in the back to work out all the details.
I also enjoyed how the yellowish highlights play a nice complementary game witthe purple shadows from my sketch.


Increasing details. Linen fabric texture is basicly thin lines dancing in the light/shadow situation.

A little more white in my highlight color did just appear by mixing the colors from primaries - I wanted to see more contrast. Take care not to mix in too much at once, go slowly. I got caught in some detail areas already, which I usually try to avoid in this stage. If you go for details too quick you might lose the overall view for the piece.
Well I did and you can see the results with kind of too bright edge highlights and details.

I use the colors rather thick and pasty and slap them were I want them. If you would ask me for a name of this technique I would suggest "rough'n'thick layering". For example if I want to see an edge highlight or such a small dot I do not want to paint him several times with glazes. He will never be as powerful as one that I place with thick paint. Slap!


I need to grow such muscles too ... geez!


It is really important in this stage that you dive into each object and spent the time on it that you think it deserves. Dive once, dive deeper, get not distracted by other areas on the model. Focus and define the different objects one by one. Do not worry you are working with the same highlight color everywhere, if nothing goes wrong, nothing will look off. Just take your time :)
If something goes to bright too fast and looks off you are doing it wrong. Mix in slowly, increase the colors contrast slowly and have a smoother result. Patience is the key and your observation. Do you like what you see? If not, change it. If yes, define it even sharper, 2% plus when you are satisfied.
Hair and fur, pfffftt! Later.

Ok, switch to mobile camera.
After I worked my way trough all those wonderful Carrasco details - not kidding, I love and hate them - I had a look on the figure again without a brush in hand and what I missed now was the connection from miniature to the groundwork.

I wanted green.

... and placed some dosh on the base. I used the airbrush to spray a thin layer of green to the base, several times, but rather slowly before doing too much once.

I also used a brush to work with green glazes to most of the surfaces that point downwards. Catching a glimpse of the sorrounding atmosphere. Focusing this stronger on the metals as metal reflects stronger than fabric. Point. Hah! I painted a gentle greyish/yellowish highlight onto the dark brown/black fur.

For the final stage I increased my highlights in tiny areas with adding a little more white/yellow mix to my last steps. Increasing shadows with glazes here and there and also tinting back a color with a glaze was also part of this stage.
For the final highlights on the NMM parts I used kind of pure white I'd say. Edges, reflection dots. Just the likes. Everywhere. Wonderful Carrasco sculpt
Back to big camera photos once again.


Some chinese letters were written on the fabrics. Well, first I googled them but quickly decided to do them with my own will of creation. I was too lazy to switch on the smart phone again and again.
Maintime spent in the end was increasing the readability of the details by adding final contrast to edges and texture here and there.
Different article than usual, but I hope you enjoyed it.
Most important lesson out of it: Observe your work, learn what you don't like and change it.
Keep on happy painting!
Best Wishes
Roman
Check out Massive Voodoo's tutorial section for more articles like this one: Tutorial Area Link
_______________________________________________________________________________
You want to support Massive Voodoo?
If you like to support or say thanks the monkeys of Massive Voodoo in what they do, please feel invited to drop a jungle donation in their direction via paypal or check their miniatures they got on sale here.
_______________________________________________________________________________
this week's tutorial voting results look like this - winner was kinda obvious, 12 of 15 votes went for:
Thanks for voting.
Roman will now take care of the article.
If you want to keep track with an overview on what has happened so far in MV's year of the painter 2
please check this link!
_______________________________________________________________________________
You want to support Massive Voodoo?
If you like to support or say thanks the monkeys of Massive Voodoo in what they do, please feel invited to drop a jungle donation in their direction via paypal or check their miniatures they got on sale here.
_______________________________________________________________________________
Step by Step: Golden Horn
by Marrow Productions, sculpted by Allan Carrasco, 54 mm
INTRODUCTION
Well, this tutorial will be different.
It starts where some other of my tutorials end. No talking about priming or basecolors. We directly dive in into this. Basic colors applied everywhere and a little highlight work done here and there.

It is not that I forgot to do other photos, right?
I took plenty of photos of this miniature by Marrow Productions during its process, but I failed on doing the first ones. Yes. Fialed. Everything happens for a reason, that is why we start this article from this stage of the model.

I would consider this basic work,
when looking on my process. I decided for my main colors on each surface, place them rather quickly so everything is blocked, add a highlight here and there or a gentle color hue here and there.
In this stage I do not mind too much if some areas are hard to decide, for example the fur or the soil on the groundwork. These do not matter for me right now and I did not decide yet. I just blocked them with some color.

Allright. Are you with me?
What always helps me is to look at the model after the sketch without a brush in hand. And I think. What do I want to change or add next to make it look more like I want it to look.
From this stage on I wanted to increase highlights.
Therefore I decided for a yellow/white color that I mixeed up from... yes, yellow and white. It should be way more white than yellow as this is the color I want to use to mix in all of my alreaday applied and appearing base colors to increase highlights. One highlight color for all. Makes it atmospheric.
Oh that's blurry ...

Have a close look on all different parts/areas of the model, even the base. The color I mix in for highlights is the same everywhere. Keeps it atmospheric.

Excuse me: What about the fur now?
In the first sketch these parts were rather bright (see above), but they distracted my eyes so hard that a dark brown/black color was needed there. Slap! Slap! Very quick! Change what you do not like.
A beautiful back ...

This article might be confusing as its photos were done with so many different cameras, you wouldn't think.
I did put the miniature under the big photo box in the MV studio, still same stage. Again please observe the highlight color when I start to increase the zenithal light.

Also check the planned NMM metal areas, blueish dark grey something but slowly mixing in the yellowish highlights. Not pure white, as this would look off in a second.

In this stage I slowly jump in detail work, checking back with all the areas, increasing contrast here and there. In this stage I also learned that one the one hand I love Allan Carraso's sculpts and on the other hand I slowly saw that this guy will be a pain in the back to work out all the details.
I also enjoyed how the yellowish highlights play a nice complementary game witthe purple shadows from my sketch.


Increasing details. Linen fabric texture is basicly thin lines dancing in the light/shadow situation.

A little more white in my highlight color did just appear by mixing the colors from primaries - I wanted to see more contrast. Take care not to mix in too much at once, go slowly. I got caught in some detail areas already, which I usually try to avoid in this stage. If you go for details too quick you might lose the overall view for the piece.
Well I did and you can see the results with kind of too bright edge highlights and details.
I use the colors rather thick and pasty and slap them were I want them. If you would ask me for a name of this technique I would suggest "rough'n'thick layering". For example if I want to see an edge highlight or such a small dot I do not want to paint him several times with glazes. He will never be as powerful as one that I place with thick paint. Slap!
I need to grow such muscles too ... geez!


Look how I just do not care about the fur :)
For now.

Skull.

It is really important in this stage that you dive into each object and spent the time on it that you think it deserves. Dive once, dive deeper, get not distracted by other areas on the model. Focus and define the different objects one by one. Do not worry you are working with the same highlight color everywhere, if nothing goes wrong, nothing will look off. Just take your time :)
If something goes to bright too fast and looks off you are doing it wrong. Mix in slowly, increase the colors contrast slowly and have a smoother result. Patience is the key and your observation. Do you like what you see? If not, change it. If yes, define it even sharper, 2% plus when you are satisfied.
Hair and fur, pfffftt! Later.

Ok, switch to mobile camera.
After I worked my way trough all those wonderful Carrasco details - not kidding, I love and hate them - I had a look on the figure again without a brush in hand and what I missed now was the connection from miniature to the groundwork.

I wanted green.

... and placed some dosh on the base. I used the airbrush to spray a thin layer of green to the base, several times, but rather slowly before doing too much once.

I also used a brush to work with green glazes to most of the surfaces that point downwards. Catching a glimpse of the sorrounding atmosphere. Focusing this stronger on the metals as metal reflects stronger than fabric. Point. Hah! I painted a gentle greyish/yellowish highlight onto the dark brown/black fur.

For the final stage I increased my highlights in tiny areas with adding a little more white/yellow mix to my last steps. Increasing shadows with glazes here and there and also tinting back a color with a glaze was also part of this stage.
For the final highlights on the NMM parts I used kind of pure white I'd say. Edges, reflection dots. Just the likes. Everywhere. Wonderful Carrasco sculpt
Back to big camera photos once again.


Some chinese letters were written on the fabrics. Well, first I googled them but quickly decided to do them with my own will of creation. I was too lazy to switch on the smart phone again and again.
Maintime spent in the end was increasing the readability of the details by adding final contrast to edges and texture here and there.
Different article than usual, but I hope you enjoyed it.
Most important lesson out of it: Observe your work, learn what you don't like and change it.
Keep on happy painting!
Best Wishes
Roman
Check out Massive Voodoo's tutorial section for more articles like this one: Tutorial Area Link
_______________________________________________________________________________
You want to support Massive Voodoo?
If you like to support or say thanks the monkeys of Massive Voodoo in what they do, please feel invited to drop a jungle donation in their direction via paypal or check their miniatures they got on sale here.
_______________________________________________________________________________


Great article!
Do you normally work on all sections simultaneously like this, harmonising the highlights? Or do you go section by section? Or does it depend on the miniature?
Cheers
Trent
Hey Trent, I usually work on all areas simoultanously, just to have the overall look in front of me all the time. With this I decide which areas need more or less work to make the full piece work.