Hello Voodoo people,
this
week's Tuesday Tutorial Voting brought a clear winner. 24 Jungle Painters voted - thanks to your participitation - and 17 wanted to read the step by step of Brognir.
 Support MV!
If you like to support the monkeys of Massive Voodoo in what they do, please feel invited to drop a
jungle donation in their direction via paypal or check their
miniatures they got on sale.
Allright, Roman's paintjob, Roman writes the step by step for you.
We hope you enjoy!
_______________________________________________________________________________
FOREWORD
Mkay, another article. Well another foreword: This article is funny when it comes to photos. I was testing several setups for this one. Not only taking photos straight from my workspace, but also taking photos with the big camera. I tested several backgrounds and was not truely happy with the bright blue one, but made most of the photos in front of it. Wonderful, ain't it. Not really funny at all :D - nonetheless, I apalogize for any photo issues you readers might encounter.
STEP BY STEP
Brognir is a very cool bust by Mpryoc, sculpted by master Raul Garcia Latorre. He is a truely tiny bust, even I made big photos of him. Just for you to see the size of the model here is a photo:
Size comparison of Brognir
... and another one!
Let's get it on then.
Brognir Stonebridge in pure resin:
What a grim fella, eh?
Primed him black with GW's primer spray:
Used the brush and some white to just have fun and hit the miniature pretty strong to get my undercoat right. Why I did that and not used primer instead? Well, I was just in the mood and enjoy getting new things into my painting. Plow! Plow! White. White looks blueish in some places on the photo, because of the blue background, but you can see where I used more of it and less. Less shows greyish areas on top of the black and more white pops out. I was even aiming for random texture here and there.

I am realyl into painting these days, so hard that I can not spell "really" well.
Not carfully applying color here and there. Straight and brutal painting. I went for my basic colors and decided to mix a skintone myself from my primarys. Just used Red, Blue, Yellow, white and black for it.
Now you might think this is pretty though and hard to do. No it ain't. Think and analyse skin and you can do that too. Which colors you need to create skin? Mainly an orange and red, eh? Ok, so take the yellow, mix it with red you recieve an orange. Make it brighter with white, Looks almost like skin, eh? Almost, but very saturated. I used a tiny drop of blue, which is the complementary color to orange and added it. Just a tiny drop. Skintone should be ready now. You can still change it as you like, throw in some tiny yellow or some tiny read and move it in the direction you want to have your skintone.
Ok, now to the funny part and way too bright photos. I placed my basic tones, Skintone first, but I already threw in some more blue in my skin into the skin's shadow areas. Marked the eyebrows in a desaturad brown, painted the clothing in a bright, but also desaturated olive green.
I am in the mood to try myself on NMM (non metallic metal) sometimes. Not the biggest fan on how it is thaught in most cases, but try to find my own way of freedom for it. This was my start of his belly plate. Plow! Plow! Colores!
Can you see the gentle blue mixed in the skin on his chin, below his cheekbones, under his lip or on his shoulder? On the clothes I roughly painted fabric texture with thin and thicker lines. Just go at it. Plow! Plow!
Backside - call this step a sketch if you like!
Painting his eyes, to see the character more clear.
Allright as the guy looks rather pale at the moment and I am in the mood to paint what I miss or what I am searching for when I look at my recent steps. I am not trying to follow a strict work order as this made my paintwork boring from my point of view.
How can I change paleness?
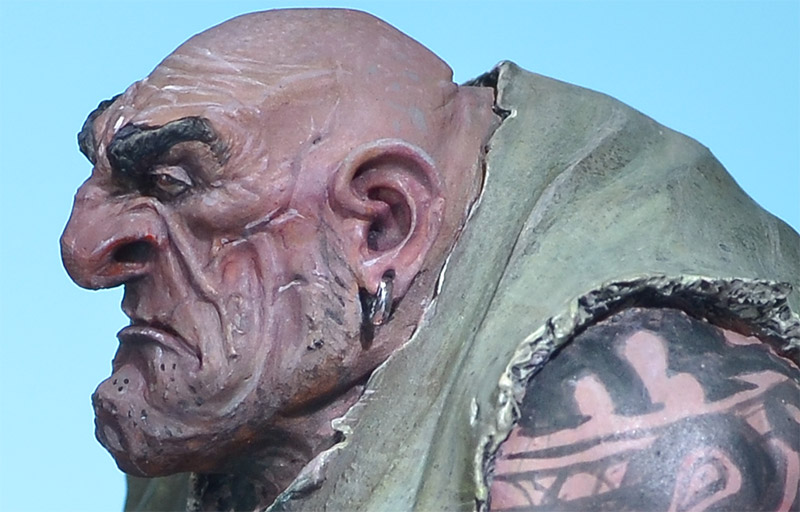
Indeed, throw in skin colors that make the skin look more alive. I did this gently with reds and some oranges, all used as glazes, but still sketching. More red to the ears, scars, nose, dark green to his eye sockets and color here and there. Plow! Plow!

Not much contrast painted yet, but you can see how the blue from the start is still there and plays together with the new unpale skintone colors that I put on top as glazes.
My NMM metal sketch went on, rough but with joy!
Here and there I used my basic skintone again to put it in areas I know I want to paint light on top. This helps me to clean up here and there. Calm down the intense effect of a glaze or just making it more readable. Cleaning up in my steps is a really important task for my way of painting.
Now I was in need of contrast and made my basic skintone brighter in about 4-5 steps, slowly adding a yellowish white to my basic tone color. This looked quickly weird, but I was not scared as I am never scared of colour. I was searching contrast, so I put it where I wanted it. Plow! Plow!
You can also see the fabric lines I started to create. Also using the yellowish white into my basic tone - olive - for the clothes. Plow!

Next I used glazes of my basic skintone again pulling it over the way too bright stuff that I painted before to calm it down again. See? Doing what is needed in that particular moment. Freedom of painting.
I gave the overall piece a spray with my airbrush with a dark sepia/black mix, BUT from below. With using less pressure of air I also enjoyed creating small random dots here and there.
The tattoo was painted, sketchly with no further design study on it. I just liked it that way. Sketch means I am going in a again and make lines which are not strong enough... well, stronger and clearer and more crisp.
The face takes shape in form of color variety.
The back ...
Painted again on some highlight plow plow here and there in the face and the fabrics. Some work to make the eyebrows dark and highlight them and also painting some beard stubbles here and there.
The scars on his right shoulder where just painted using thick colors. A little bit like in the
tribal scarification tutorial, but this time with only thick acrylic color.
I made small tiny dots on his head plate.

Then I finally realized that the blue background fucks up my article and switched to a black one. The photos on the blue with too much light were just ugly.
Alright, at this stage I was not really happy with the extrem whites in some highlights.
So same procedure, using glazes of skintone to smooth it down. He even recieved another tattoo.
But still some of the whites were just too strong still.
I used some more glazes and added stronger highlights on the fabric and NMM here and there and called him done.
For the first time.
Liked him a lot, but still was missing something I could not name.

This was how I put him into the cabinet.
I did pull him out again and decied to make final photos on black background again as I was not happy with the bright final photos above.
 Then I realized what he was missing:
Some more work! :D
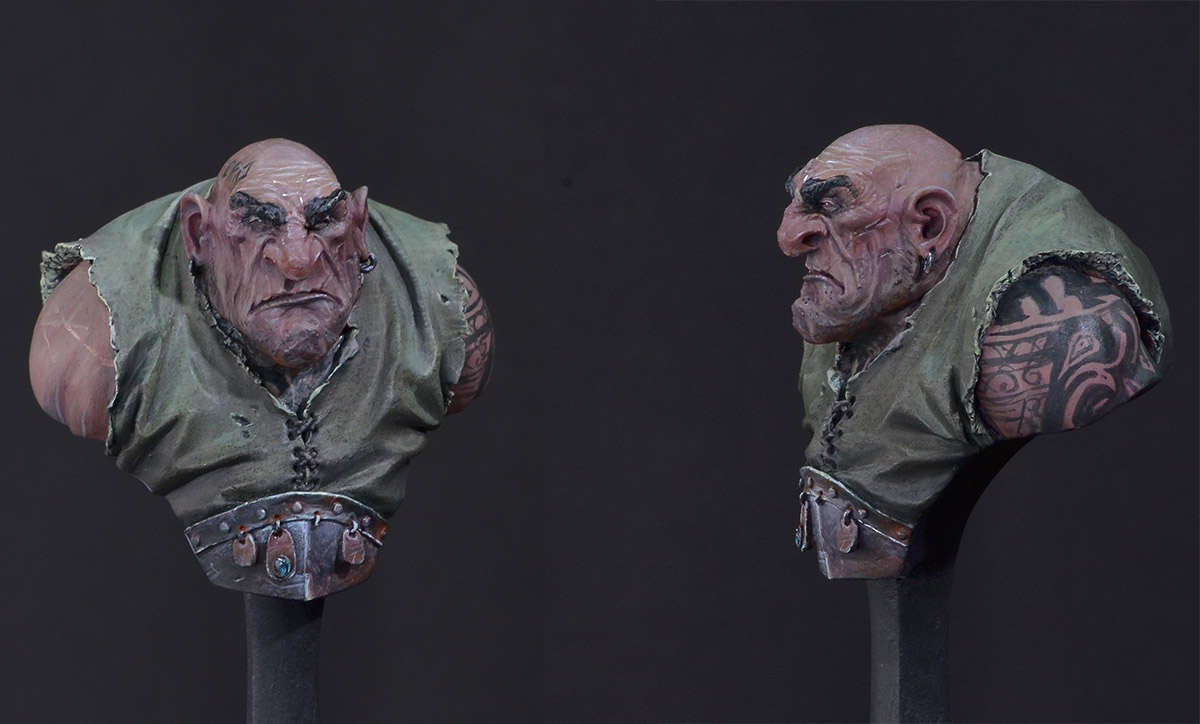
I went in the skin again and carefully glazed more oranges, magentas, purple, green and yellow to it as during my work I mainly focused on contrast and everything went too bright. With the next two hours spent I worked on smoothing transitions here and there and making the skintone much more interesting.
I even went into the fabrics and intensed the green color here and there. The metal parts recieved some more delicate highlights with pure white and a gentle glaze with blue to make it look more like steel. Funny NMM. Will try myself on more of it.


I hope you enjoyed the insight into my brain during my paintwork on this bust. Plow! Plow!
He was a lot of fun and I had to laugh on myself the three times I called him done via the process, but now he is done.
Is he?
Keep on happy painting!
Best Wishes
Roman











 Posts
Posts

