News: Workshop News & Updates

by Roman aka jar


You can find this roadmap linked up

to the right navigation bar of Massive Voodoo :)


Hi everyone,

a quick roundabout of the updates hitting the MV seminar roadmap.
Nova Open Seminars, me teaching statewise are now online, please check below! Additionally I am slowly starting to plan dates for the second half of 2020. In Germany I will mainly teach in my hometown, Augsburg. If you want to organise international workshops with me the best way to contact me is via mail. See below!


Roadmap 2020 overview   
- here are the dates and topics for 2020. Red are upcoming seminars,
green
are the ones in the past. Check for the reviews on the green ones.

You can find so far enrolled student numbers behind the seminars.
All seminars in Augsburg will take place as soon as we got up to six students!


Actual planning on more seminars in Augsburg, teaching at the NOVA Open in DC and maybe a New York Beginner Class after the NOVA for the second half of 2020.
As soon as information is available it will be linked in here.

First half of 2020___________________________________

Bern, Switzerland - Info Mail soon!
// 31st January - 2nd February 2020  3 day Beginner Workshop
german language - 19/28 - Information PDF 

Madrid, Spain

// 29th February 2020 1 day Speedpainting Masterclass

english language - 9/12 - Information PDF
more information!

Madrid, Spain 
// 1st March 2020 1 day OSL Masterclass

english language - 9/12 - Information PDF

more information!


Augsburg, Germany
// 13rd March - 15th March 2020  3 day Beginner Workshop
german language - 30/30 Waiting List: 3 - Information PDF

Augsburg, Germany
// 18th April 2020  1 day Speedpainting Masterclass
german language - 12/20 - Information PDF


Augsburg, Germany
// 19th April 2020  1 day Object Source Light Masterclass
german language - 12/16 - Information PDF

Augsburg, Germany

 // 25th - 26th April 2020  2 day Skintone & Faces Masterclass
german language - 14/16 - Information PDF

St. Albans, UK
// 15th - 17th May 2020 3 day Advanced Workshop
english language - 0/18 - Information PDF (fee will vary due international seminar)
to sign up, write an email to: journeymanminiatures---at---gmail---dot---com

Planning on


Augsburg, Germany

// 5th - 7th June 2020  3 day Beginner Workshop
german language - 0/30 Waiting List: 0 - Information PDF

Augsburg, Germany
 // 12th - 14th June 2020 3 day Advanced Workshop
german language - 0/18 - Information PDF


Washington D.C.
I will be teaching at this years NOVA OPEN in Washington D.C. again. Please see links below to get directed to my weekend class before Nova or my seminars during the convention. Please use the Nova Open Store to sign up:

// 30th August - 1st September 2020
Jar's Advanced Workshop, prior to the NOVA Open

OSL Masterclass
Sat 9/05/2020 - (OSL ) 09:00 AM - 11:00 AM

Skintones & Faces
Sun 9/06/2020 - 12:00 PM - 02:00 PM

Speedpainting for Wargamers
Sat 9/05/2020 12:00 PM - 02:00 PM

Happy Painting Church
Private Coaching and Individual training
Thu 9/03/2020 08:30 AM - 01:00 PM

Learn to paint the color black with ambient light

Fri 9/04/2020 01:30 PM - 05:00 PM

___________________________________________________________________________
If you have any questions or want to sign up please send a mail to Roman:
jarhead---at---massivevoodoo---dot---com


See further seminar describtions below,
in my curriculum or via the PDFs.
Thank you!
 

This roadmap is always under construction.
Every Seminar has an informational PDF to it to inform you about its content. Everything you need to know for enrollment. As soon as you are enrolled further communications will happen via email on the specific seminar.
_______________________________________________________________________________

Reviews on Seminars
- get to know what is coming at you:


Beginner Workshops
Advanced Workshops

Special Seminars (OSL, Basing, Speedpainting, Material, etc.)


_______________________________________________________________________________


You can find this roadmap linked up
to the right navigation bar of Massive Voodoo :)

SBS: The Elves' Robin Hood

by Daniele "Found" Trovato

SBS: The Elves' Robin Hood


Helloooo :-)


This is Daniele again and today I want to share you my last creation: a unique and personal interpretation of the legendary character of Robin Hood :-)


Risultati immagini per robin hood

The idea


You know, I have a soft spot for all Fairy Tales.


Indeed, a lot of my sculptures taking inspiration from them. I don't know why.
Unconsciously, probably it is a way for me to don't grow :-) To always stay inside my childhood :-) LOL


Risultati immagini per robin hood


I wanted always to sculpt in my personal cartoonish style, but maintaining a sufficient level of details.
And, obviously with classic archer pose.

To obtain my unique version, my idea was to create not a human, but an Elf, partially writing again the tale of Robin Hood.

The Story

"In the elves world, Robin Hood had not won.
Instead, he remained segregated for years.
Away from his city and his friends, many of whom were unjustly execute, many years ago.
Many years passed, and the old elf Robin ElfHood became older.
One day, while the old elf was hunting in the woods, he received a surprise visit.
An old lady who told him that he had a daughter: a young woman called Anne, who was locked in the castle of her arch-enemy, the Sheriff of Nottingham.
So, Robin decided to take again his bow and his arrows, to return again in his shoes of the man-who- -steals-from-rich-to-give-to-poor.
Robin returned to Nottingham Castle at night to find his daughter and free her.
But this times isn't alone: he has also the help of our forest's little friends"

If you want a copy of this bust, please SUBSCRIBE now


The sculpture

As always, I just start working on my project following my inspiration which is crucial for every project, in my opinion.

Basically, I worked off a piece of cork.


Created a little ball with Super Sculpey Original and baked it.


Defining first skull lines


Adding very slowly masses using a spatula and some tools.


I try to smooth every mass into the skull to create a unique.


With these 3 tools, you can to pretty everything in this stage: ball tool, a loop tool, and a tiny spatula.


My first idea was to create an Old Elf.


Defining better some details and expression


the result wasn't bad, but I wasn't happy


So I was feeling free to sketch the head and the expressions of the face.

In first attempt, I wanted to create an Old Elf, with a lumpy nose and a bad expression.


I changed the expression because He seemed too bad evil expression.
After all, Robin Hood is a kind guy :-)

So I hardly decided to switch his expression into a hard smile :-) Better for everybody.

The body


Created the first shape of the sculpture using Super Sculpey Original Blend.
I use this because is softer and easy to manipulate in this first stage.


As Always, I create my character directly with my hands, without drawing them before.


I created the bust in Super Sculpey Original, then create 4 holes to pin some wire into them.
I need this to create a head, arms, and spine.

After baked the pose with the first coat of sculpey.
This ensures me a lot an extra hardness. So I put some on my fresh Polymer Clay.


It's really important to have firmness under your sculpture.

the more firmness you have, the simpler is to sculpt.


Here I used a mix of Super Sculpey Firm 20%, Fimo 40%, and Beesputty 40%.


Working on, adding some masses ...

The Arch


for the arch I'm using aluminium copper wire which is very flexible and lightweight


The armature in wire aluminium metal and a sausage of clay


Going scraping the wire in order to better attach the clay into


I created two versions of the arch, just to be sure.

In both, I created a bent hard wire, coated with a thin layer of putty and baked, then sanded a little bit with some sandpaper.


Sketching the drapery and folds.


The hands were very important in this piece (anyway, they're important in every sculpture).


So I baked to squashed balls of clay and created 5 hole each one.
So I put some wire, then I worked them saparately.


Changed a little bit the pose, twisting the head looking toward the direction of the arch


I use this little loop tool, made by myself with some guitar string.

 I use this to a smooth surface like a little piece of sandpaper. Then I'll do smoothly with a little spatula.


For the backpack (with arrows inside),  same process: a piece of clay baked, fresh clay modeled into, and put in the back...simple!


Every detail is important!


I have the habit to take a picture of the model from different perspectives and sign what part I don't like

(from a picture you see the sculpture differently)


 Limited Edition bust

The Elves' Robin Hood

designed and sculpted 
58mm 

Super Sculpey Original
FIMO Classic + Beesputty + QuickMix

I'f you'd interested to this bust please subscribe here


If you want a copy of this bust, please SUBSCRIBE now

It's a Limited Edition  available only 72 hours from 26 March 2020.

Thank you


Final thoughts

What I need to say?
Every time, I try to vent my passion, my love through my sculptures.
I hope this piece like you.

THANK YOU ALL :-)

Link and resources:


_____________________________________________________________________________


This Blog is free for everybody, but we spent hours and days of work to create something unique for you.
Support NOW Massive Voodoo!
If you like to support or say thanks the monkeys of Massive Voodoo in what they do, please feel invited to drop a jungle donation in their direction via paypal or check their miniatures they got on sale here.
_______________________________________________________________________________


MVTV: Updates on MVTV - 360° videos

by Roman aka jar

Hey Jungle,

the Massive Voodoo TV youtube channel slowly recieves some updates again. We plan to have some more in the future, but not with time pressure, just when it feels right ... starting with some 360° videos of some of my recently finished projects!


Keep on happy painting!
We hope you enjoy! More soon! Massive Voodoo TV

SbS: Building the ultimate miniature showcase

by Hansrainer

Hello Jungle!

Hansrainer again :)

No matter if you are a competition painter, an army painter for wargames or painting the figures of your board games, we all like to keep our results in a place were we can see them and show them to friends, visitors and family (well, many of us do :) ).

Follow me in this article to build the ultimate miniature showcase with me:


Over the years, Detolf, a full glass showcase made by the swedish company Ikea has become the staple of miniature collectors it seems. Its a full glass case with three floors, and a lot of easy hacks to add more. However, while the concept makes the best use of ambient light, adding sufficient lighting is a challenge, especially without displaying a lot of wiring and cabling as well. There are some solutions to run current through the metal shelving of the showcase, but in a household with little children, thats an unacceptable safety hazard.

I ended up with a similar construction as many other hobbyists, adding additional shelves the detolf and rigging some rather week lighting to it. The construction was functional, but due to weird setup, I ended up rarely using the illumination and rarely looking at the showcase, only turning it on every now and then, if someone interested in the hobby showed up at my place. And with this treatment, my works were somehow in our living room but rather in a way like a cabinet with glasses and plates than as a proud exhibit of my dabbling in the fine arts.


There are ways to improve the Detolf's though:

How to dust proof your Detolf Ikea Cabinet
Raffa explains a good way to make your cabinet dust proof!

How to pimp your Detolf Cabinet
Raffa explains the pimping of his cabinets.

... but my Idea was even bigger!

Idea:

Late last year, I realized how sad I was whenever I put a new piece in there, only to be stored and more or less forgotten. I put some thought to it and analyzed what most annoyed me and how to solve it:

1. I rarely used the illumination because it was a fuss to turn it on in the evenings and off when I went to bed.  

2. The fact the shelves were glass/plexyglass as well, made the whole impression somewhat noisy, as each shelves display was affected by the shelves above and below.


3. Only the top to or three shelves really drew attention as the rest would need constant bending down to take a closer look.

4. Having all busts and figures on each shelf at the same level made the shelves either looking empty or crowded, making it hard to look at the models in the back.


    I solved these Issues by looking for a showcase with separate cabinets, a programmable timer for the light and some ways to structure each cabinet. Also the cabinets needed to be spread over less height, thereby making them easier to look at.

    As an added requirement, I realized, that Miniatures are best shown off under a mild daylight (5500  Kelvin) while on the other hand my family preferes warm light in the living room.
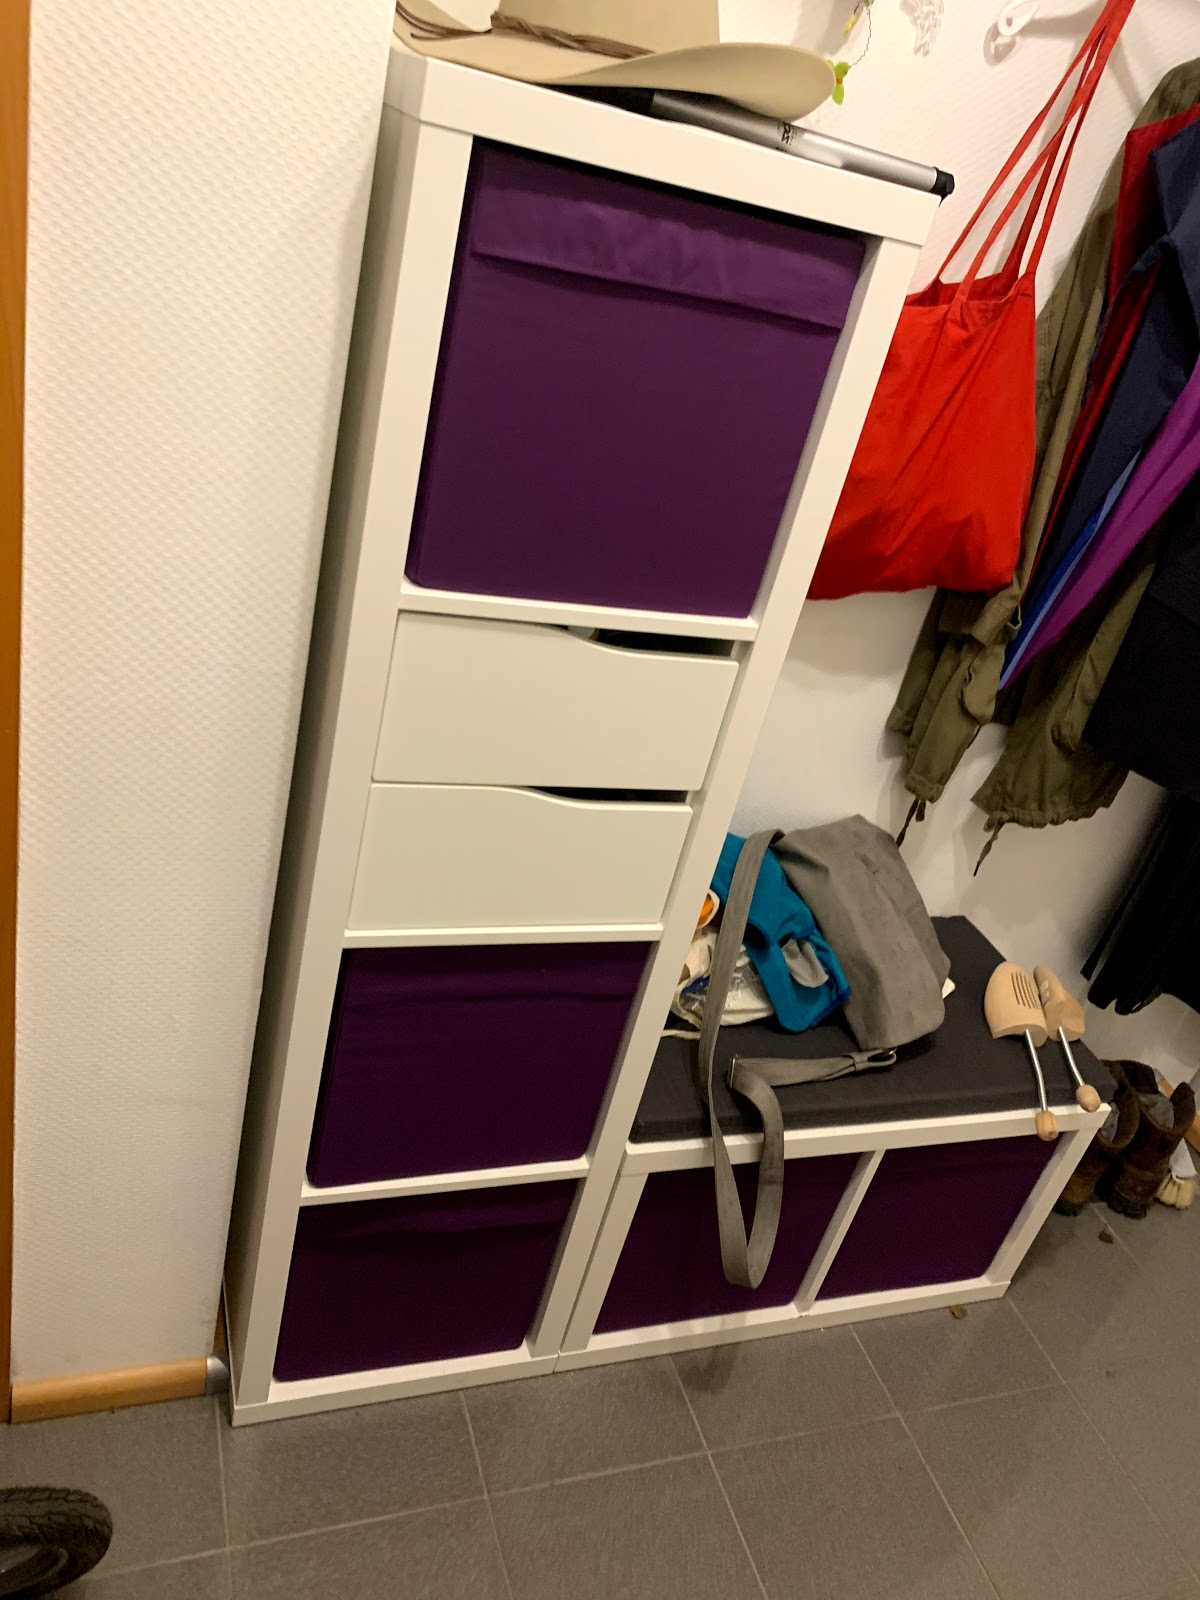
    Plan:

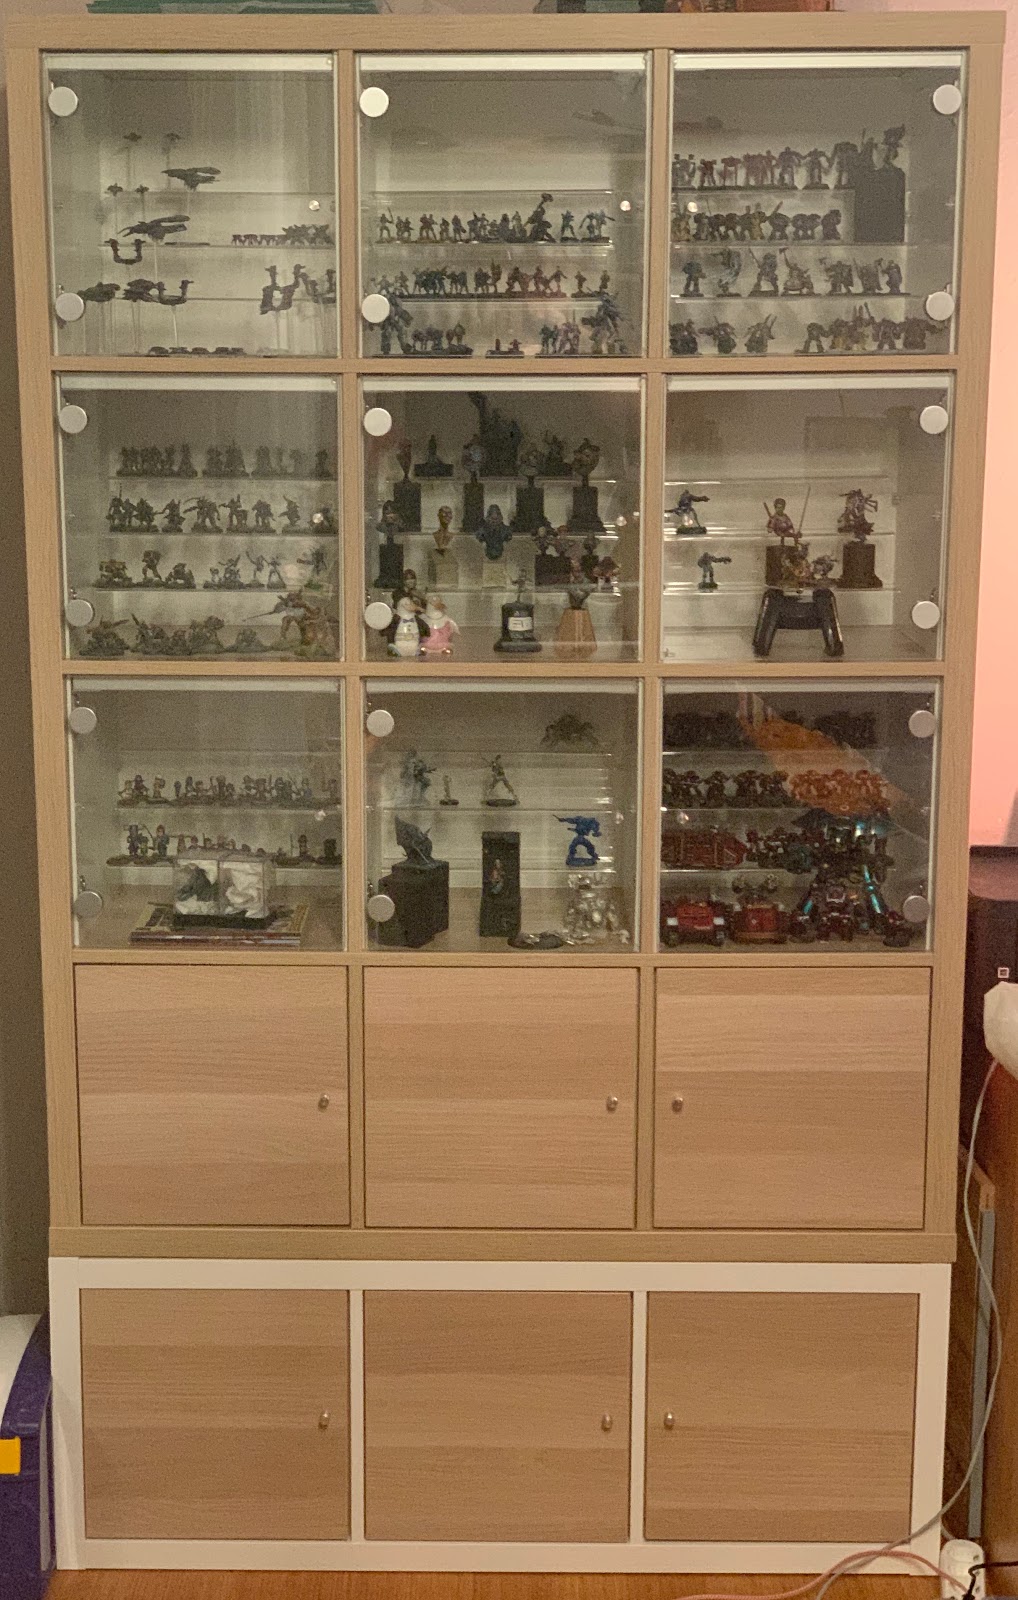
    As for the cabinet itself, I ended up with Kallax by Ikea - its a staple system of the brand and comes in lots of varieties. All shelves have a roughly cubic arrangement and you can get all kinds of inserts, not least among then a showcase insert with white insides and a glass door.


    While the shelf is availabe in several different sizes an configurations, I ended up going for 5 high and 3 wide solution. This allowed me to create a showcase that fits the other interior of our living room with regard to height. I converted the top three rows (with three cabinets each) to showcases and using the lower 6 as storage for stuff currently not on display, unpainted minis etc.


    For illumination I decided to go with LED strips that allow me to control the light temperature and the controlling module also came with a programmable Bluetooth-element. The strips provide 500 lumen per meter and can be adjusted from a warm 2700K to a very bright 6500K. This sounds like a lot of light, but within each cabinet, you can use about 1 m of strip and thats a decent light not too much.

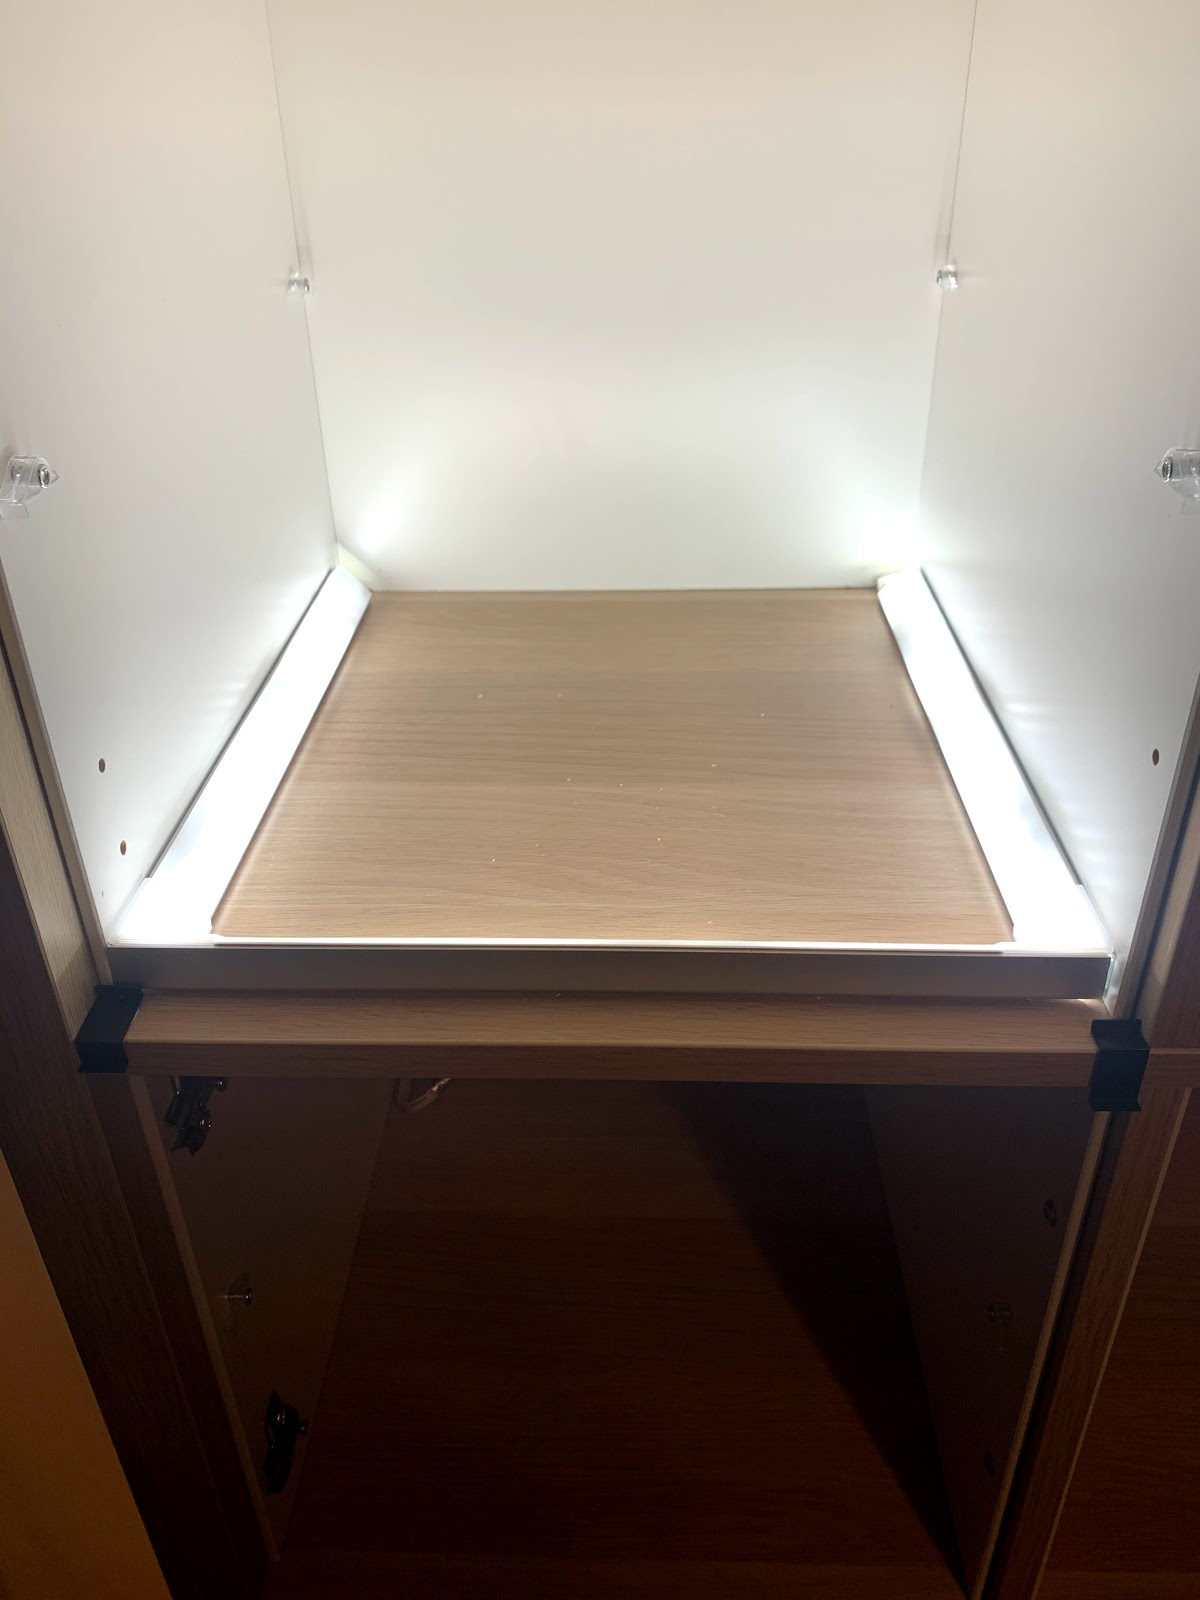
    To achieve an even, largely shadow-free lighting in each cabinet, I planned to put them in a U-shape, with the closed side to the door. I also decided to mount them in a roughly 45 degree-angle from the ceiling to avoid casting hard shadows when illuminating from the top or blinding viewers too much and losing lights on the lower levels by mounting them on the walls. To make the mounting a bit easier and for a more professional finish, I got delta shaped aluminum rails for mounting LED-strips. 

    I chose the strip system primarily based on availability, convinience and price. There are multiple brand suppliers out there, with prices ranging from cheap (a few € per meter) to really expensive (upwards of 30€ per meter). If you want to stay on the cheap side, you should at least consider sufficient light output at a decent light temperature - 300 Lumen/m at least and look for a daylight source (for more details on light quality, please refer to the earlier article on painting lights. The same basic principles apply: what to look for in painting light). I went with the tunable white version as the showcase is part of our living room furniture and I wanted the option to blend in with my families lighting preferences at most times while being able to present my works in the ideal conditions.
    The system also provides connectors that can be crimped directly to strips, sparing me any soldering hassle to connect the strips in each cabinet. Soldering would have been cheaper but a lot more work either and my soldering iron is kinda crappy and I wasnt willing to go the whole nine yards here.

    Construction:

    The construction of the IKEA parts was unsurprisingly quite simple. There were two major changes I made in timing to make the installation of the LEDs easier: I didnt install the doors of the cabinets and I cut the upper corners of the back walls, to leave room for the cables/strips to be threaded through.


    The likely most annoying part was cutting the delta profiles with a compound saw at 45° angles to allow for a seemless installation of the profiles.


    Take some time to think the cuts and settings of the saw through, otherwise you'll likely ending up throwing away quite some profile with wrongly cut corners... Also, when using powertools: Always wear eye protection and make sure your pieces are secured properly. We created a backstop jig to make sure all pieces were of the same length and the cuts in the right places. If you are inexperienced, ask a friend or family member who does. With our second cut we ended up shooting a piece of aluminum shrapnel across the workshop...
    Also: Measure twice - cut once. When you cut to miter, make sure you take the correct length of the outsides into account. Otherwise you end up throwing away the pieces that were cut to short.

    Back at the appartment, I did a dry fit of all parts (profile and strips) into the cabinets.

    Pro Tip: Turn the whole thing upside down, its a lot easier to mount the profiles that way instead of working upside down.


    I decided to glue the profiles in place using a double sided tape, mostly because its easy and looks neat and is a lot less work than drilling holes and fidgeting around screwing them fast. The profiles and LED strips are practically weightless and the construction bears no mechanical strain, so using tape is more than sufficient. Before glueing the profiles in, I removed the plastic diffusors ready to be put back in after the strips were installed.


    After the profiles were in place, I put the LED-strips in, fed the cables out, installed the back walls and finished the installation of the inserts. After an initial power- and programming check, I turned the whole showcase back into the ending position - upside-up so to say. After the final tests, I removed the protective foíl from the diffusors, clicked the diffusors in place and started mounting the doors.


    Now that the showcase was basically finished, the manufacturer offers an app on iOS and Android that makes setting up programs for the lighting pretty easy. Its also compatible with some smarthome standards like zigbee. The final tweek was the addition of some simple acrylic step counter stands to each cabinet. I went with simple transparent models (300 mm wide, 200 high, 200 deep with 3 steps), easily obtainable on amazon for about  12€ apiece. These allow me to present the pieces much better than just havin all pieces on one level.


    For now, I am pretty happy with the result, after nearly 6 weeks I still end up looking at the items in my showcase a few times a week and the whole thing is more present in our daily life. I might end up putting a white floor into the cabinets, but other than that, this thing fulfills all my display needs. Thank you for following me on the travel for my perfect showcase.


    If you want to build this or something similar yourselves - here is a list of the materials I used:

    Material list:

    Shelves:
    1 x Ikea Kallax White Stained Oak effect (4x3)
    1 x Ikea Kallax White (3 x 1)
    9 x Ikea Kallax Insert with Glass Door
    6 x Ikea Kallax Insert with Door (White Stained oak effekt)
    5 x 2 DISPLAY4TOP Acrylic 3 Step Counter Display Stand Retail Riser Polish Base 200 * 300 * 200 * 2

    Lighting:
    1 x Paulmann MaxLED Tunable White 10m Basisset (70565) ca. 130€ (Comes with 10m Strip, Bluetooth Controller und Power Adapter)
    5 x 2 m Paulmann Delta Profile
    4 x Paulman MaxLED Universal Connectors (for connecting the cut 1 m pieces of LED strips)
    2 x Paulmann MaxLED  Cable 1m
    1 Roll of double sided tape

    Tools:
    cordless screwdriver (makes setting up the shelves easier)
    miter or compound saw
    universal pliers
    philips-head screwdriver


    Yours,
    Hansrainer