


Hi all,
Hansrainer here :)
As promised before,
here is the tutorial on how to pimp your old tri-tube painting lamp:
This is the logical conclusion of my quest for a good painting lamp, started in my last article:
http://massivevoodoo.blogspot.com/2019/05/article-what-to-look-for-in-painting.html
http://massivevoodoo.blogspot.com/2019/05/article-what-to-look-for-in-painting.html
The Tri-Tube Pro is a staple tool of miniature painters
I know, many of you use a TriTube-Pro lamp for painting, as this has been the “gold-standard” in paint lighting for many years. After a while of usage, eventually the tubes start burning out and the light output diminishes.Replacing the daylight-tubes cost around 45 € every time I did it, and again, as it is the way with fluorescent tubes, they will diminish in performance as well after roughly 6 months of use (may be a bit less or more, but in general, that’s the trend).
A few years back, a successor-model has been introduced, using LEDs. This one is quite a bit brighter, but also more expensive, and more important to me, the light quality isn’t the same.
While the regular Tri-Tube clocks in at around 85€ nowadays, the LED-Version sets you back roughly 140€. On paper, both are roughly equally bright (around 1200 lumen at 40 cm) and the LED version uses a bit less power and stays cooler.
With regard to light quality, both have 6400k color temperature and a CRI of around 80 (LED) and 85 (Tubes).
Last year, shortly before christmas, I realized that my Tri-Tube was fading significantly and I was facing the option to either replace the tubes again or the whole lamp. I was leaning towards the LED version, but due to some research on color representation I did earlier last year, I was also interested in a full-spectrum light alternative.
After some price-checking I realised that the likely best option, a CRI 98+ full spectrum daylight LED workplace lamp would cost about 600€ - definitely not within my price range.
Looking for affordable alternatives...
Inspired by a somewhat complex but efficient modification Raffa did to his old tritube: wiring an actual LED-Panel to it, I was pondering modding my existing lamp as a third option. After a friend pointed me towards permanent light sources for video-bloggers, I discovered an interesting candidate on amazon:
https://www.amazon.de/Professional-Videoleuchte-Farbtemperatur-Metallgeh%C3%A4use-Fotografie/dp/B07FYLF2M2/ref=cm_cr_arp_d_product_top?ie=UTF8
This baby has a whooping 600 daylight LEDs with 5600K and a CRI of 95+, is mostly for lighting videos, can be run on rechargeable batteries or wired and has about 3 times more light output than the old head.
I ordered it and tried affixing it to the boom of the old tritube, in order to have the same flexibility. In the end, I was more than happy with the outcome, the lamp is really great, illuminates a larger area evenly with some light volume to spare. Due to the higher output, you can have the lamp head higher above the painting surface, further softening the light.
Of course I also compared the output to the LED-TriTube while I could still send it back and I can say it absolutely exceeded all expectations. The output (using the included diffusor) at 50% is already slightly higher than the competition and there is still a lot more to be had:
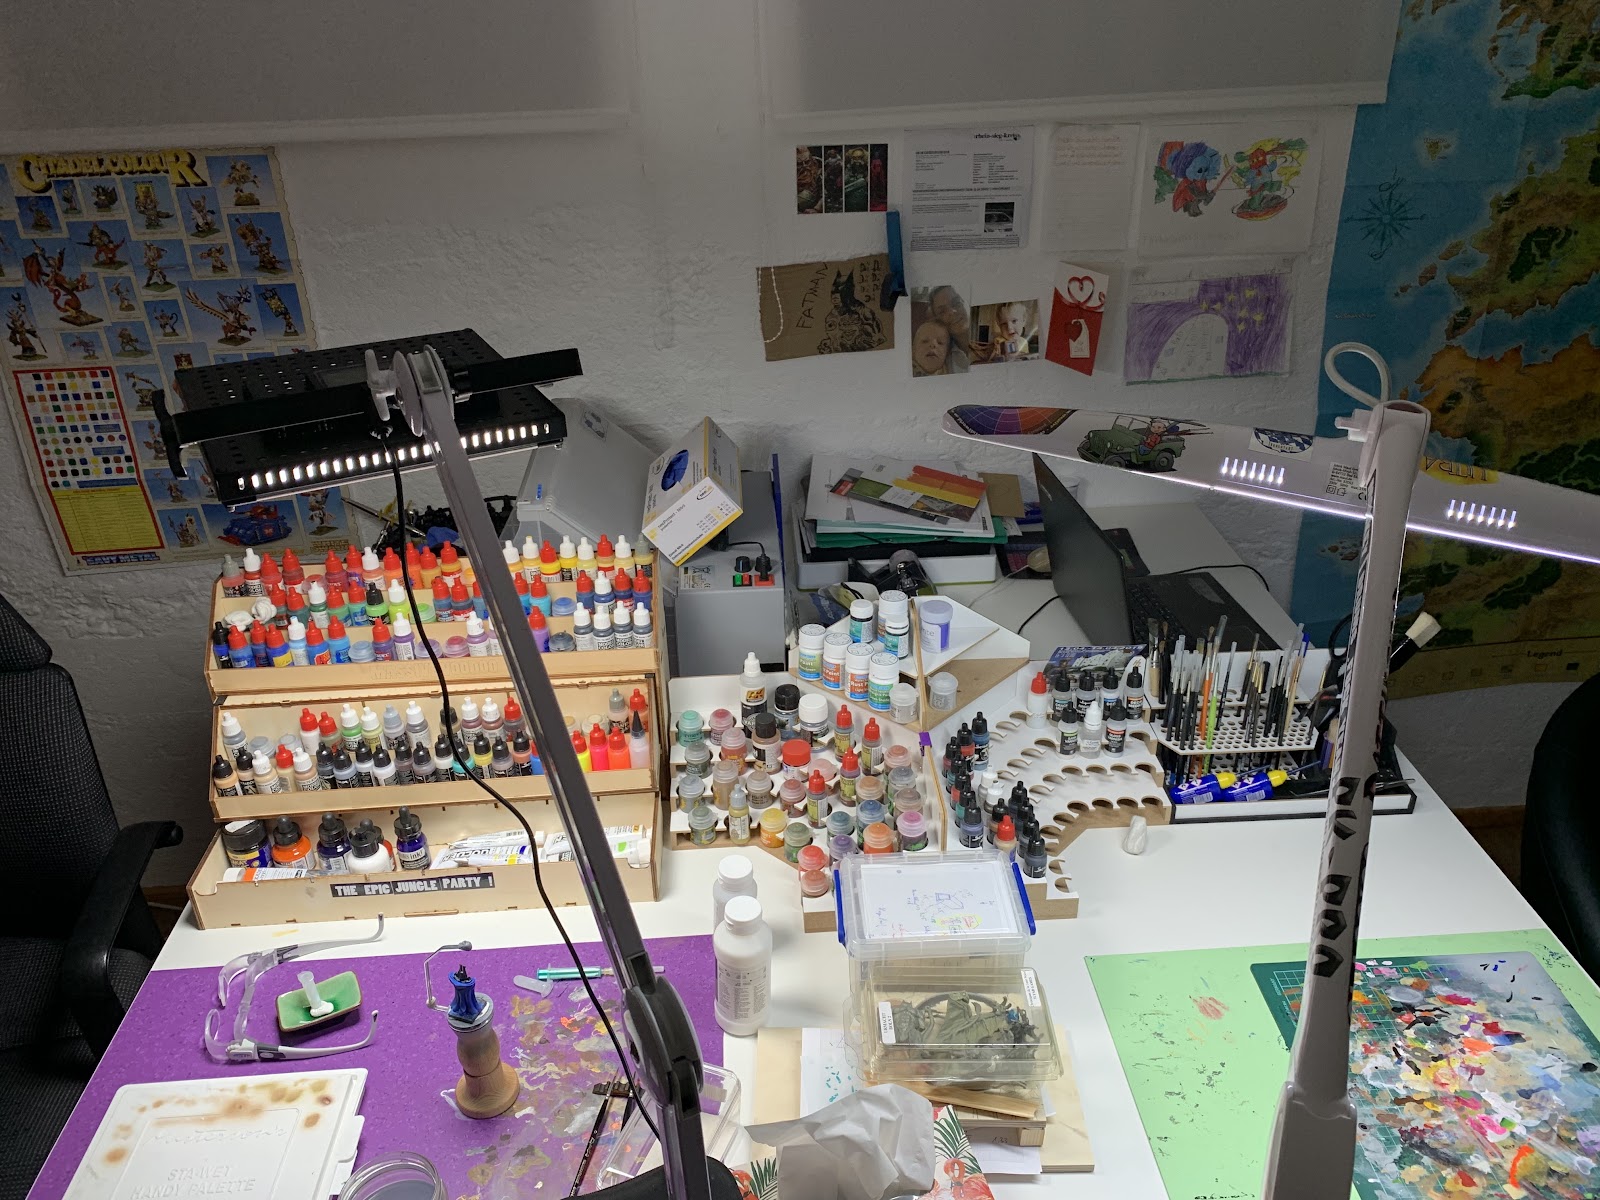
If you compare the white areas of the desk, you can see the difference. When actually painting, the difference is really stunning. So much of what we can or cannot see during painting depends on the quality and quantity of lighting.
So, if you want to use this mod yourself...
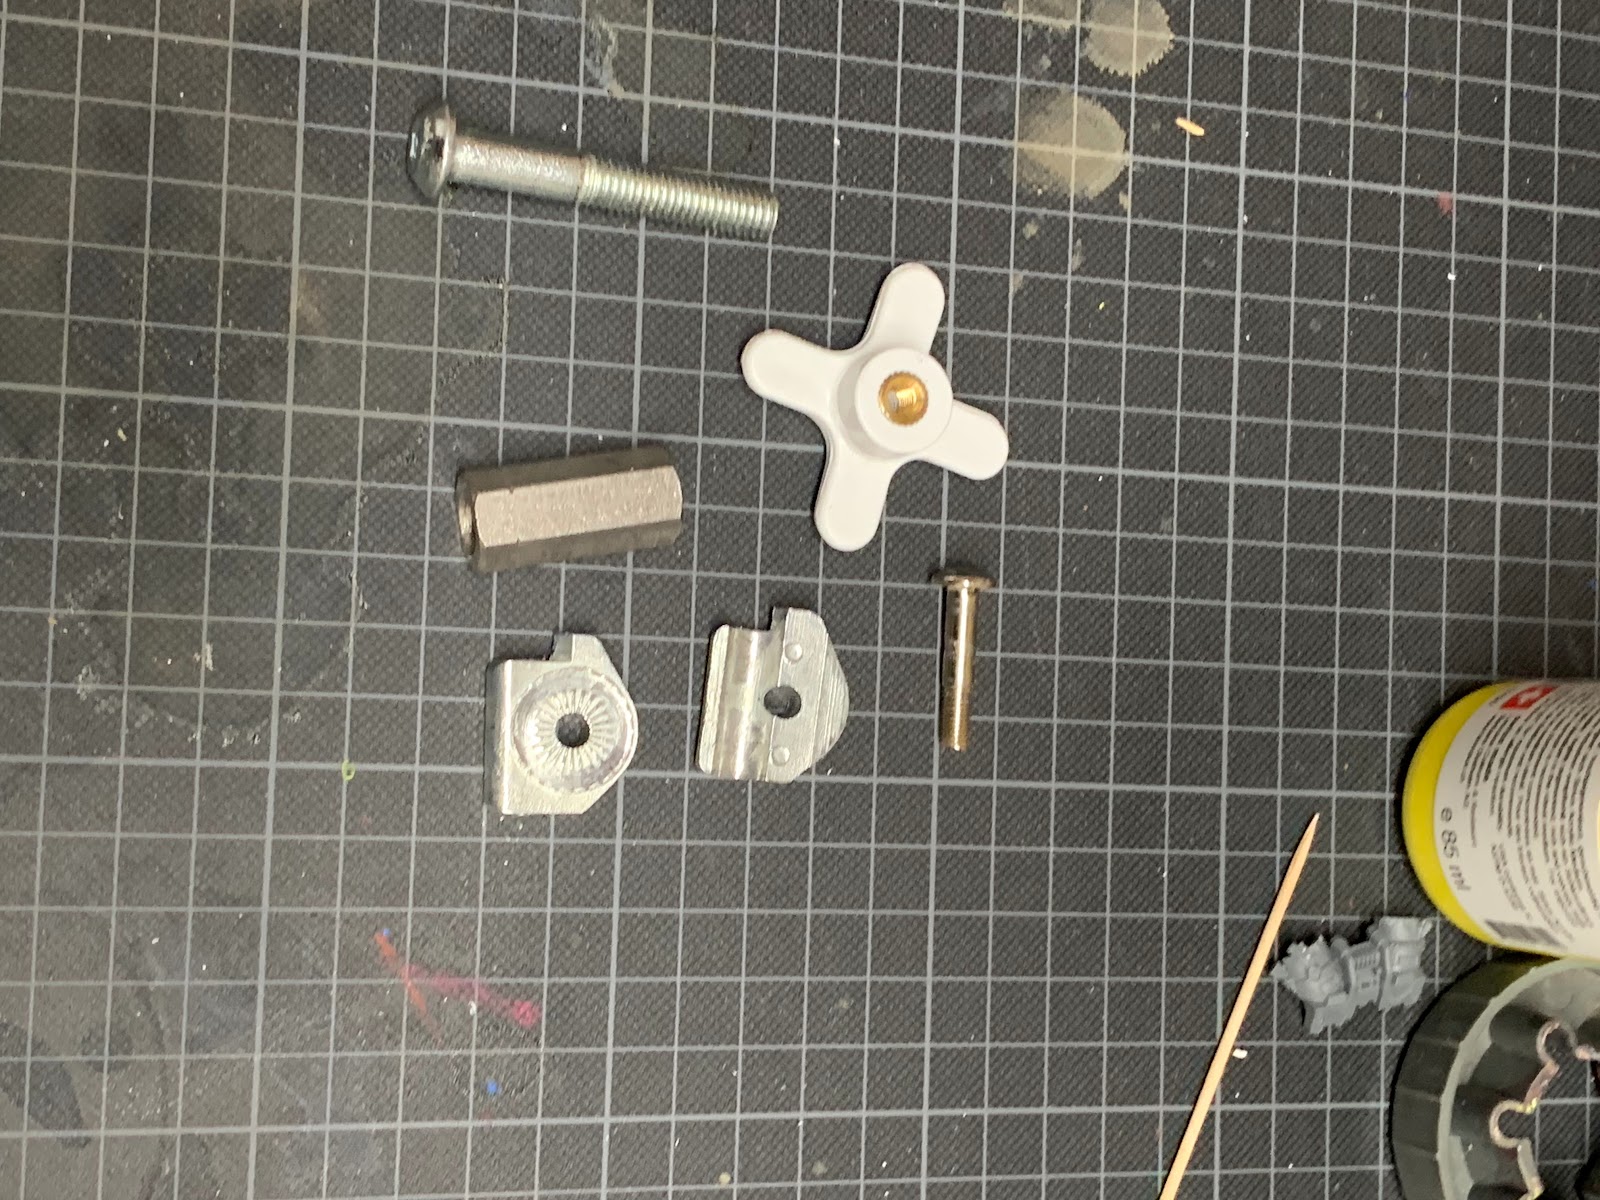
the parts you need for this mod are:
- 1 x Pixel K80 LED panel (be careful to avoid the Bi-Color K90!) (ca. 120 € on Amazon)
- 1 x Heavy duty lamp boom (salvaged from my tri-tube. The cheapest Lamp I found with the same boom was about 42€ at Amazon, if you want to build this from scratch).
- 1 x Metal Screw (8.0 x 50 mm) (less than 1 €)
- 1 x hexagonal connection nut. (less than 1 €)
- Some cable ties (few cents)
- small phillips screwdriver (size 1)
- Allen-Wrench (Size 5)
- wire cutter
First of all, I prepared my old TriTube by removing the original lamp head and cable:
UNPLUG YOUR TRITUBE PRO from the wall socket! Seriously, this should be natural, but DO IT!
Turn it on and off to validate that it is not powered anymore and that there is no residual charge in the system. If it still is, stop reading this tutorial and stop modding your lamp!
Assuming it is not working now and it is actually unplugged, you may continue!
Also, I recommend removing the whole boom with the head from the stand and work on it while its flat on the table.
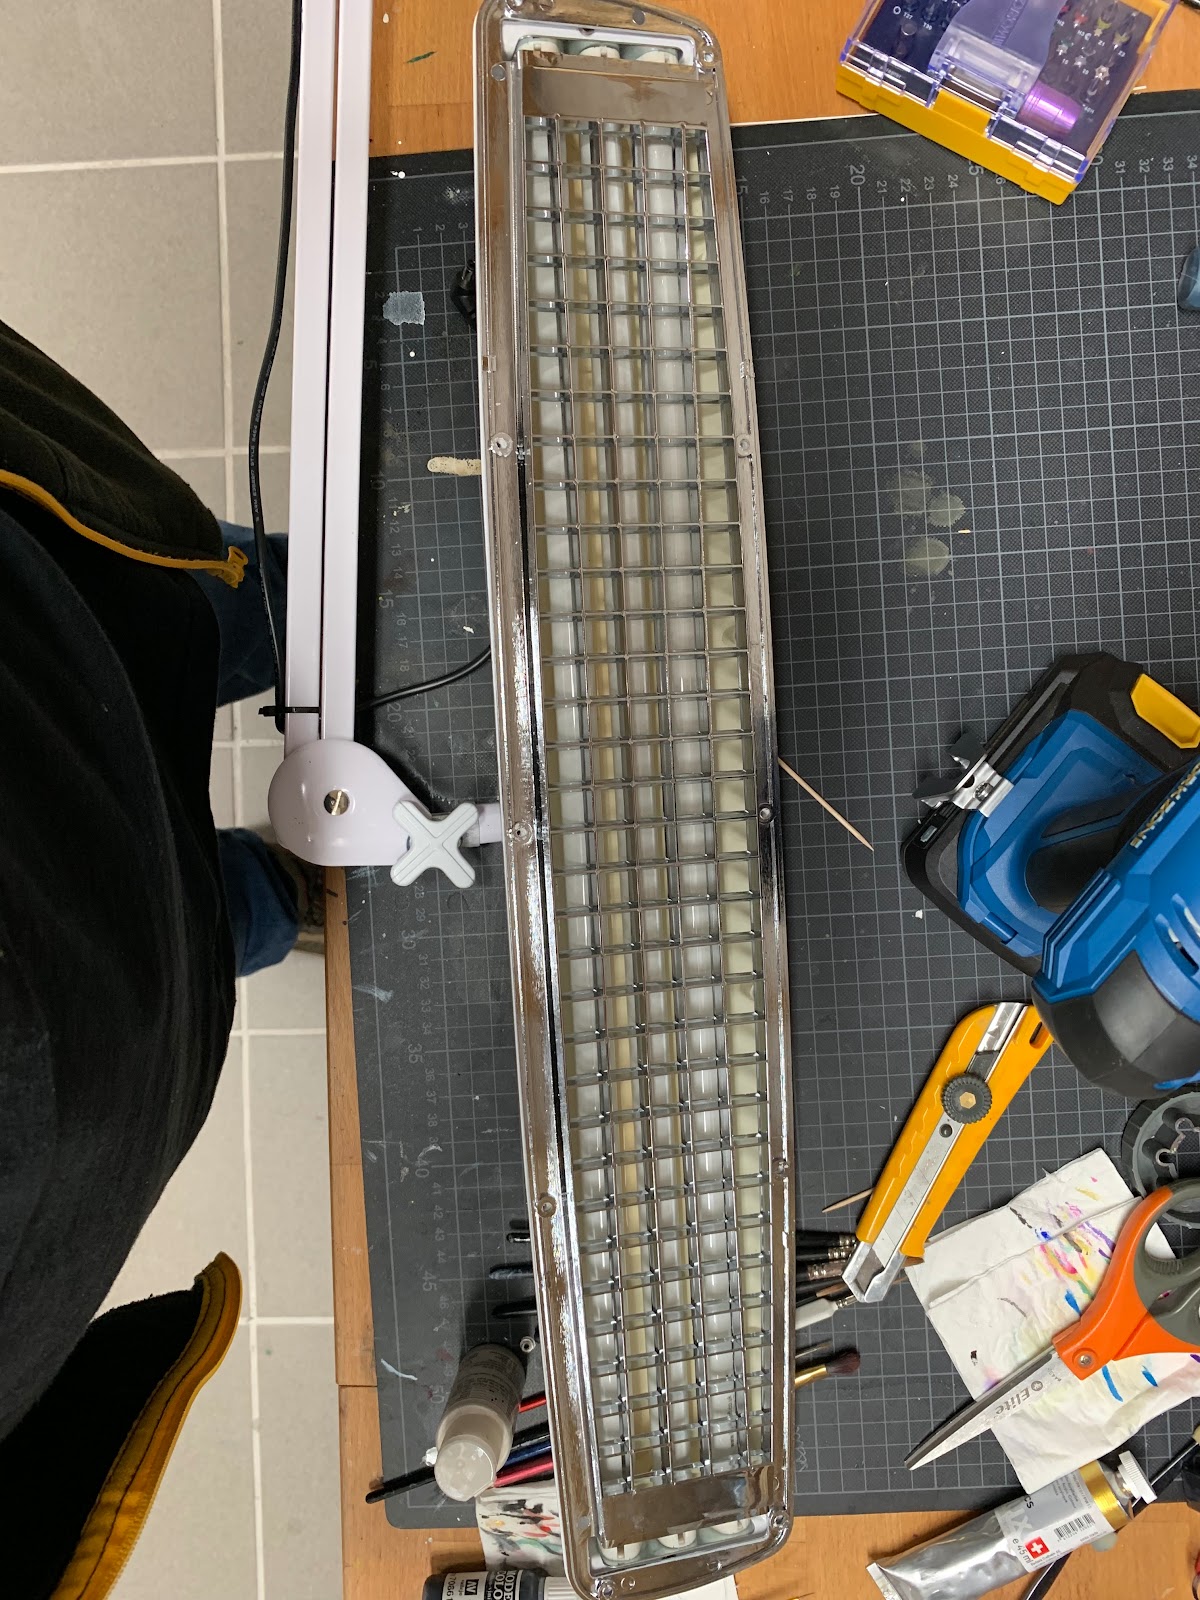
Unscrew the bottom cover by removing the 10 screws visible from below:

Remove the bottom cover and the silver reflektor grid, the tubes become accessible:
Remove the tubes (I didnt, I was lazy but for safety-reasons, you should!)
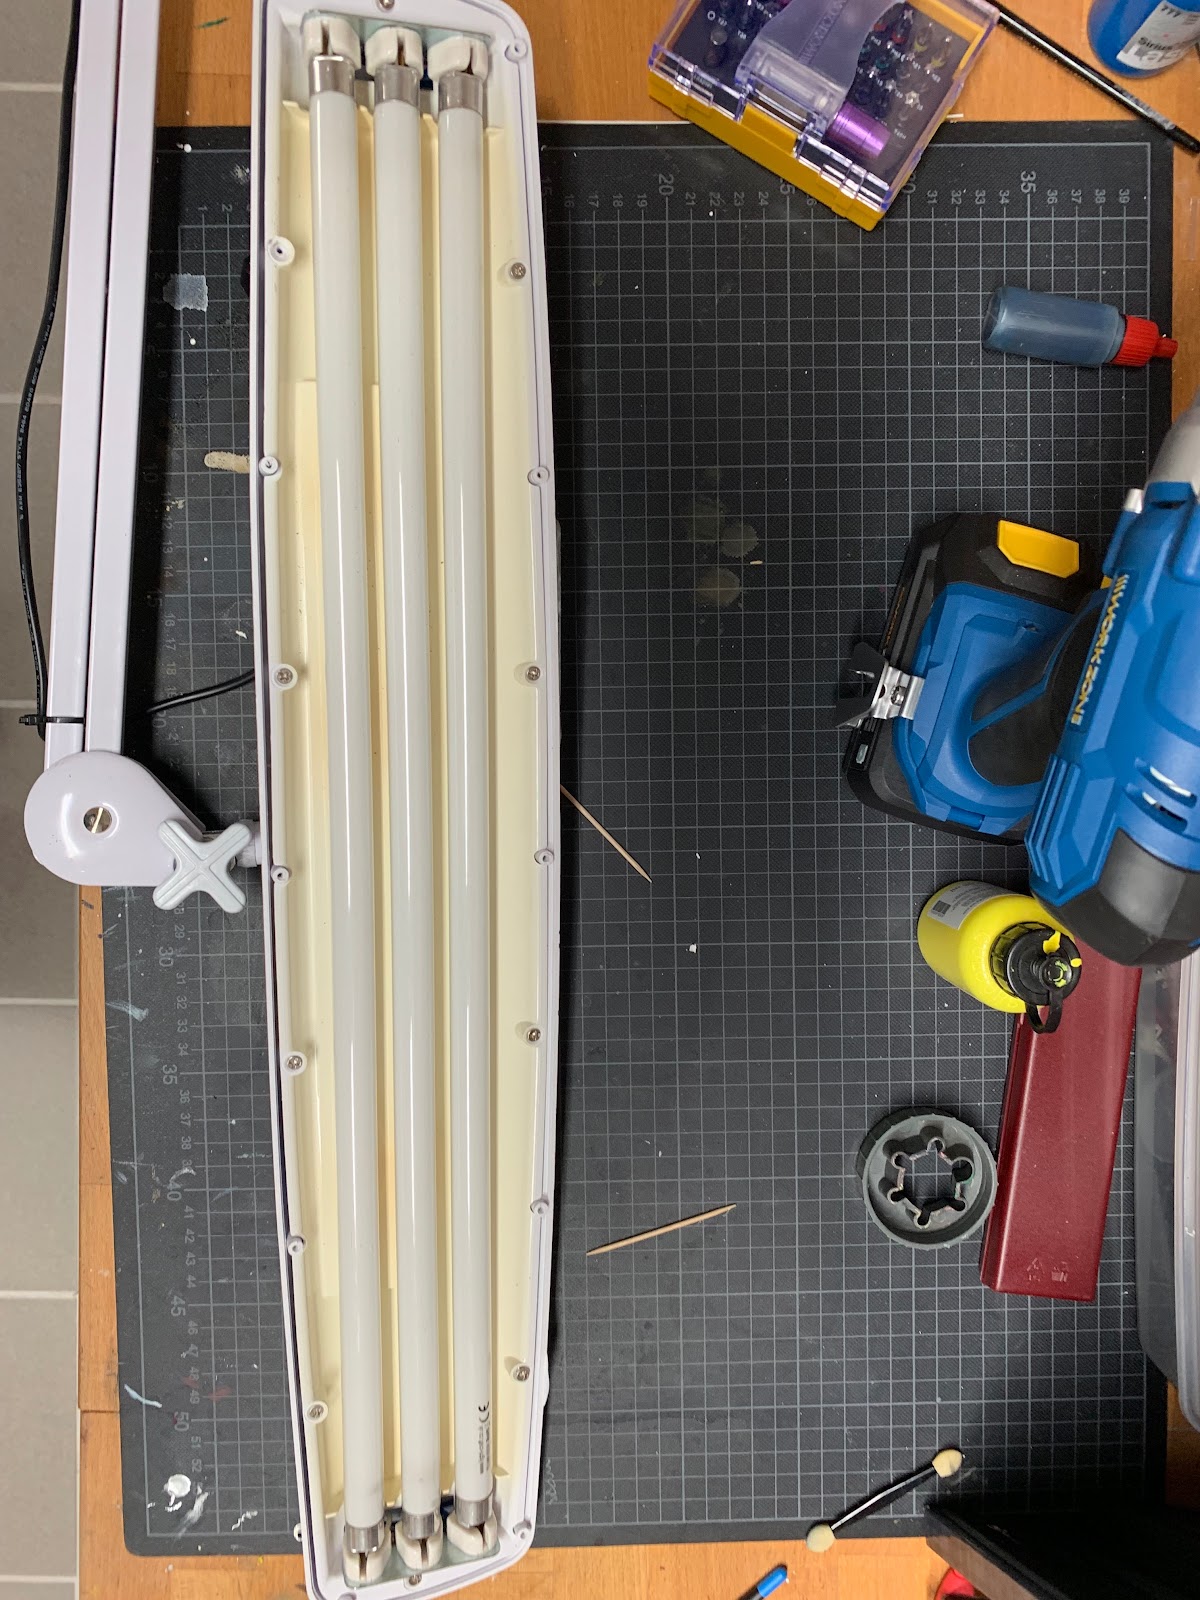
Unscrew the tube plate.
Carefully lift off the tube plate. I forgot to take a picture here, but essentially, this is where the electronics and wiring becomes visible.
Last chance to change your mind, since in the next step, destruction ensues!
Cut the wires as close to the inleading power cable as possible.
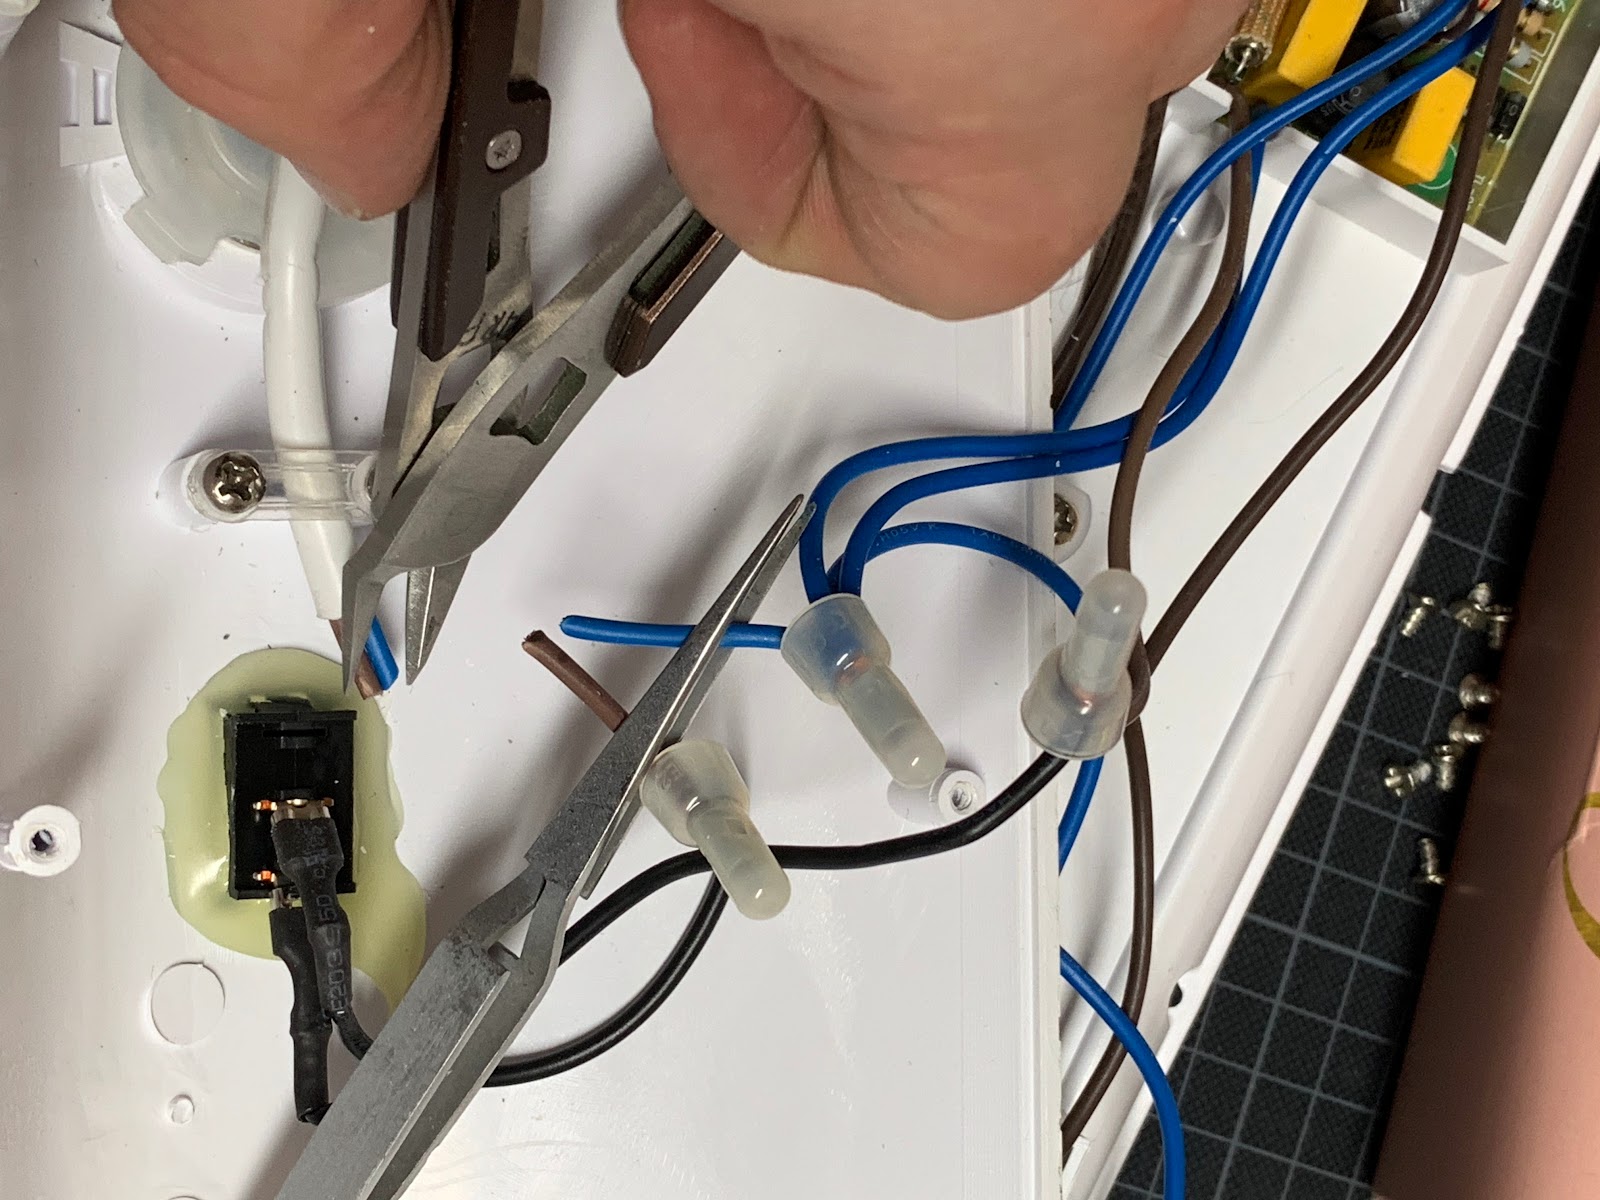
Now you can pull the power cord out of the lamp head and also out of the boom. If you want to keep the lamp head, you know, just in case… I would reassemble it now and screw it shut. Also I would remove the power cord completely now.
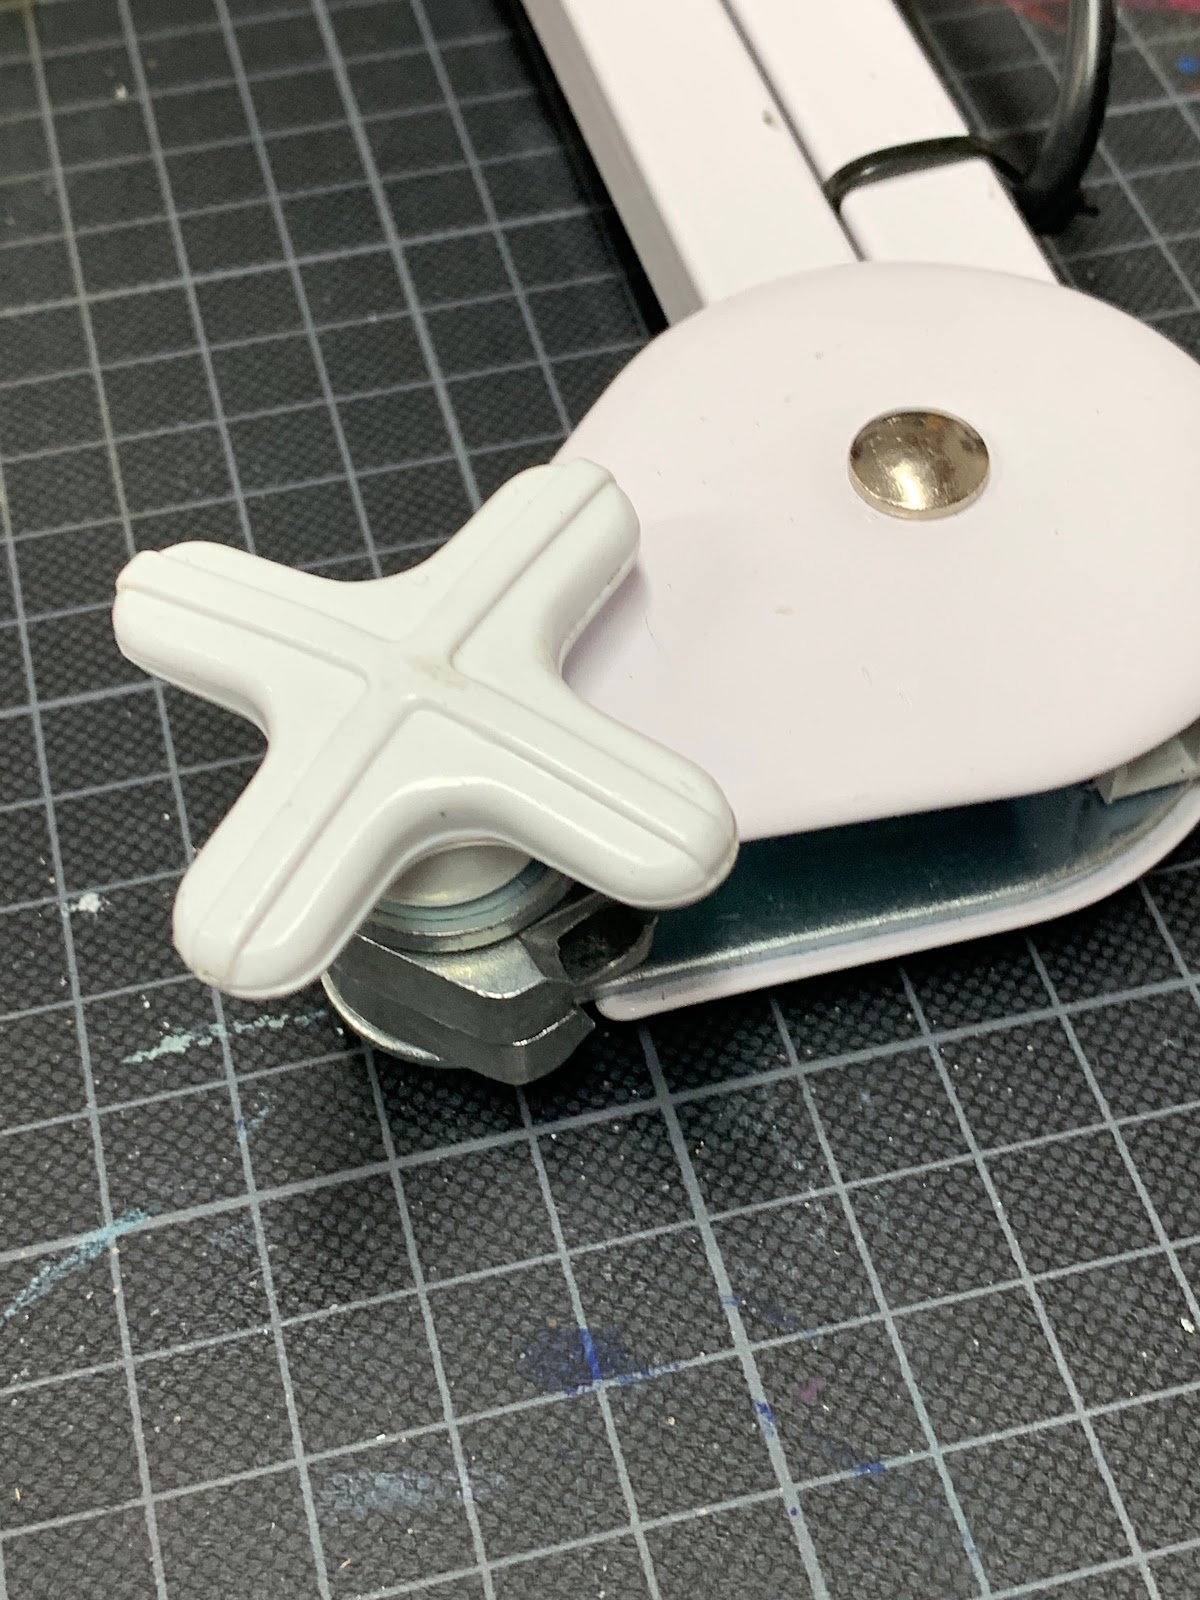
Completely unscrew and remove the white wing-nut that is stabilising the lamp head.
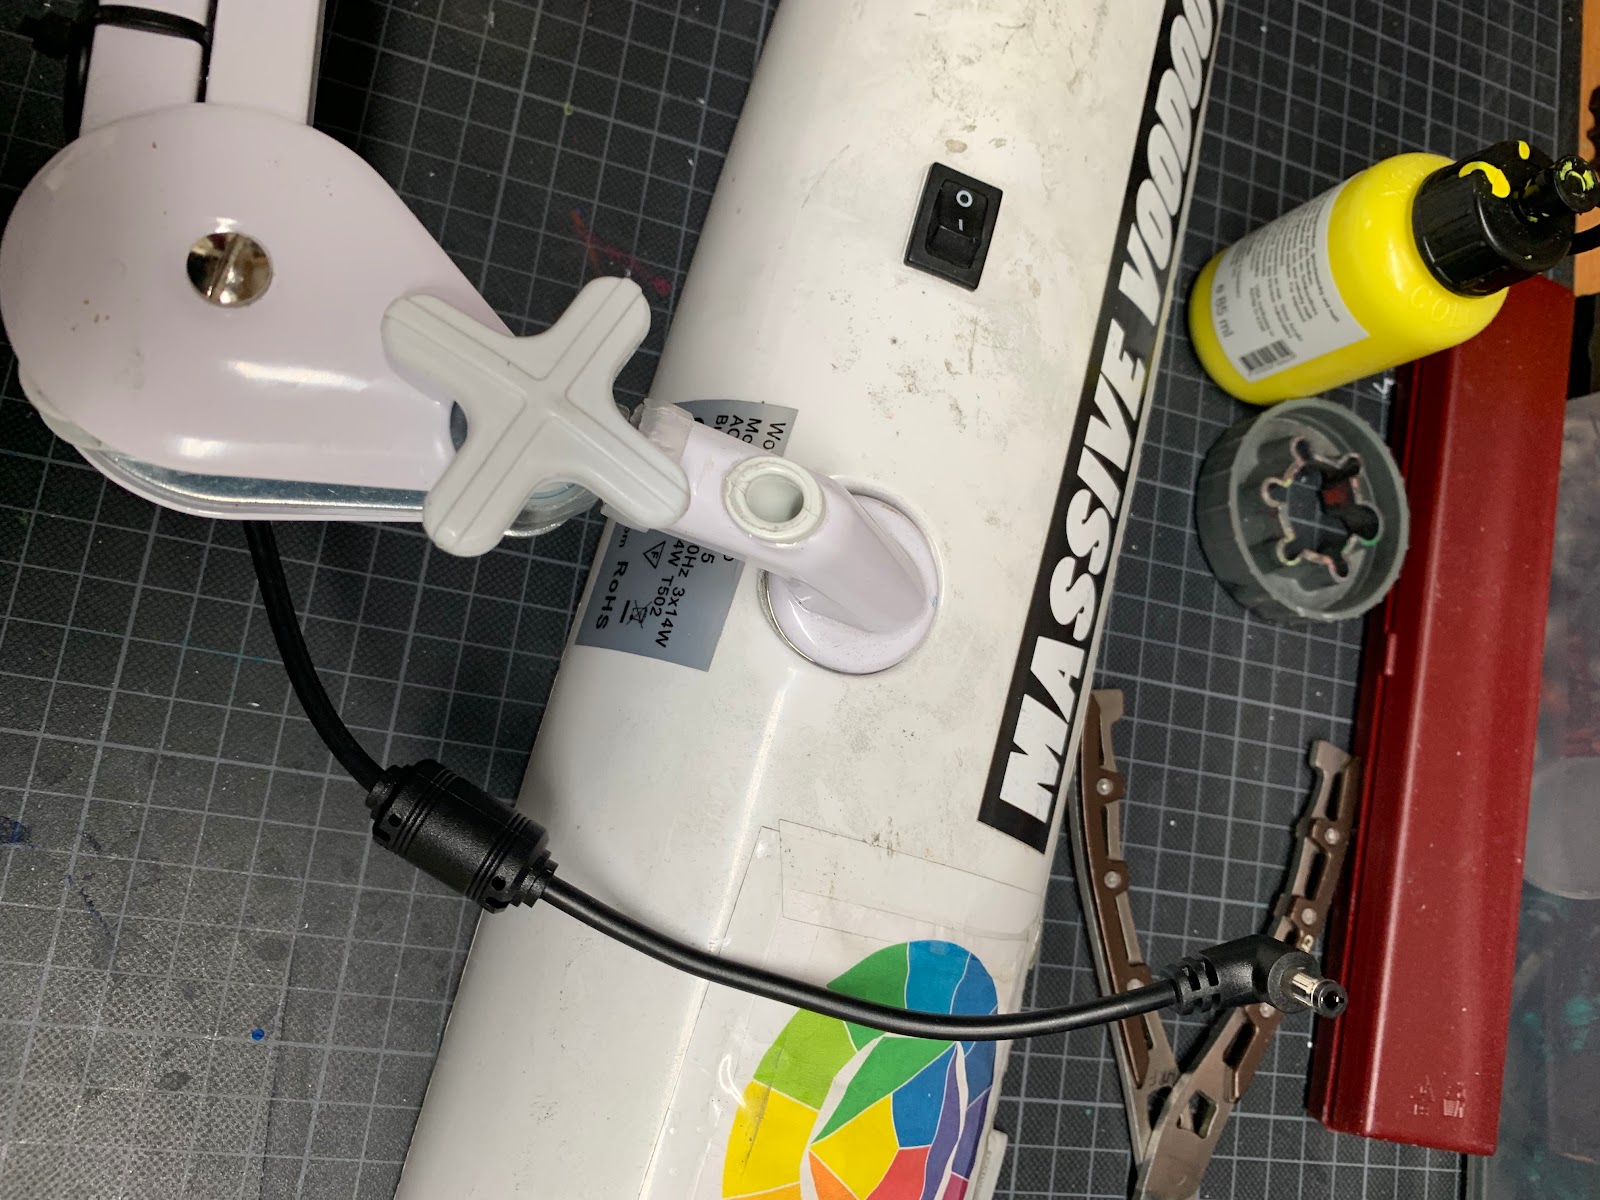
Remove the screw that was held in place by the wingnut. (Just push it out carefully, its just stuck in there).
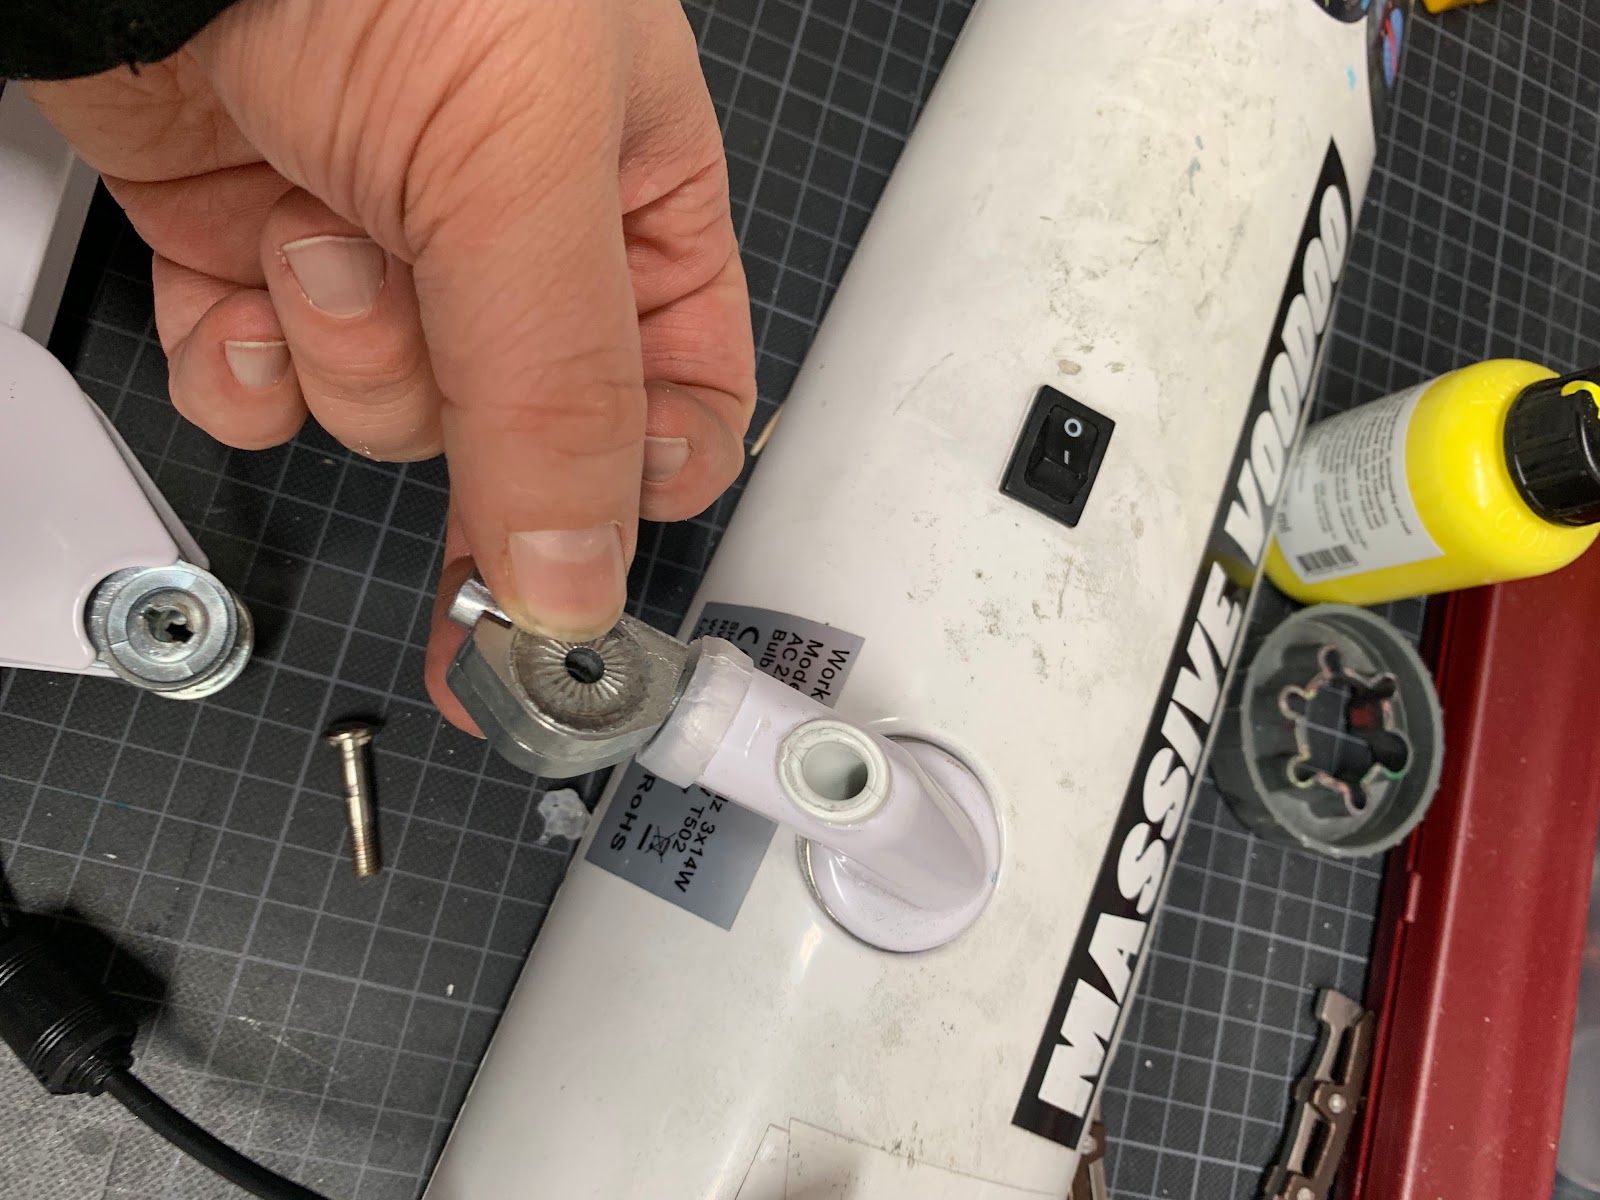
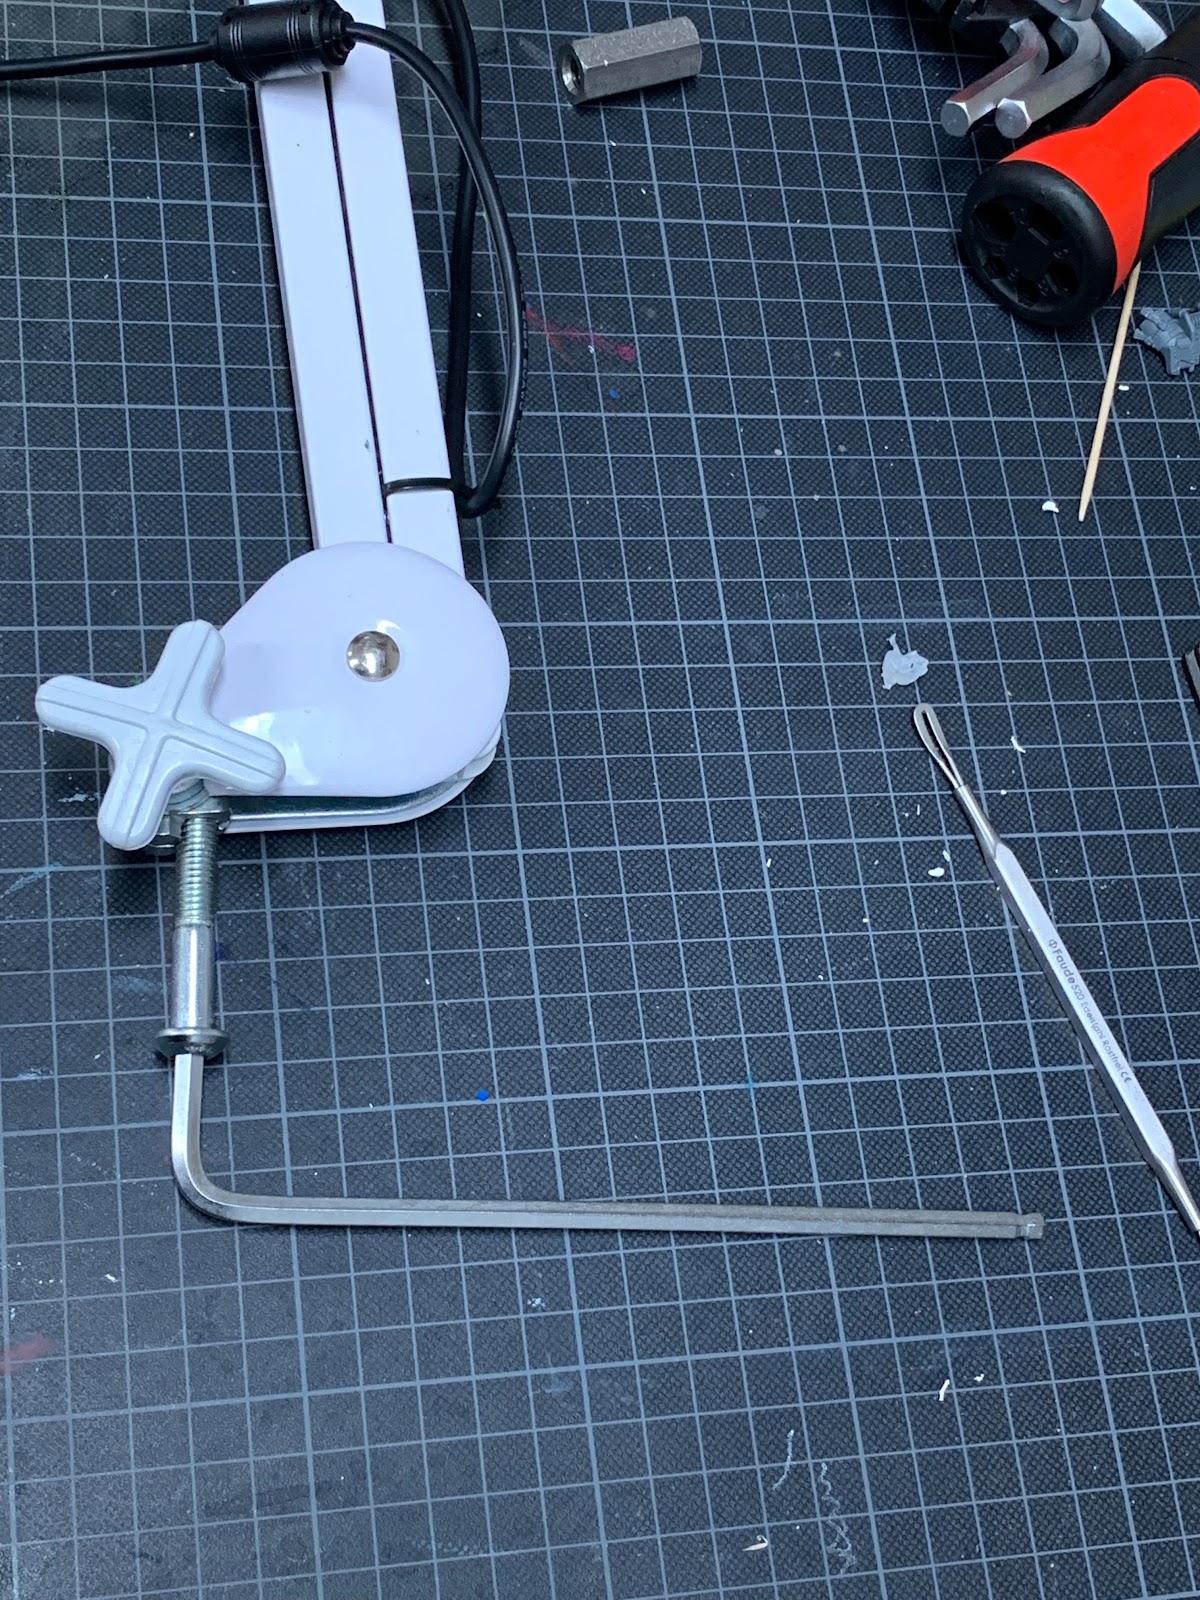
Now you can (with a little force) pull out the lamp head holder.
The holder consists of two parts that grip a bolt affixed to the lamp head. You can now get rid of the lamp head but keep the two halves of the grip.
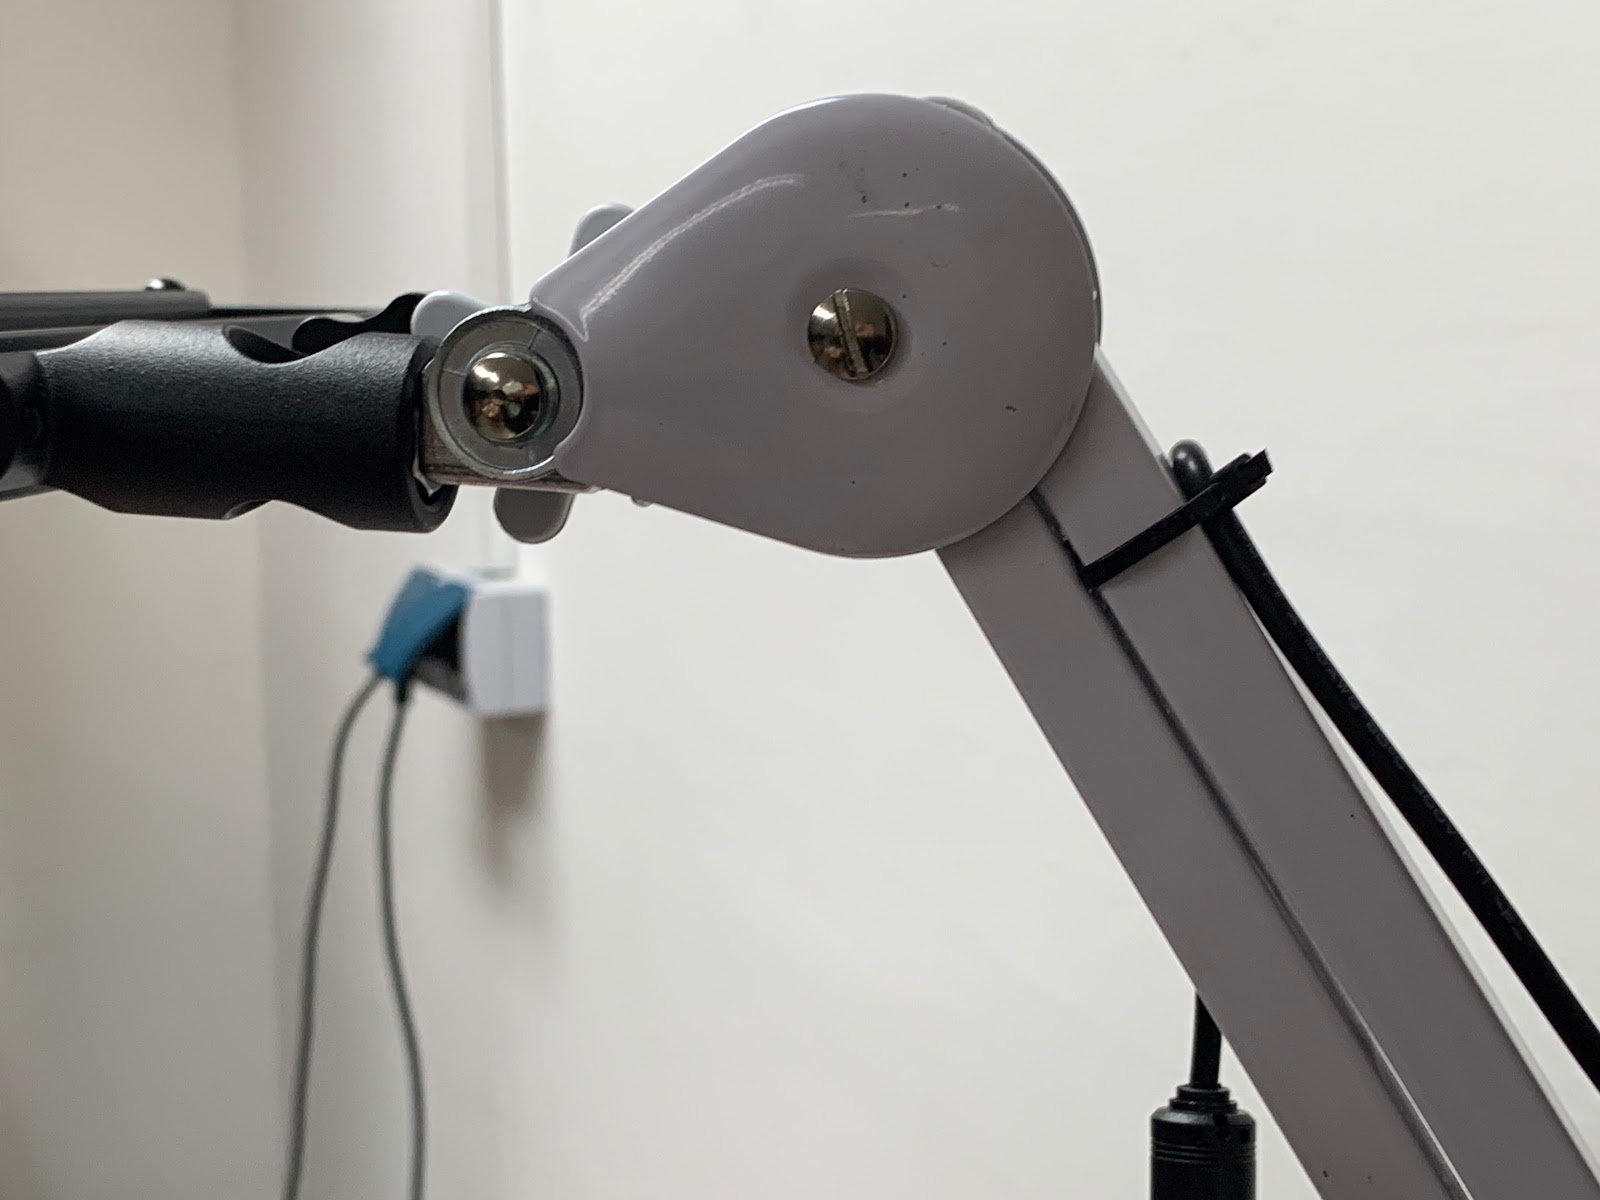
Put the grip back in the original position, put the screw back in and affix it with the wingnut. Of course without the lamp-head.
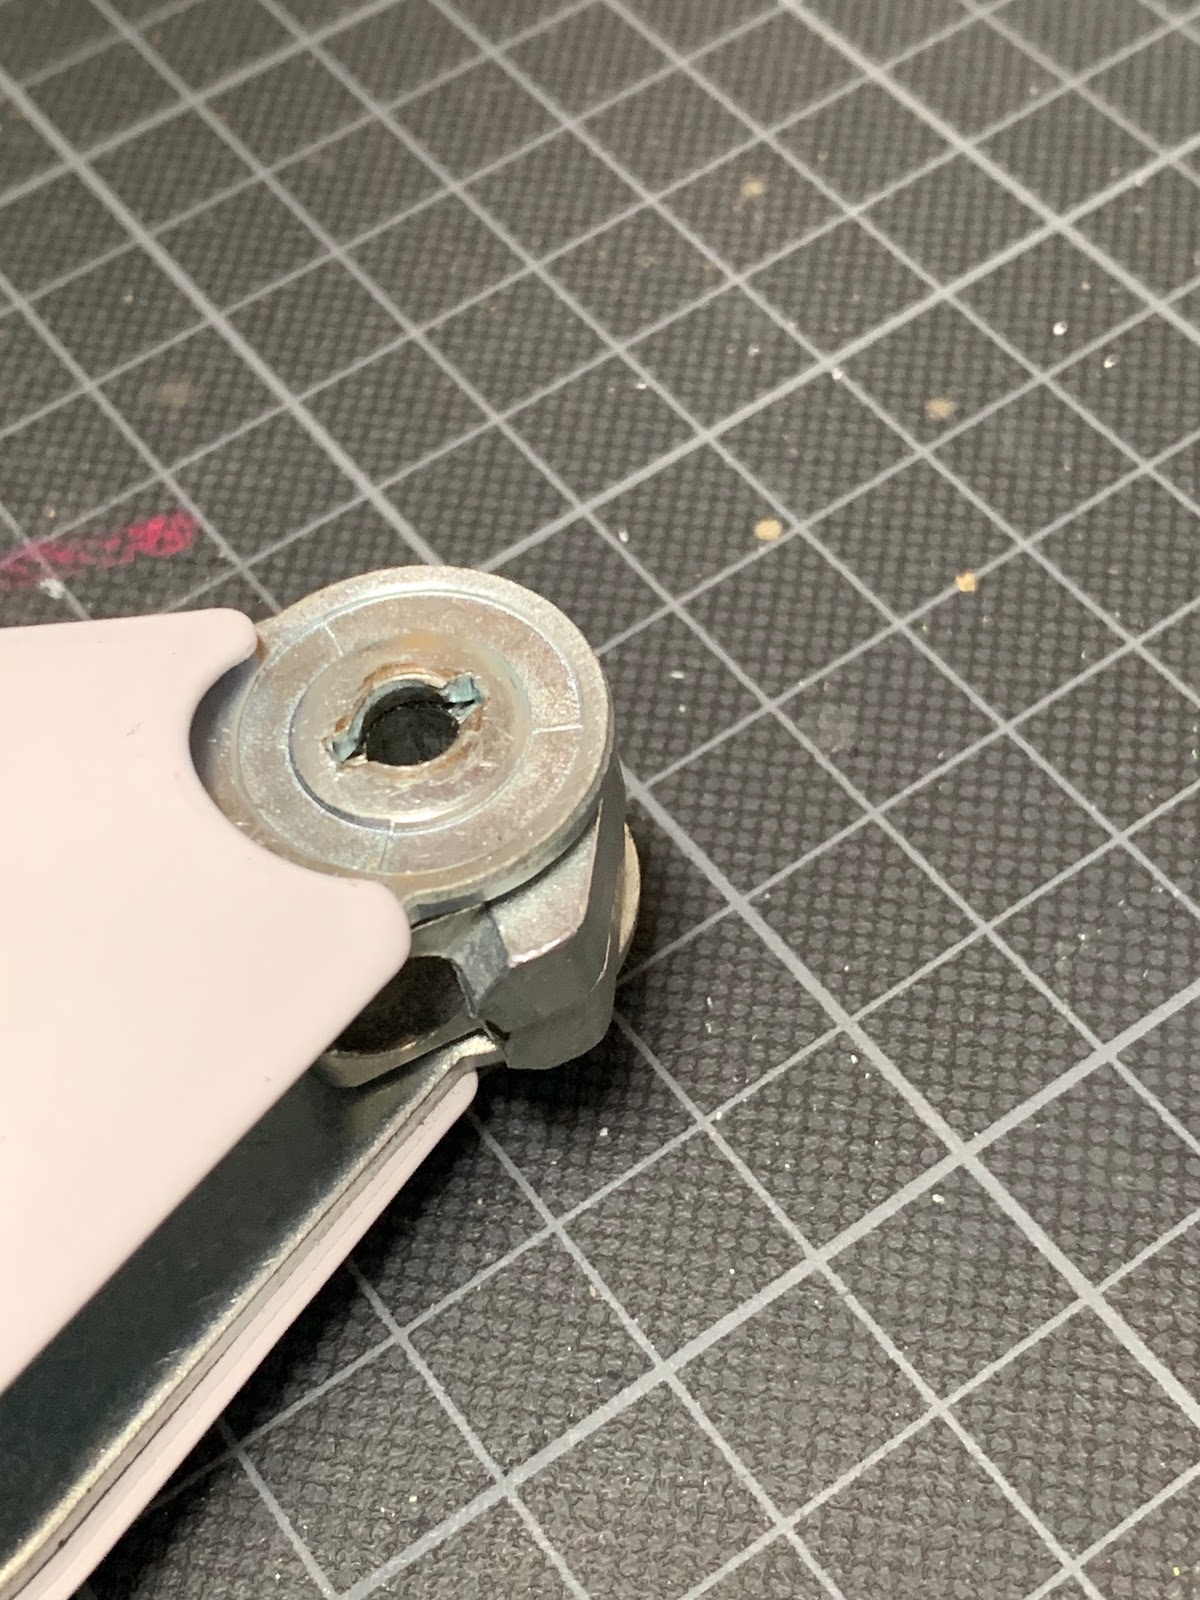
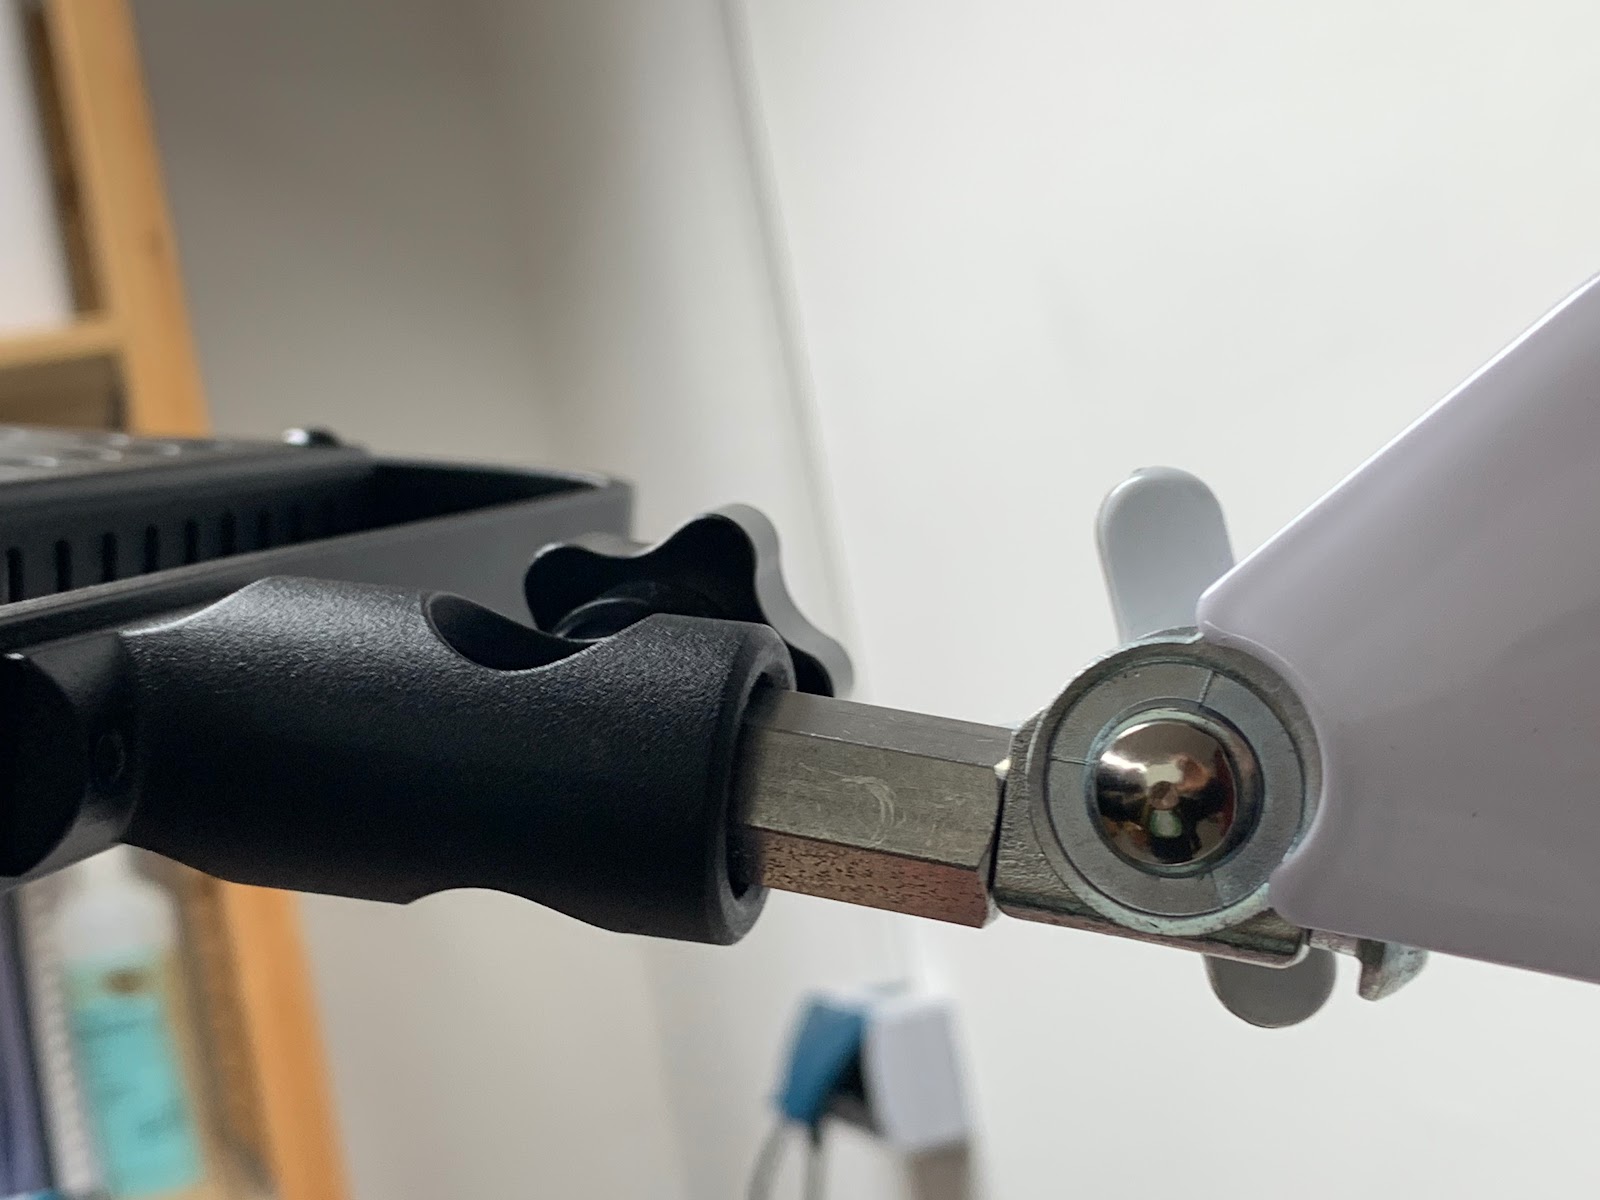
Now you need to be a bit careful when inserting the 8 mm x 50 mm screw. Since the screw holding the wing-nut protrudes a little into the bolt-tunnel, you need to actually screw it in. Make sure its flush with the end of the “grip”.
Screw the hexagonal connection nut on the big screw.


You can prepare the LED-Panel by removing the barn doors (I did, they are of no use to me and the actually restrict the movement of the panel within its own U-frame. )
Now, shove the panels holding opening over the hexagonal nut, screw tight. For additional grip, you can add a piece of rubber between the screw and the nut, metal on metal connections like this can be somewhat slipping without it.
Plug in the power pack and test the panel. If you like it, attach the wiring to the boom with the cable ties:
Done.
TLDR:
Tube lamps tend to fade over time. Many LED-Lamps are suboptimal for painting due to poor light quality. Replacing the existing lamp-head of my Tri-Tube with a high quality, fotographers LED Panel was cheaper than buying the LED version of the Tri-Tube, has more than 3 times the output and significantly higher color reproduction quality.
PS:
In case you don’t own a Tri-Tube yet but like the idea, the cheapest lamp with the same heavy duty boom I found was at around 42€, so together with the panel, a complete new build would be about 160€, not cheap but doable.
Yours,
Hansrainer


Update:
Since the panel in the link is currently sold out, this is the same:
https://www.amazon.de/Professional-Videoleuchte-Farbtemperatur-Metallgehäuse-Fotografie/dp/B0793K8NPM/ref=pd_aw_sim_421_2/257-9290662-8707749?_encoding=UTF8&pd_rd_i=B0793K8NPM&pd_rd_r=7657c16e-8c6c-11e9-8c9f-59469b461ced&pd_rd_w=dB8vb&pd_rd_wg=RN8DF&pf_rd_p=be282965-be25-4298-9436-17f3f7cfd9e0&pf_rd_r=D38HGARQBCZ8MRE7XZ8D&psc=1&refRID=D38HGARQBCZ8MRE7XZ8D&th=1
Please be aware to avoid any Bi-Color panels, half of their LEDs are useless for us
I am still wondering, where one could find the "normal" TriTube for 85€. It would still be quite an improvement over my current daylight lamp, I guess :)
https://www.amazon.de/Maul-Arbeitsplatzleuchte-Klemmleuchte-MAULatelier-8267002/dp/B00381ETUA/ref=pd_aw_sbs_364_2/257-9290662-8707749?_encoding=UTF8&pd_rd_i=B00381ETUA&pd_rd_r=0f43586e-8d2c-11e9-a9ea-3f647b379e3d&pd_rd_w=YMlto&pd_rd_wg=u1iAK&pf_rd_p=30a0a8e8-6bf3-44ba-8402-3c443b600d00&pf_rd_r=EC4BX7GNBWSJVE9N4F47&psc=1&refRID=EC4BX7GNBWSJVE9N4F47
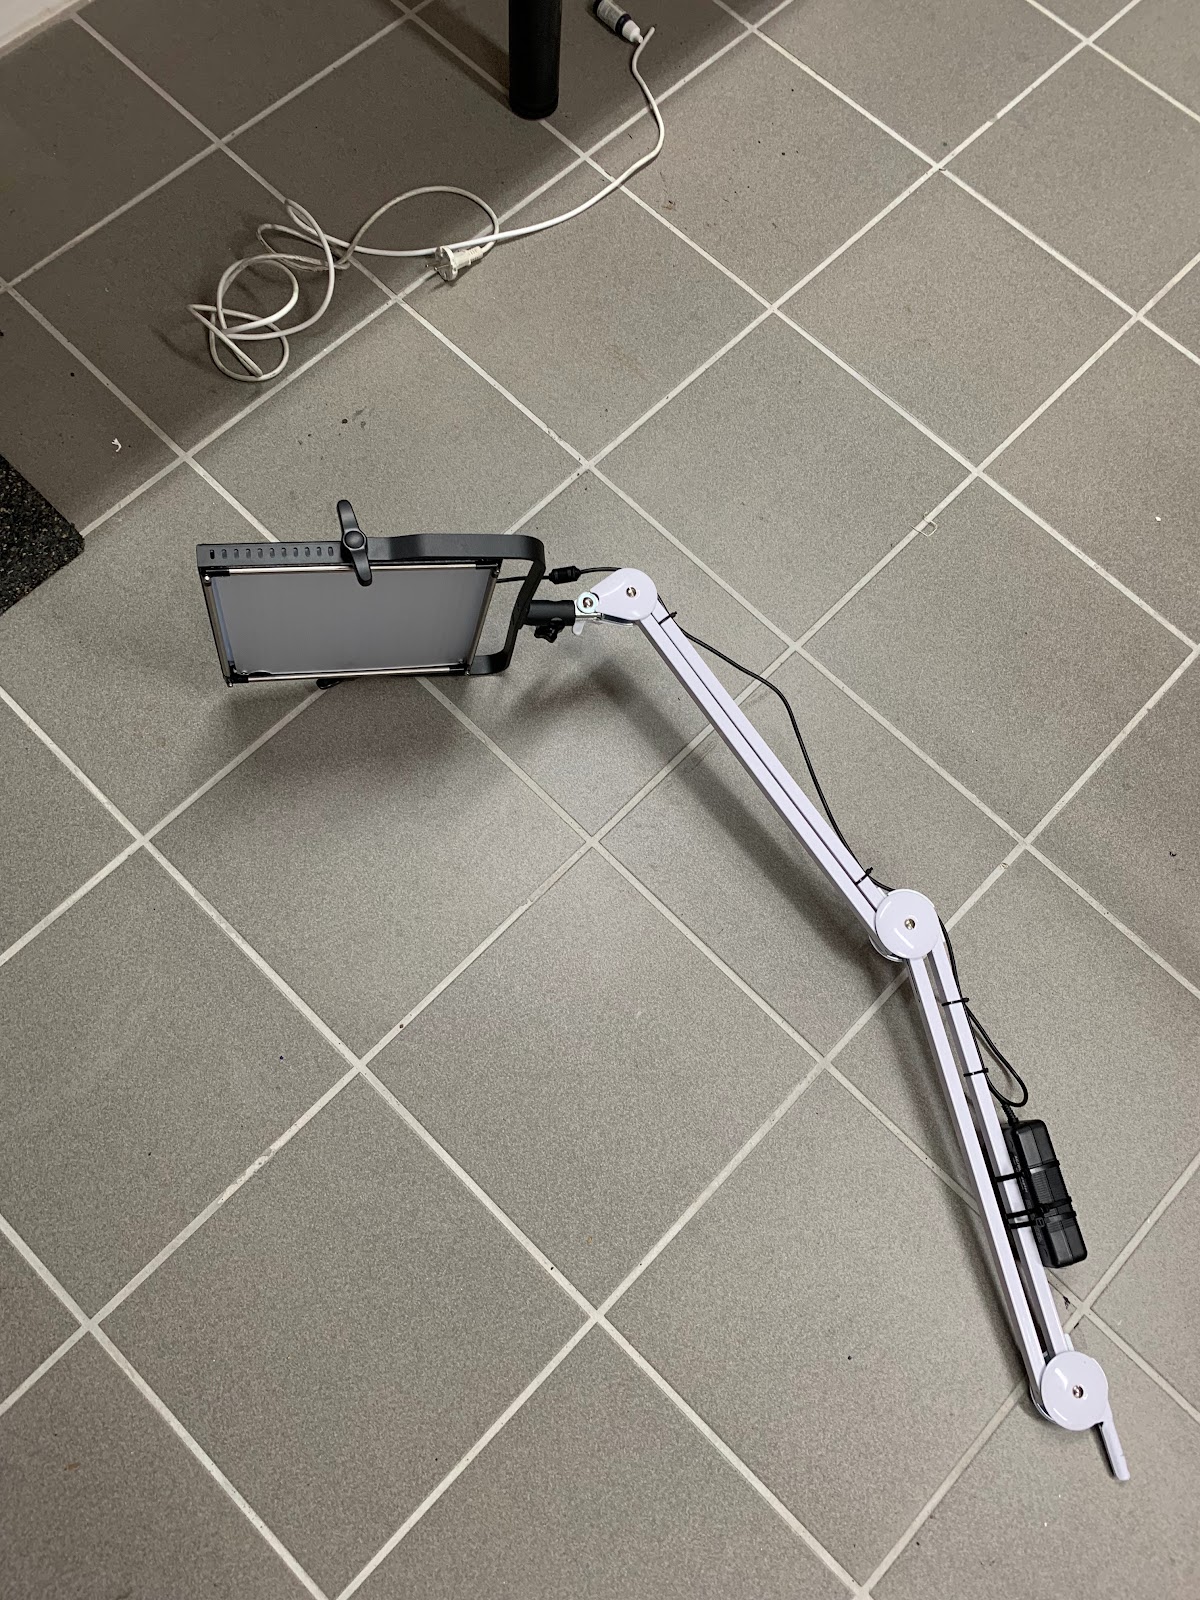
I like the Idea and also tried to rebuild it but without salvaging a Tri-Tube.
I tried to use a microphone arm which has the same construction like the lamp. But the Gravity pulls the lamp to the desk.
Therefore I'm searching for a new mount. Doss anyone has a suggestion which ist available in Germany?