FM: Ludo - Friend?

by Roman aka jar


Hi Jungle!

BrokenToad's last years Kickstarter about Jim Henson's Labyrinth & The Dark Crystal was a big success as the theme from the movie really makes the hearts of Fantasy Fans worldwide jump. Such unique and great characters.

I recently painted Ludo, sculpted by Lucas Pina and all I can say it that it was a joy to breathe life into this big friendly monster.


This unique painted bust by me is for sale.
If interested to make this yours and support me in my art, passion and life, feel invited to check back with my miniatureart and art PDF cataloge on projects I got for sale:
https://www.romanlappat.com/uploads/RomanLappat_MiniatureArt_2017.pdf


Work in Progress insight:

I took not many photos of the process on the paintob, but some and I want to share them with you.
First one, shows my basic color applications. He was pretty yellowish/ochre/brownish ...

The next photos will explain to you how I painted the eyes.
The process on the full figure already much further than the first WIP, but hey, eyes explanation are always good, right?


1. I was working with a reference. Important. I painted the full eyeballs black, followed by an off white that includes some of the ochre skintone, not much, just a tiny drop to make the white off white.
See, friend?

2. Next step: I was marking the center of my Iris/pupil with a small
black dot in both eyes (can be easily repaired if its a fail). Then I painted
the base of the Iris/pupil area with black and concentrate to make it a round
circle. If you have trouble with it, just repair with the off white.


If it fits, it fits ...


3. I painted orange on top of that, but left a black outline

4. I intensified the orange by adding more and more yellow to it
and focused painting it on the lower part of the iris//pupil

5. When intense enough for my taste I added black tiny dots again to mark the
center of the eye for the pupil ...

6. I then painted the pupil and white reflection into the eyes ...

Remember you can click every photo to see them larger, friend!

Friend?


This unique painted bust by me is for sale.
If interested to make this yours and support me in my art, passion and life, feel invited to check back with my miniatureart and art PDF cataloge on projects I got for sale:
https://www.romanlappat.com/uploads/RomanLappat_MiniatureArt_2017.pdf
_______________________________________________________________________________
You want to support Massive Voodoo? 
If you like to support or say thanks the monkeys of Massive Voodoo in what they do, please feel invited to drop a jungle donation in their direction via paypal or check their miniatures they got on sale here.
_______________________________________________________________________________


Mu 108: MINIWARPAINT Brushes: Regular-Set & Liners

by Roman aka jar

Welcome
to another review here on Massive Voodoo.

If you are interested in the many reviews we already wrote, check this link:
http://massivevoodoo.blogspot.com/2009/10/miniatures-unpacked-overview.html

This review is about Kolinsky brushes from the company MiniWarpaint from Russia.


To be honest, brushes are a delicate theme to talk about.

Why you might ask?
Well, because it is always personal preferences on how you paint with what tool.
Brushes are the main tool for the miniature painter and you can say there are as many different preferences, experiences and oppinions out there with painters on their brushes. It is a tool, that will be used for painting. Some prefer this company, others this one, some are sponsored by this one, others by this one.

One thing is clear when you are looking into new brushes:
Do not buy them, because somebody, somewhere said you will become a better painter when using this brush. You need to work with brushes to understand their "flow" and how they fit to your way of painting. So this is a very personal view on these brushes from MiniWarPaint.

It took me almost a year to write this review. Why?
Well, because I was painting with them and used them on certain projects.

During this year I was using:

MiniWarPaint Set of brushes series Regular
and several brushes from the 'Liners-series'


What I do like about them on the first look is the different colors that help you pick the brush you need without searching too much. Of course, only if you painted with them and get used to the colors. A really good idea.

When it comes to large surfaces like busts or bases or vehicles I was mainly using one of my favourite brushes by Brokentoad, number 2 or 1, but I can say I was always drawn to the brushes from MiniWarPaint for detail work.

The ones from the regular set offer a wide range of sizes that you can use for all sorts of detail.
After one year of painting and several painted miniatures they still look good and hold their tip. Most of you, who know me, know how I treat my brushes and it is a miracle how these survived the last year so good.

The thicker grip, going convex to the brush tip allows you to find your perfect grip for your personal way of painting.

I was using the regular brush set to paint a lot of details on my 28mm projects and Astronauts from last year. Some examples:


They are very precise and as you can see I was painting most detail with the tiny ones from the set, they got beaten up the most during one year of painting:

So after one year and many projects that these brushes painted through I can say they are a really good deal, looking on the price of the full set of 28,00 € for 7 brushes. Yes, seven brushes.


Looking at the liner brushes
from MiniWarPaint, I did not use them as often as the regular ones and they survived much better :D

Still I used them, but with their certain purpose they have - based on the technique of freeline drawing with brushes - I recognized I was not often in need of them in my way of painting or the subjects I was painting.


As you can see above and below, compared to the regular ones they are much longer. This is what MiniWarPaint says about these types of brushes:

"MiniWarPaint "Liner" series kolinsky brushes are specially designed for painting miniatures in watercolor techniques. The brushes feature a largeer liner capacity and an unprecedented sharp tip. The main focus of the brushes is the use of the lining technique (drawing long thin lines for contouring and stroking), working in recesses, drawing small details, as well as working with acrylic washes.

The ability of the liner to take up a lot of water, to expel it smoothly and evenly for a long time allows you to work longer, less often turning to the palette. The sharp tip in combination with the medium length of the liner allows you to work out the smallest details with perfect brush control."


I used them here and there, but to be honest with you, not very often. I can imagine that they make painting freehands on large surfaces much more easier, for example on Games Workshop's large models like tanks, heavy walkers or a giant's tattoo. Unfortanetely I did not paint one of these models in the last year while testing the brushes.

What I can say is that I used them for my watercolor illustrations I do once in a while for exactly the reason they are meant to be used: Precise lining with a great color flow for long lines.

Some exxamples:


I was really using them carefully and protected them well with their brush cap. Like I said, if you are painting larger surfaces on your big models or freehands somewhere in your diorama these make a lot of sense.


Well, all in all I can say after one year of using the MiniWarPaint brushes:
They do their job pretty well:

  • good brush tips
  • comfortable handling
  • colors to seperate them and find them fast
  • really good for detail work
  • long lasting Kolinsky brushes
  • affordable price


Again, a brush is always a very personal tool that you can only get to know while painting with it.
I can recommend these from my point of view. The company behind these brushes is helpful and trustworthy and do not only offer brushes for fair prices. You can find really nice basing material and miniatures in their store too. If you are looking for new tools and want to give these a try you have my recommandations:

MiniWarPaint

Thank you for enoying this review.

Keep on happy painting!
Yours,
Roman


_______________________________________________________________________________
You want to support Massive Voodoo? 
If you like to support or say thanks the monkeys of Massive Voodoo in what they do, please feel invited to drop a jungle donation in their direction via paypal or check their miniatures they got on sale here.
_______________________________________________________________________________


Sculpting Material Review: Castilene

by Daniele "Found" Trovato


Sculpting Material Review: Castilene


Hello :-)
This is Daniele :-)

Something new here, some new things, some new stuff.

Not actually new for all, but truly new for me LOL :-)


Why this article?
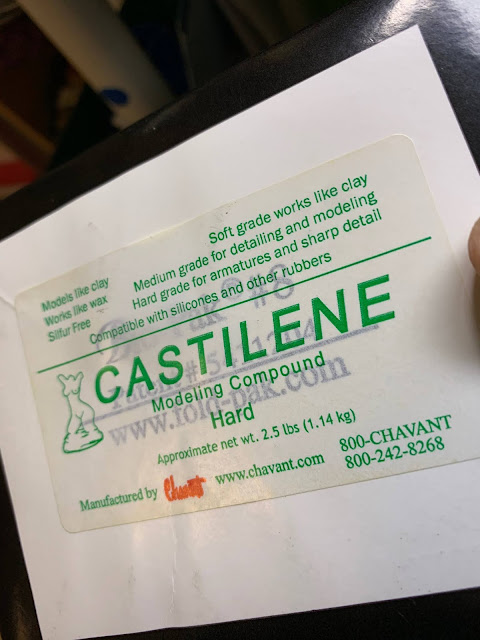

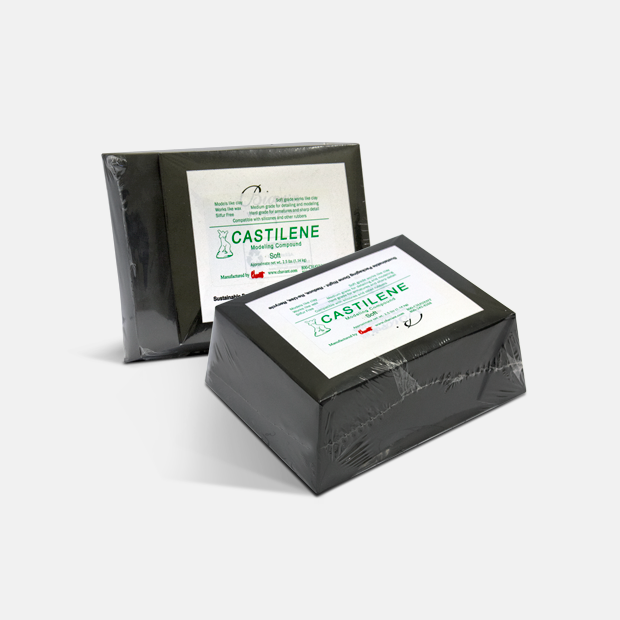
my Castilene


just because, for who know me, my mantra is:

DO NEW THINGS! ALWAYS


Curiosity is the best enemy of the happiness

This is why I always try to do something different in my sculpting process... where's the fun instead????

Just speaking with Chris about sculpting, he introduced me for the first time a different approach for sculpting: Castilene.


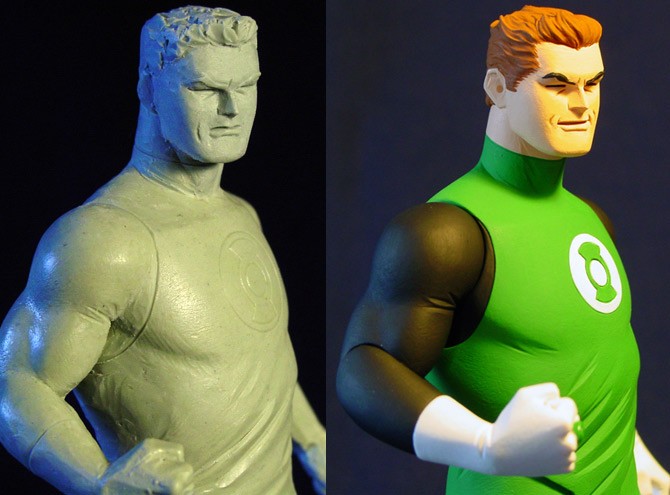
Actually, our first speech was about Wax Sculpting, but generally speaking Castilene is a great thing to do the transition from Clay to Wax.


Risultato immagini per castilene"


What's Castilene


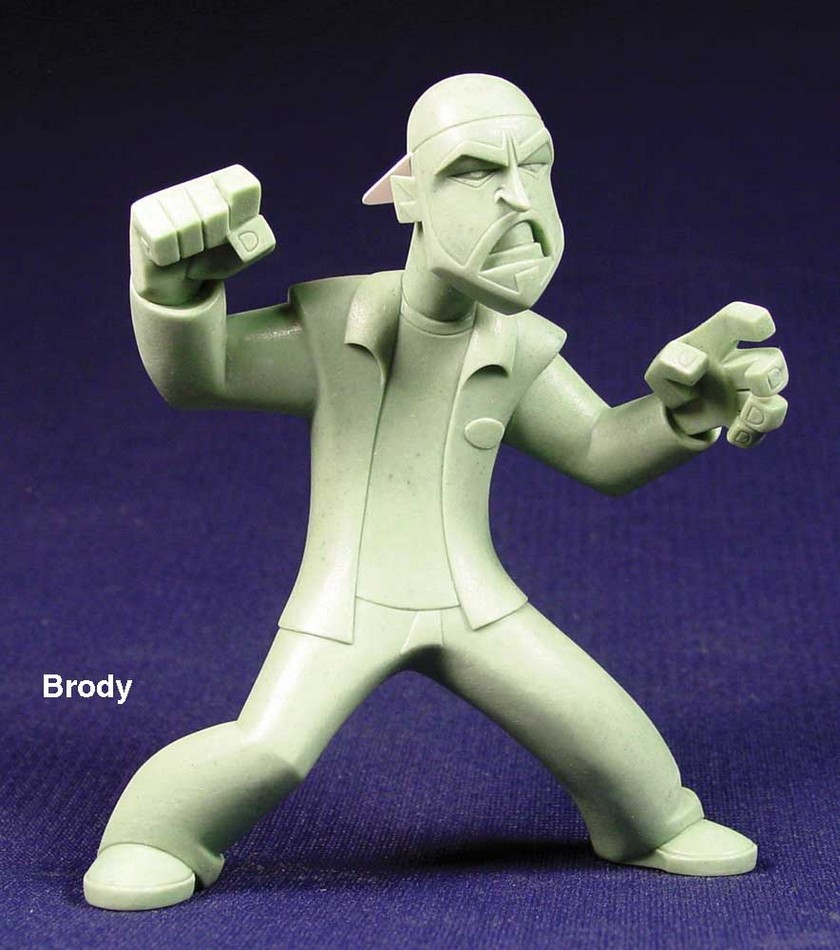
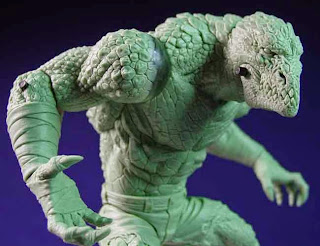
Jonathan Matthew sculpts vastly in Castilene his figures


Castilene
is a wax-based sculpting material by Chavant developed as sort of a bridge between two of the most commonly-used sculpture mediums (especially in toys and Action Figures): traditional sculpture wax and plasticine.


Actually, as we'll see, Castilene is very different from pure wax, but it maintains some very interesting features.

The great thing about Castilene is that it's easily shaped and formed, like plastiline, but it's also lightweight enough that it can support itself without the use of an armature!


YES: WITHOUT ARMATURE!!!!


Risultati immagini per castilene sculpting


What's bad??   Exactly like Wax, in my opinion, Castilene has a high learning curve and most sculptors (me too obviously) learn to sculpt in other materials before moving on to Castilene.


When I started to use it, I felt like I have never sculpted in my life.

Indeed, Castilene-like-Wax isn't indicated for beginners.

Sometimes when you work with Castilene, you have the feeling to grab all your sculpting tools and throw them through the nearest window :-) :-) LOL.


But persistence and consistency will help you (as always my friend)

It comes in two colors and three levels of hardness.

I decided on the hard version (greenish one), because more hardness means more simple to create details, especially for miniatures.
Risultati immagini per castilene jonathan matthews

Tools  and Equipment


The first thing you will need in order to start creating a sculpture in Castilene is the proper tools and equipment.
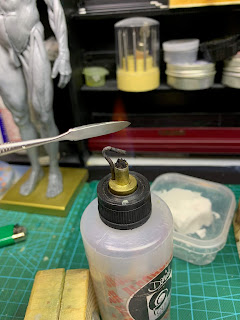
Castilene, like most waxes, is easiest to shape when you heat it, so you will need heat sources to soften the material for creating the basic shapes and tools that can be heated in order to do the actual
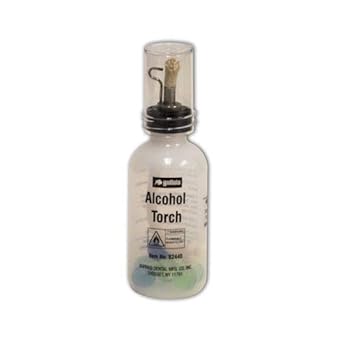

Risultato immagini per alcohol torch"
I use an alcohol torch continuously with my metal tools


So The majority of the tools that you will want to use will be metal.


The medium and hard grades of Castilene are most easily manipulated when they are heated


Castilene will become somewhat pliable from the warmth of your hands, if you hold it long enough, but this is not a very effective method of heating the material.
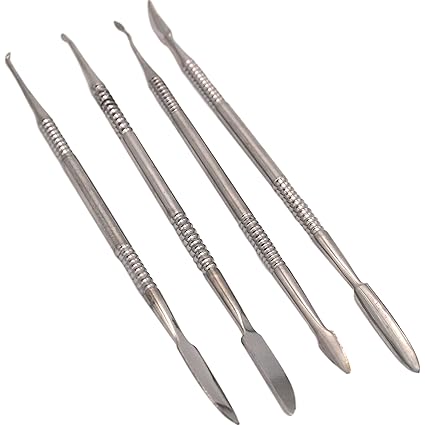


Risultato immagini per wax carver"
Metal tools for wax carving are perfect for Castilene


Create the Shape with Castilene


I move my metal tools over the flame continously. Castilene is all about temperature.


When creating any sort of a complex sculpture, you will want to start with the hard grade Castilene in order to create a base or armature to work .

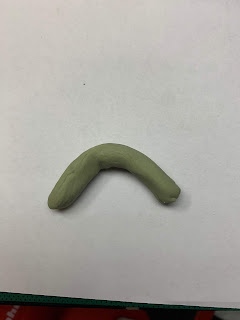
When warm is exacly like a clay.
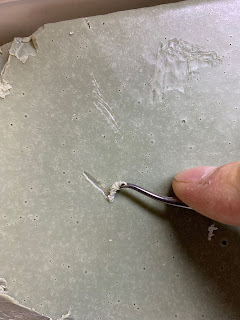

at natural state, Castilene is very hard.

The hotter the Castilene is, the softer it gets.

Hot Castilene also sticks to itself a lot better than cold Castilene

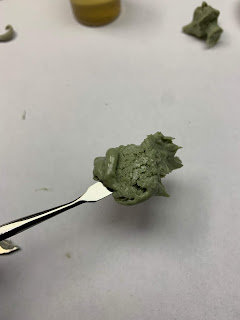
 If you need to add material or pieces to the sculpture, it's best to heat the Castilene you are adding to a near-liquid state and press it on firmly.


Also you can simply use a hot lamp, but actually I haven't, because hard version is really HARD!
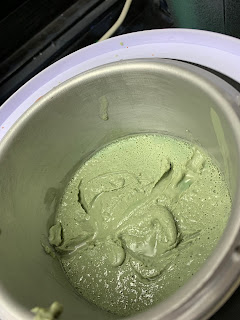

Put into a wax warmer, bought in a local store for 8 euro


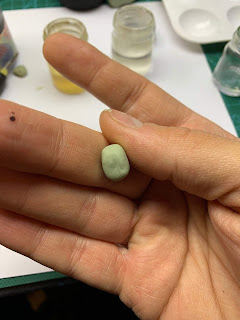
just taken from the wax warmer, it is like a hard toothpaste as consistency, but warm


Castilene cools very quickly, it becomes more harder

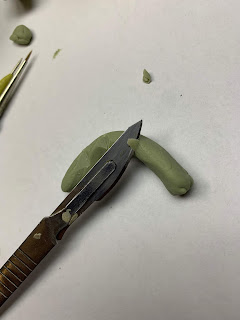
Carving is easily when is cold


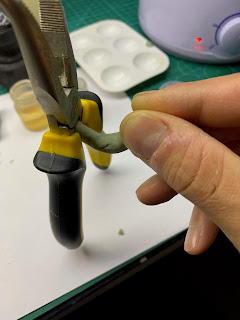
After 2 minutes is so harder that I can lift my metal plier

Playing with Castilene


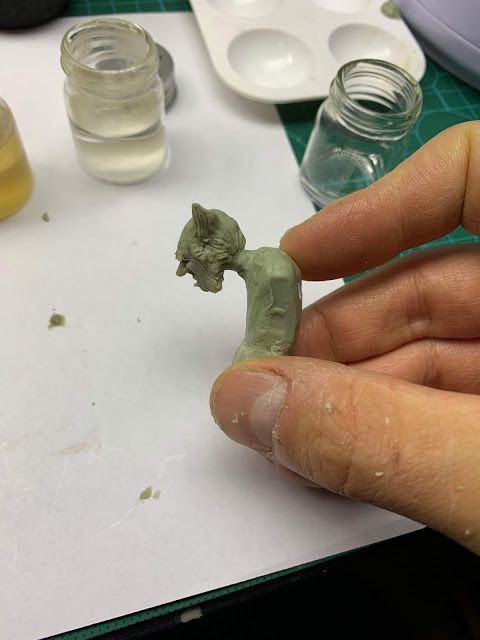
As Always I created two different parts for the torso and the pelvis, then I linked and sketched the pose
I sculpted torso and pelvis separately while Castilene is warm


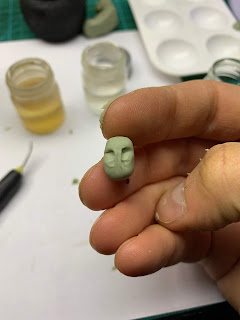
sketching the head


Set up the pose and face

Finishing and Polishing

This is the HARD thing about Castilene.

Smooth finish is so difficult (exactly like wax)

So frustrating, especially for who comes from Sculpey or FIMO.


Castilene can be sanded with sandpaper for a smooth finish, but isn't simple as polymer clay

I have the habit to working with Polymer Clay, though.
In Sculpey or FIMO, I use mainly turpentine or isopropyl alcohol to smooth surface, that is pretty simple to achieve (I vastly do this at the end of session, just to let liquid evaporate)


Risultati immagini per castilene jonathan matthews


About Castilene instead for areas that require special shaping and sanding,you can use sanding pads designed to work with wet sanding (3M brand works perfectly as Chris Vierra suggested me)


Sanding pads are more durable and flexible than sandpaper, but you will find that they don't work in every situation, so it's best to keep both handy.


IMPORTANT: you have to wash your hands often because Castilene tends to be sticky and dirty, especially if you manage your sculpture with your hands.


Another con is that the more you manage your sculpture with your hands, the more it gets warm, then soft, so be careful.

To sanding, for areas that are delicate or have a lot of detail, I froze the sculpture first.


 It will take more work to sand a frozen sculpture smooth, but it can sometimes help to get a more refined finish.

Pros and Cons

Castilene is undoubtedly  a great material, but here my personal opinions about the pros and cons.


Anyway, like I said in my article "The Ultimate Guide to Become a Miniature Sculptor",  Whatever works for you is whatever works for you.


No tricks. Every sculptor work in his path.

Often, the material we’re first introduced to is the one we end up staying with.


 But just as often, as we work, the longer we work, the more we understand what we want from a material based on what we want to accomplish.


Most PRO:
  • It's lightweight material 40% than plastiline and other clays.
  • You can play with your clay, without any thought about posing and armature
  • You can easily cut and attach your sculpture in every moment
  • You can change you pose in every moment (nearly actually)
Most CONS:
  • Castilene, like wax or plastiline, isn't a definitive material  so you need yo create the mold and cast your creations, in order to create the definitive piece.
  • Castilene It's hard to understand, especially for beginners and its hard-curve sometimes is frustrating
  • Personally I think that Castilene is not suited for tiny miniatures (32mm or 45mm)
  • Really POOR documentation about: Wax/Castilene sculpting is absolutely an old art, and most documentation is so hard to find.

Link and resources:

_____________________________________________________________________________


We could watch the newest TV series on Netflix, instead we're here to write articles for you!!
Support NOW Massive Voodoo!
If you like to support or say thanks the monkeys of Massive Voodoo in what they do, please feel invited to drop a jungle donation in their direction via paypal or check their miniatures they got on sale here.