Hey all,
it's me, David, and I'm back again with a small step-by-step article.
This time it's basing time. Some of you might have seen the pics of the little vignette that includes two 1/72 figures I built together with
Udo Spreng as a present for a friend:
The vignette depicts the epic duel of an Athenian hoplite vs. his Spartan counterpart sometime during the
Peloponnesian War in Ancient Greece. Udo painted the Athenian (the guy with the owl on the shield), I painted the Spartiate. We first painted the minis, then I constructed the base - which is what this tutorial is about.
The whole process can be broken down into
six parts:
- Selecting the plinth
- Preparing the plinth 1
- Building the groundwork
- Preparing the plinth 2
- Painting
- Details, vegetation and clean-up
But before I get into these steps - let me introduce you to...
0. My personal "Three Golden Base-building Principles"
As I have briefly in one of my
first articles here on the blog, I follow a set of three simple rules when I create my bases:
(1) the base should capture and portray the most important aspect of a
hopefully natural scene, condensed into a very limited piece of space -
thus telling the story by giving the feeling as if the vignette was cut
and lifted out of the world in one moment (that's one reason, for
example, why I don't like stuff "sticking out" beyond the boundaries of
my base; and why I like deep-black plinths).
(2) the vignette should be as large as necessary for the viewer to understand what's going on, but as small as possible to create a scene as dynamic as possible
(3) the base should use
variance in all three dimensions, and should
have as few parallel lines and right angles as possible. So, there
should be variance in height, in depth and in angles on the horizontal
(and possibly vertical) lines. For an early example where I experimented
with that, see my
"Feeder of Crows" Vignette.
1. Selecting the plinth
I started constructing the base by selecting a plinth of the right size and shape. I browsed through my collection of plinths (since I like my plinths simple, and often cut, or break off parts of the plinth, most plinths in my collection are simply cut-offs of beechwood lathes) and checked which one might be good for the. I had a second set of the minis that were supposed to go onto the base, which I used for a few mock-ups to get a feel for the necessary size, both in terms of the
area of the base surface as well as in terms of the
plinth height.
In this, I follow my "second golden rule" of
as large as necessary, but as small as possible. In
terms of area, the base has to be large enough to provide space for everything you want to include -- most importantly, the mini(s) you want to have in the center of attention. Also, you want to have sufficient space to give the viewer a good feeling for the place the scene you are depicting is occuring. At the same time the area should be not so large that the figures get lost. I find that a smaller surface area helps in making a given scene dramatic and dynamic. In
terms of height, the plinth should give the feeling that there is a nice balance between the height of the plinth and the area of the plinth, the height of what's on the base (e.g., walls, trees, bushes, etc) and the height of the minis. Again, I tend to prefer a smaller height, as high plinths often give the feeling of imbalance. Often the
Golden Ratio can help for a first approximation of plinth height and area. See this
Wikipedia article for more on the Golden Ratio, how to calculate it and why us human beings tend to find things that follow the Golden Ratio pleasing. But keep in mind that the Golde Ratio should only work as a first approximation. Use it to get a first feel for the plinth sizes, and then see where this takes you.
While most of my bases are created on square plinths,
for this vignette I liked the idea of a round plinth
as it gives a more immediate feeling to the scene and invites the
viewer a bit more than a rectangular plinth to turn the vignette around
and watch it from many angles. However, I did not have a lot of round
plinths at home, and the one below definitely was too small in terms of
area: both hoplites almost stand on each other's toes, there is too
little space to showcase the environment.
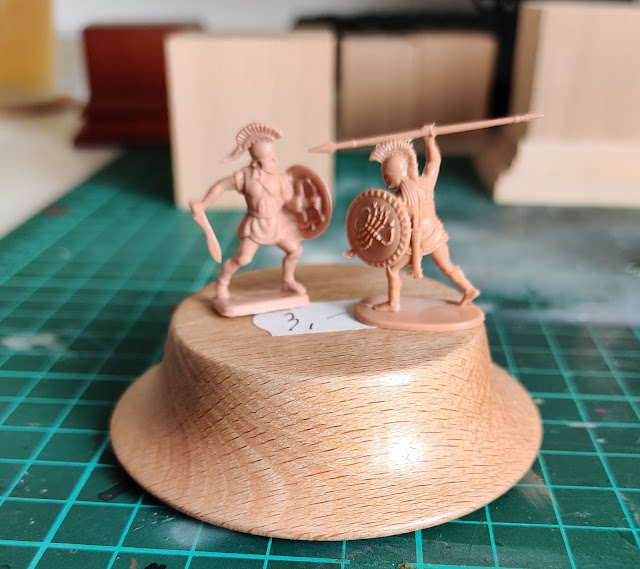 |
| First test plinth: too low, too small area |
Then I tried a plinth that was a bit larger, but rectangular and
immediately discarded the idea: it was too angular, "blocky" and it was
too large in terms of area. I knew for sure now that I wanted a round
plinth, and after drawing a few circles on paper and testing different
positions for the two hoplites (sadly, no pics of that) I had a good
feeling for the area: I needed a diameter of about 5.5 cms. But, of
course, I did not have something like that at home.
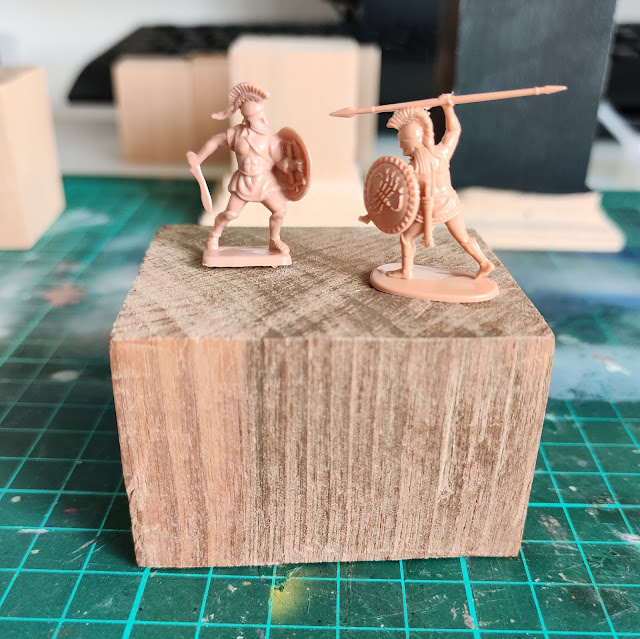 |
| Second test plinth: too angular, too blocky, to much space left and right. |
So, I asked my good friend
Jan whether he had a fitting plinth: a round piece of wood, about 5.5 cm diameter and about 7 cm high (which would be much lower than the Golden Ratio, which would require a height of about 9 cm if the diameter was the "minor"). And: he had such a piece of wood (6 cm diameter, which was great, however). I saw, however, that 7 cm was still too tall - the minis were feeling lost (again, no pics, sadly - sorry about that). So Jan was so kind and cut a bit off the plinth, such that is was the perfect height.
2. Preparing the plinth 1
While I now had a plinth of the perfect size in
terms of height, it was still too large in
terms of area. I needed the 5.5 or 6 cm diameter to fit the minis standing opposite each other, with sufficient space between them and the sides of the plinth. But, since they are standing with their respective left feet forward, I did not need much space left and right of the minis. That area would just be empty space. So, I decided to cut some parts of the plinth away, namely about half of the area, from about half of the height of the plinth upward:
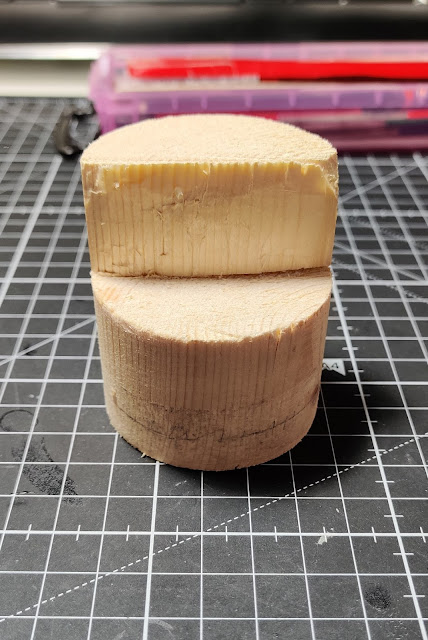 |
Cutting half of the plinth's upper half away...
|
By cutting away on the plinth, I also allowed for the vignette to follow my third golden rule of base composition: to have variance in all three dimensions. Since I knew that I didn't want to include anything to the vignette that was higher than the minis themselves (a tree, for instance, or a ruined column or some such), the creation of a vertical surface below the minis was a nice and easy way to create a bit of "verticality" to the otherwise rather "horizontal" vignette.
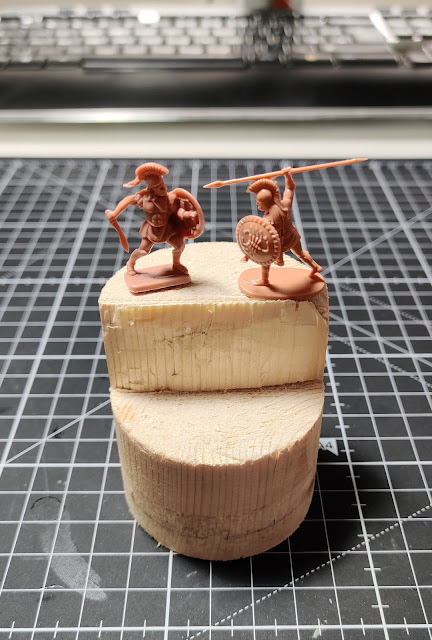 |
... and testing the look and feel of the plinth with the minis
|
By the way, in terms of tools, I used a hand-saw to make a horizontal cut straight to the middle of the plinth, and then carefully cut away the wood down to the horizontal cut using a wood-carving chisel. I bought two of these some years ago and I really like to work with them. Of course, using power tools would have been easier and faster - but I do not have any (besides my Dremel) and no place to stow or operate them.
3. Building the groundwork
After the plinth was cut to its final size, it was high time to start rebuilding some of the stuff I cut away. I knew that I wanted a steep, rocky cliff. For large, rocky surfaces, I find there's little better than pine bark. You can get it in a few places: you can buy it (through Ebay, for instance, or at local/online terrarium and aquarium shops) or you can pick it up in the forest. If you do so, just make sure to treat it somehow to kill germs, vermin (eggs), fungi, etc. I am not a specialist on this, but I am sure you'll find some info on that on the web. I bought some bark for 3 or 4 Euros at a florist a few years ago, which will last me probably for the foreseeable future.
But before I started working with the bark, I glued on a piece of cork, which I broke/cut off from a coaster I bought from IKEA. Those are cheap, easy to get and store, and can be used for many purposes, including bulking up on volumes for bases.
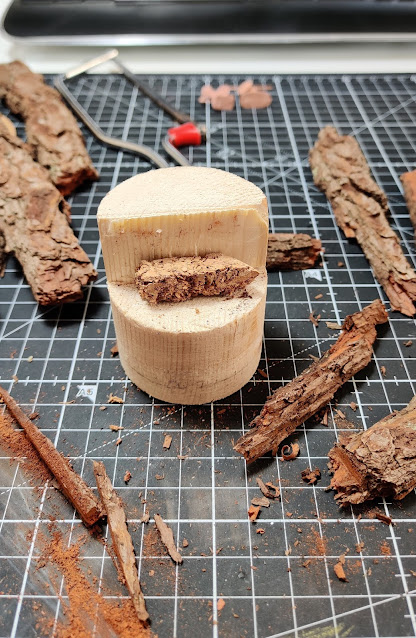 |
A piece of cork coaster for some volume...
|
I then started checking the bark for fitting pieces (I wanted the piece to represent that nice rocky, multi-layered structure), sawed/cut/broke them off the larger bark pieces and glued them onto the plinth using super-glue. In adding the bark, I made sure to have some variance in surface
structures and took care that the topmost piece of bark was roughly the
same height as the top of the plinth. The lowermost piece of bark was positioned such that its edge aligned roughly with the edge of the plinth:
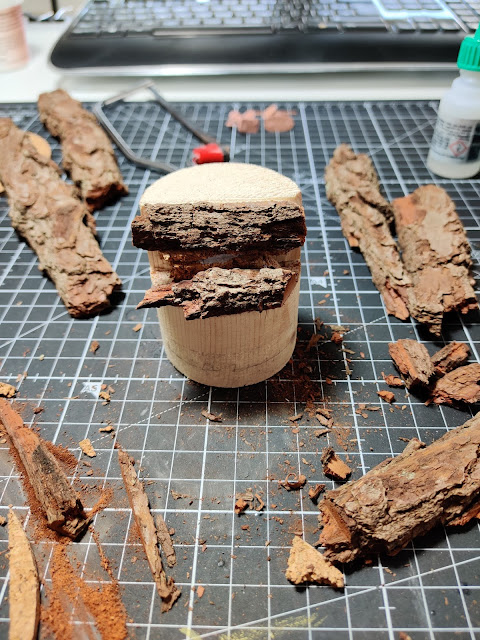 |
...adding some bark...
|
After that, I filled out the middle parts with more pieces of bark, which I cut/broke such that they fit into the "holes":
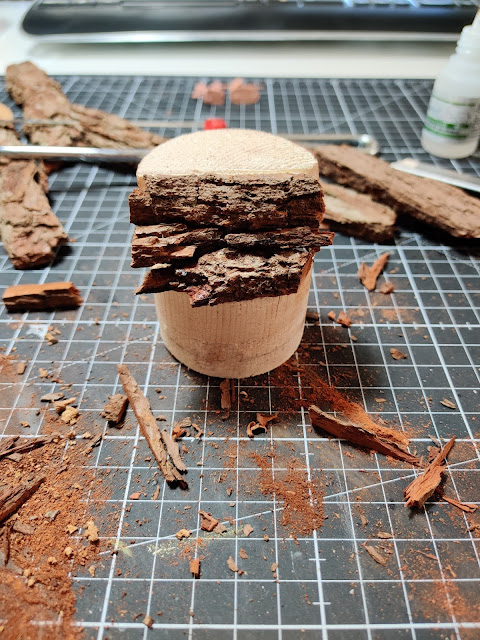 |
... closing the bigger gaps ...
|
I didn't worry about leaving small gaps or holes between the pieces of bark, as I knew that I would fill them with Milliput later.
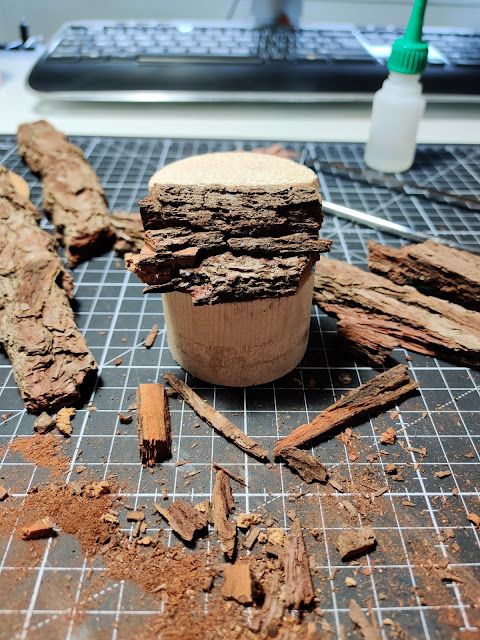 |
... and done for that step.
|
The next step was to trim the surplus bark protruding over the edges of the plinth. Some base-builders like it when parts of the groundwork extends beyond the borders of the plinth, but I prefer that the groundwork ends where the plinth ends. For trimming, I first cut the protruding pieces of bark with a hobby knife, and then used a file for plastic fingernails bought at a drug store. I really like these files for such work, as they are rather coarse, cheap, and easy to handle. I also glued a piece of bark on top of the plinth (didn't take a pic of that) to further add a little bit of vertical variance, some interest and highlight the rocky nature of the scene, and smoothed it to align to the curvature of the plinth as described above. After that step, the base looked like this:
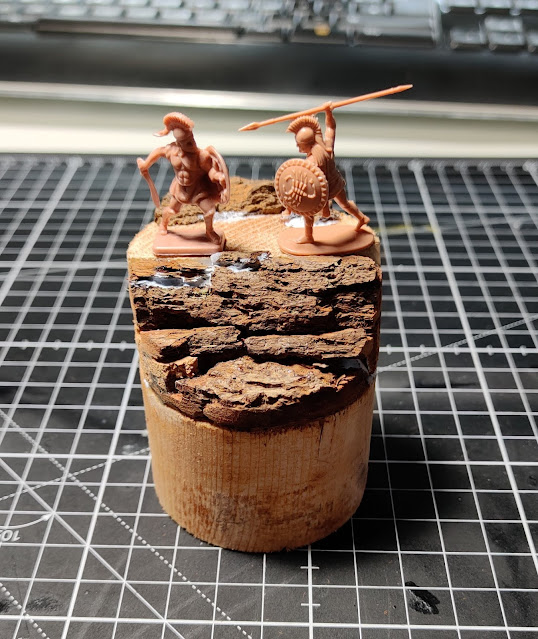 |
A little test with the two figures on the base after building and trimmingthe basic groundwork. Behind the figures you can see the exta piece of cork I glued added. Also: my work area is nice and clean again, ready for the next steps. The wite stuff is the result of treating the copious amounts of super glue that I used for sticking the bark to the plinth with accelerator spray.
|
After the basic rocky groundwork was laid, there were still a lot of cracks and crevices between the pieces of bark and between the bark and the wood of the plinth. I used generous amounts of Milliput, my favorite material for working on bases, to fill the cracks and holes. I use a range of different tools for applying Milliput, including steel sculpting instruments and silicone brushes, and always have water handy to clean the tools and smoothen the putty. I particularly pay attention to get the sides of the base as smooth as possible already in this stage as this reduces the amount of sanding I have to do, later (as I said: I don't have power tools, so all the sanding and filing I do is by hand):
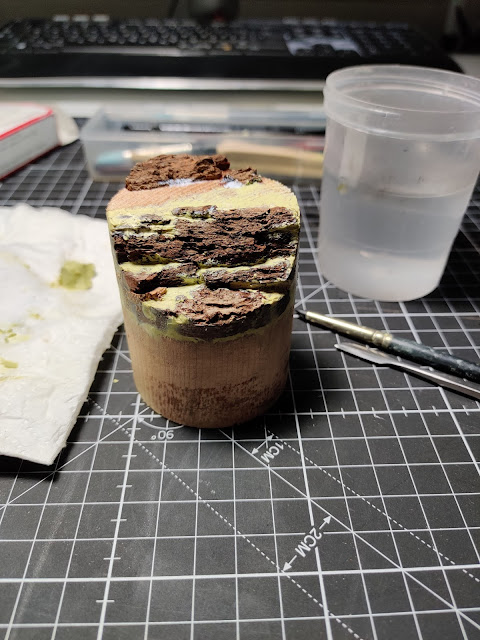 |
After the first Milliput treatment: filling cracks and smoothing the sides.
|
When the Milliput was hard, I did a second round with the stuff, this time focusing on the surfaces. I envisioned the surface of the rocky cliff to be covered with sand. While there are many different ways to create sandy surfaces, I prefer to use Milliput for my 1/72 projects. For that, I lay down a relatively thin layer of putty, let it harden a bit (maybe waiting 15-30 minutes) and then stipple a hard-bristle brush into the putty, which not only leaves hundreds of tiny "holes" in the putty, but also allows me to create little "waves", "valleys" and irregular structures in the putty. Once that was done, the base looked like that:
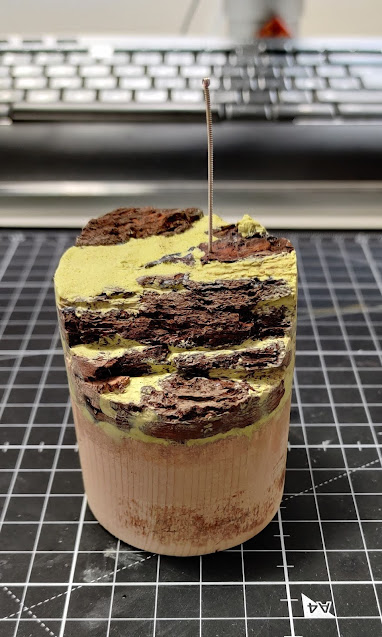 |
| And the sandy surfaces are done. Note the acupuncture needle I stuck into the base. I do that to mark the
hole I drilled for one of the figures |
4. Preparing the plinth 2
One problem resulting from the slightly improvised plinth selection was that the wood was not perfectly smooth. Rather, one could see and feel the wavy wood structure. In addition, there was residue of some kind of sticky tape aound the lower part of the plinth. While one could argue that this gave the plinth some character, it would not be nice later on, when I would paint the plinth black. I prefer to have my plinths as smooth and unassuming as possible in order not to draw too much focus from the actual base and miniature work.
So, I had to sand the plinth smooth. However, the grooves in the wood were rather deep, so I made a mix of Milliput and water, brushed it onto the plinth (all around, nice and even) and let it cure. In order to speed up that process, I put the whole thing into the oven for about half an hour at 60 degrees centigrade - a trick I learned from my jungle brother Hansrainer; thanks for that! Then, I sanded the plinth - and repeated this whole processes for a total of three iterations. This gave me a nice and even surface, almost without any imperfections.
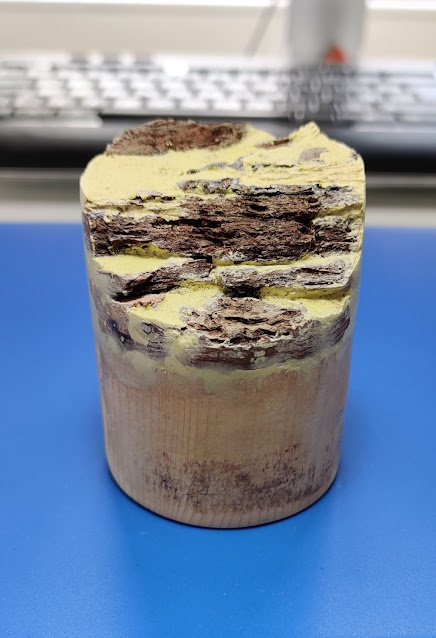 |
The plinth after three iterations of the Milliput/Water - Oven - Sanding treatment.
|
Of course, you can spare yourself that afternoon of work by just selecting a nice and smooth plinth to begin with. But to me, this whole process was kind of meditative and calming - and I could experiment a bit with Milliput juice (check Roman's
great article on filling gaps with Milliput on some further tips on working with the yellow-grey putty)!
5. Painting
And on to painting! The first step in the painting process was, as always, priming the base, following the trusted 2K priming method. Next to laying the foundation and giving the actual colors a good "grip", for me 2K priming always has something magical: for the first time during the process everything comes together to give a coherent picture. In addition, priming also is the moment of truth as it shows whether the plinth is nice and smooth - any imperfections would be visible now, even though they might not have been obvious in the previous steps.
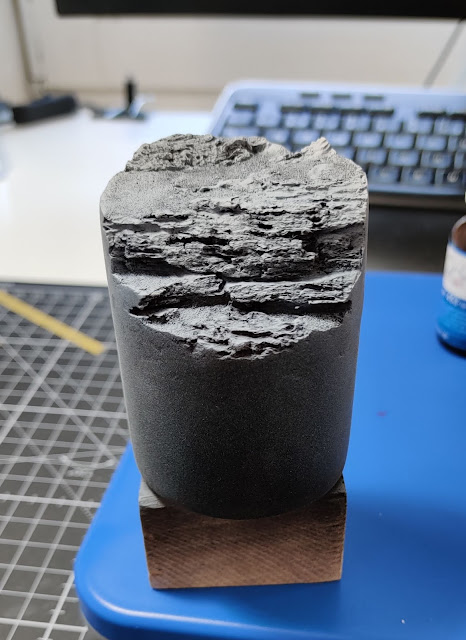 |
The base after 2K priming.
|
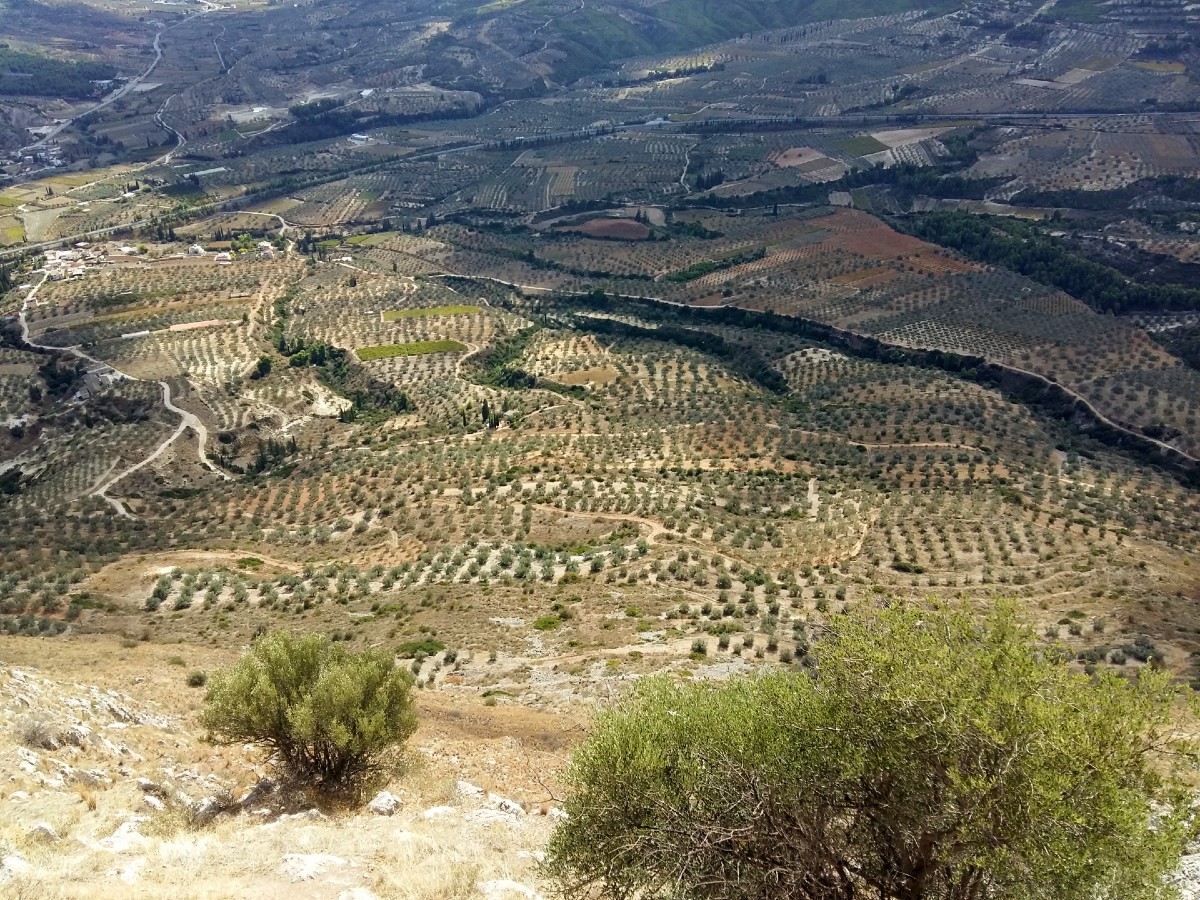
After the primer was cured, it was time to put down some base colors. But which colors to choose? Having never been there, I did some research on the landscape of the
Peloponnese (Google image search and Pinterest are great for these kinds
of research). In my mind, I wanted a dry, rocky and arid scene, so I selected the following picture as my main source of inspiration.
 |
https://realgreekexperiences.com/wp-content/uploads/2020/01/Landscape-in-the-Peloponnese.jpg
|
So, the base would be a mix of yellowish sandy tones and the rocks would be rather pale, whitish tones. I wasn't sure whether I wanted to add the deep green of the bushes and olive trees into my scene, but decided that I would consider that once the base was further developed and the figures were on the base. So I started with the basic rock colors, using Vallejo Model Color (VMC) Stone Grey as a base (I tried to take pictures in a way that you can see the palette in the background):
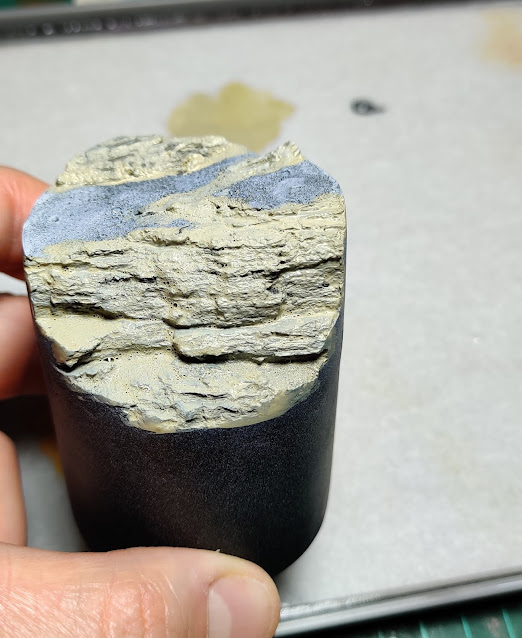 |
| Couple of layers of Stone Grey laid down... |
|
Next came the
shadows. I added a bit of VMC Neutral Grey into the stone color and slapped it onto the lower parts of the rocky cliff-face and into the crevices, while the previous stone color was still wet (check this article for an in-depth explanation of the
wet-in-wet technique):
Next would be
highlights to be applied on the top of the rocks. For that I used VMC Ivory and just mixed it, wet-in-wet, into the stone color:
Next, I added color on the
sandy areas, using VMC Dark Sand:
Then I added a few,
controlled washes of Army Painter Strong Tone Ink to give the sand a bit more depth.
I continued to add Strong Tone
washes, very controlled and targeted, onto the sand and to the lower parts and into the crevices of the rocks, to further increase contrast and give more depth:
Once I was happy with the shadows, I went back to bring out the
midtones and highlights a bit more, further strengthening contrasts by carefully going over the surfaces again with the lighter colors: first the midtones and base colors (Stone Grey and Dark Sand), then highlighting both sand and rocks with Ivory. For this, I used both dry-brushing (especially for the sand) and "normal", detailed brushwork to bring out the edges of the rocks:
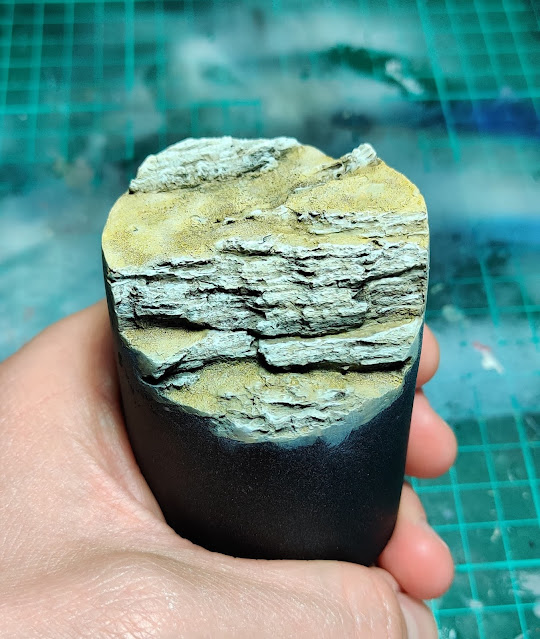 |
Basic painting done. Ready for the final steps.
|
6. Details, vegetation and clean-up
Now, I was closing in on the finish-line. Before I would be able to continue, I needed to see how the scene looked like with the figures. So I carefully glued them to their spots, using super-glue. While the super-glue was at hand, I also added a few "stones" (i.e., little pieces of cork) onto the sandy areas. Normally I do that much earlier in the process, during the creation of the sandy areas - but this time I just forgot about that and had to do it now. I also glued a few micro-tufts of dry grass to some selected areas. And it was time to get take it all in and decide what to do next:
Overall, I was quite happy with the state of the base now. The cork stones had to be painted, of course, and the grass tufts had to be integrated into the scene, as well. I decided not to add a large green bush to the scene, as I felt that this would take too much focus from the two minis. However, the micro-tufts were a bit too uniform for my taste, so I
added a few larger tufts here and there, in places removing smaller tufts that I had glued on earlier. I also added a bit of a wash (very diluted) of Strong Tone and a bit of Vallejo Model Wash Desert Yellow on the tufts to
integrate them into the scene. When that was dry, I carefully drybrushed the tips of the tufts with Ivory to achieve a little "zenithal highlight".
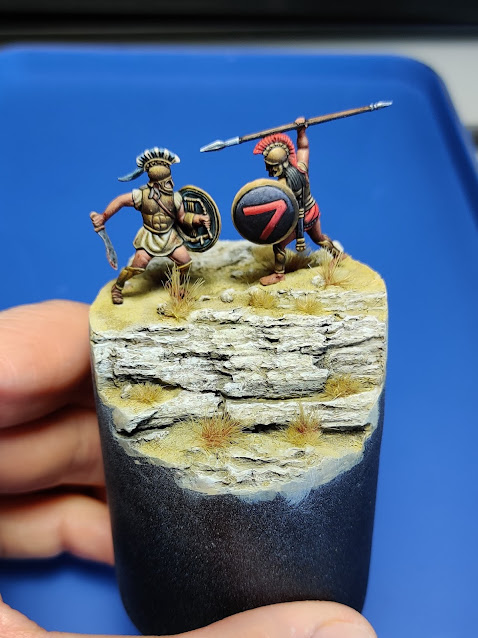 |
Stones painted, larger tufts added and tufts integrated into the base...
|
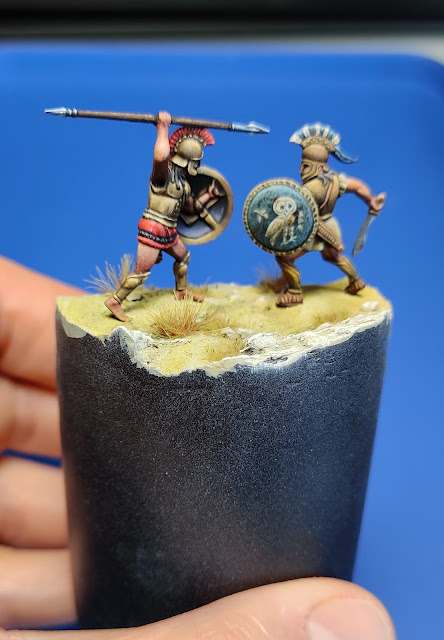 |
... and the (slightly blurred) rear view.
|
The last steps to finalize everything was to paint the
plinth a deep, matte black. I always use a cheap, acrylic hobby color for this. I slightly dilute the color with water and usually paint on three relatively thin layers with a large, soft, flat brush to achieve a clean and smooth finish.
I really like these simple, black plinths as they provide a
stark
contrast to the colors of the minis and base without taking any interest
from what's actually going on in the scene. The black color signals very clearly where the actual scene ends - and for me it provides the perfect frame for the overall image.
The final step with every scene I build is to add a small
signature to the back of the plinth:
And that was it, folks. Hope I could give you a small glimpse into the process and reasoning behind the individual steps of me building a base.
Let me know if you have questions. Looking forward to reading your comments. Talk to you soon!
Best, D.


