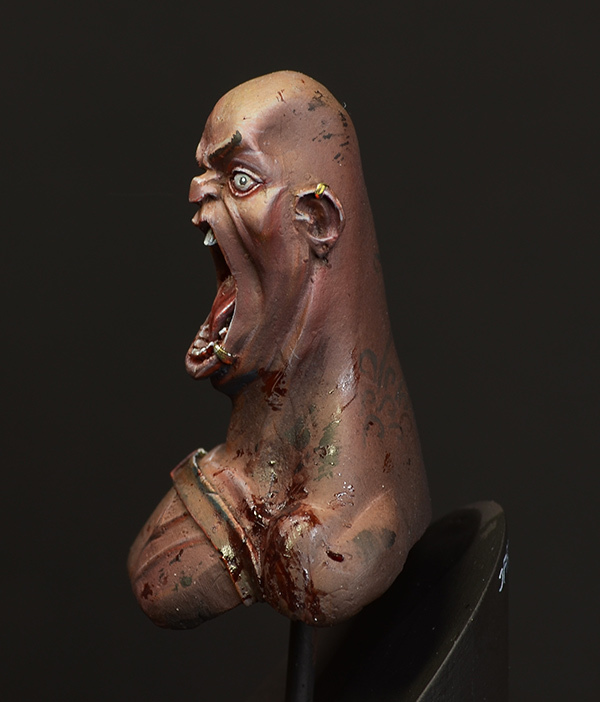
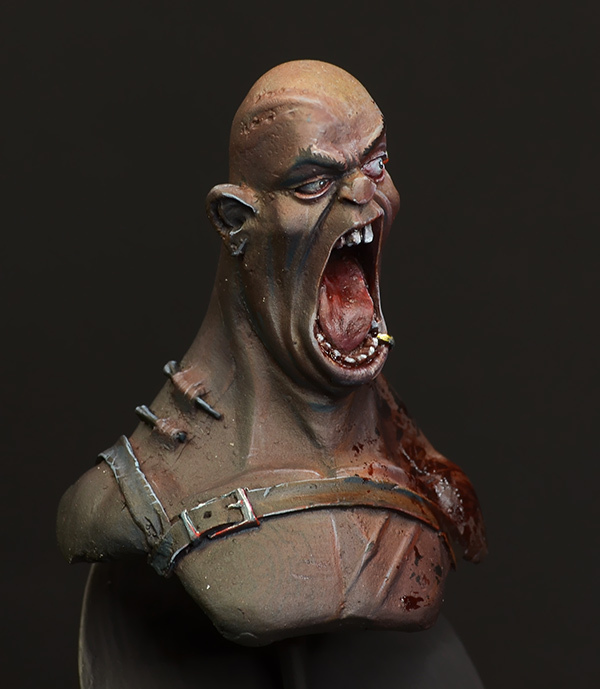
Step by Step: Pirate Buccaneer

by Roman aka jar

Hello,

nobody believed this day will ever come,
but the Pirate Step by Step won the last Tutorial Voting.

Massive Voodoo's year of the painter is proud to present you another article.
Everything sorrounding this model is sponsored by CoolMiniorNot.

Introduction
Roman already wrote a Miniatures Unpacked to that figure and as you can see he really had to struggle with the quality of the cast - click here to see the honest review.

The paintjob itself was planned as a quick fun project for Roman, not a competitive piece, just a fun paintjob. A paintjob for joyment. A problem that occoured during the paintjob was still the odd surface issues on the white metal and - sorry to say that - a lack in preparation time. Maybe you encounter this lack yourself sometimes and in the end you find out that this is not the best idea, even for a fun paintjob. Anyways this did not made the paintjob the joy Roman was looking for. Some mouldlines that were placed on awkward areas on the figure appeared even stronger after priming it and the surface of the white metal showed his true horror while painting.

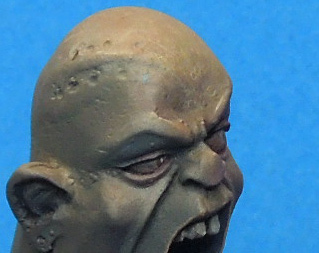
A photo from the Miniatures Unpacked to show what we are talking about here.
This were issues up front cleaning it.
 

The Painting Process

Regardless of those issues Roman pushed his way through the figure and in the end it still became that fun paintjob he was looking for, kind of. Another point that has to be mentioned is the "painting strategy" Roman took for this bust. It is a bit different from his usual approach and might bring in some - first awkward looking areas during the process, but let's see all together ...

The start was done with black primer on top of the bust. The priming with the can left some spots which were not easy to reach and they were erased to black with the brush afterwards.
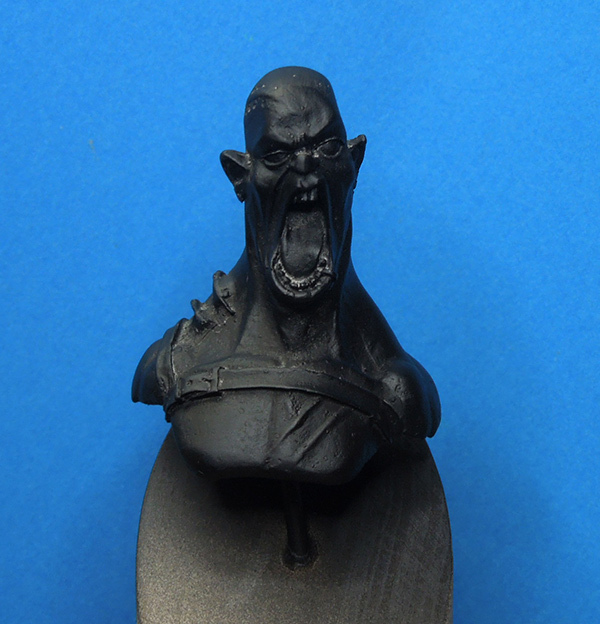

Basic tone application with the airbrush was next.
At this point it is already important that you make your thoughts on what skin you want to paint. Roman did not want to paint black skin here, rather he planned to make a very suntanned dark skin. So he did choose a basetone not too dark as in his mind he already thought: "First I will go very bright and use glazes on top of that to darken it all down".

 Basic tone here was Orange Brown by VMC, applied with the airbrush, 
but as you can see Roman was not happy with the covering power of his colour so far:
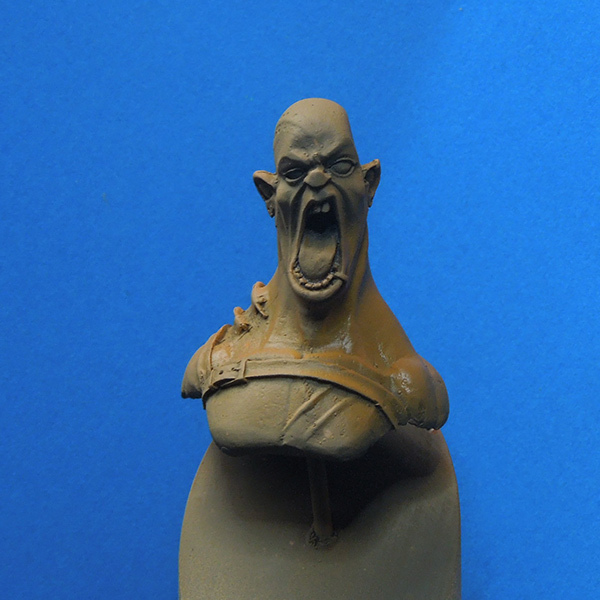
 After the first applyment dried, he did two more to make that colour strong.

Next was still using the airbrush for the first shadow area sketch. Therefore the following colours were used: Basic Tone VMC Orange Brown, VMC Air "Tank Brown" (to make it darker and even more brownish) - this was the frist shadow application. An additional step made this tone even darker as VMC Dark Sea Blue was added in the mix.


This was sprayed mainly from a low angle into the figure. Aiming for the shadow areas.


Now the poo hits the fan with the next step. Working pretty rough on the highlights of the skin, but don't you worry Roman got in mind that he is able to bring it all together in the end. Working mainly on the facial prominent areas.

Sad thing is that all those stupid mouldlines now appear again even stronger. The lack of time in preparing that bust gives credit. Whatever, time to head on forward, no reason here to clean already coloured areas, this would mess up everything even worse. A brighter skintone was used and mixed into the orange brown basic tone to get the first strong highlights in place.


Additional to that Roman choose to close in on the final picture of the bust by placing a basic tone to the leather parts. Preparing the eyes, mouth area and other details. You even can see a little texture added to his lip basic tone with a stronger brighter tone. Same here, it will get darker in the end again.


Article that brings you thoughts and examples on how you can paint eyes.
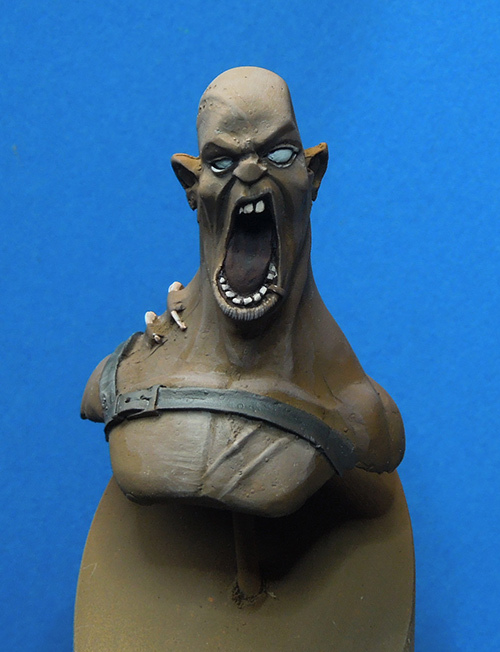


Well, next step is even going brighter. Still looks kind of madness of the cleanness of the blending quality. Sorry that the picture is brighter than others but the lamps on the table closed in a bit to really show you all those mould lines ... gnarrggll!! Using more of the bright skintone here, even adding white to it in the mix for highlighting the areas in three steps.
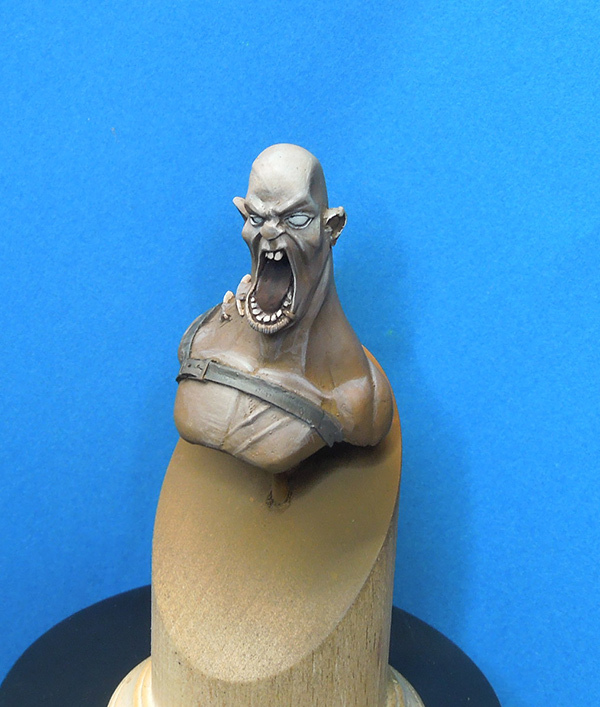


Now it even went too bright for Roman so he switched back to the airbrush, using some dark brown tone in it. A mix from the shadows he used in the beginning. The dillution of the paint was pretty thin, like a thin glaze and carefully sprayed on top of that highlight mess. Not aiming for an covering layer, just some layers of thin application to bring it all together. This could also be done with the brush and glazing work, but takes much more time.

Ahh, these mould lines hurt!!
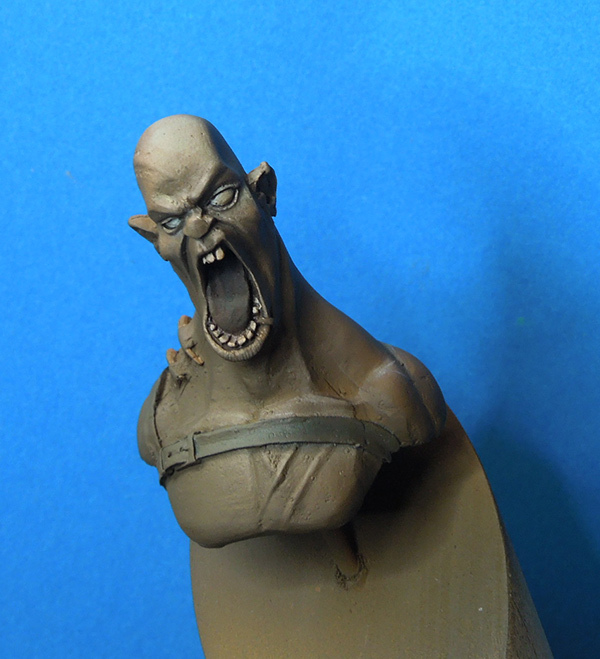
Next step was taking the highlight colour again and doing the same procdure again. Adding stronger highlights. Working with the surfaces and colours the step before resulted in. It was time to start the eyes more properly and ...well maybe Roman should have made him look directly on the evil mould lines, eh? Then he would look in several directions and might need more eyes.
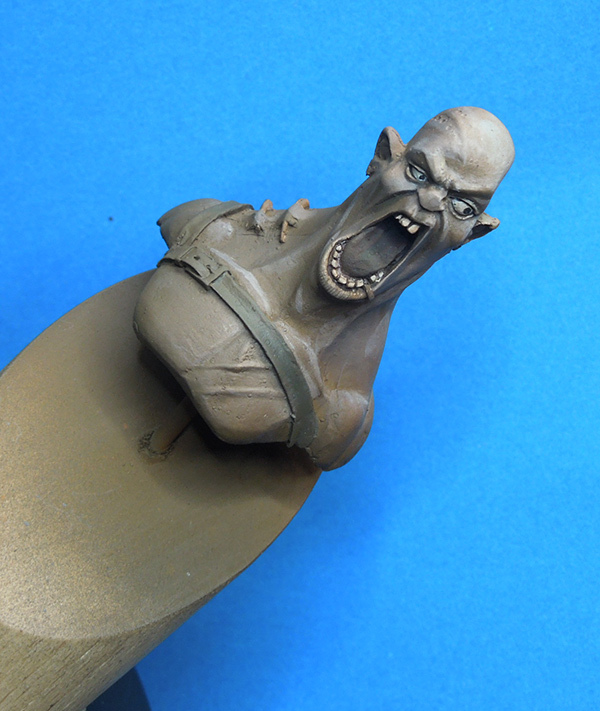

All went too bright again. So Airbrush again and carefully darken everything down with a shadow tone. Maybe too much but no time for worrying or being sad of mould lines here.
Pft! Pft! Pft! Pft! Pft! Pft! Pft! Pft! Pft! Pft! Pft! Pft! Pft! Pft! Pft! Pft! Pft! Pft! Pft! Pft! Pft!


Too dark? Yes, so what happens next? Well easy answer: Doing highlights again. Also some have been added to the ears as they were totally forgotten so far. Edge highlights to the leather part. Eyebrows are important too. Even added some bright blue colour to his right side. Used the same highlight colour there but added a small drop of a bright blue to it.
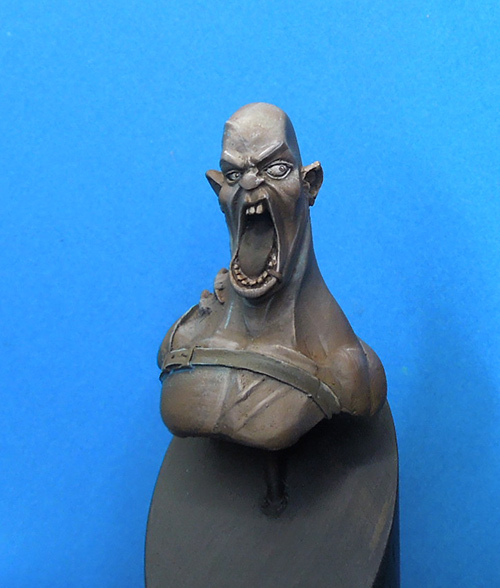


Too bright? Too blue? Yes, so what is next? Right, shadows again, BUT not with the airbrush this time. Roman decided to go with the brush to have a better control on where to apply the glazes and have better control on how often he applies it to intensify the colour there.

This time he did not use the dark shadows he used earlier, he used the basic tone VMC brown orange or was it orange brown?
Glazing work now has the task to bring it all together, smoothen it. Eyes, lips and nose were glazed with thin red glazes and the teeth recieved some highlights back as they were messed up from all the airbrushing. Same happened to the leather parts and even his tongue got some bright tones on top of one edge.

You can see that the glaze was more often applied to the left side. The side the direction he looks at as Roman wants more focus over here. It is gently bringing in a warm/cold contrast in the skintone due the bigger shadow areas on his right, where still the VMC Dark Sea blue was used in the skin's shadow.


ARRRR!!! Those mould lines!!!


Remember that you got control on how often you apply the glaze. For example on the next photo you can see how the blueish highlight still looks kind of blueish under the glaze.

ARRR! These surfaces ...

Now it was time to use the brush again with some darker glazes, not the basic tone anymore as done before. The shadow and basic tone areas had to be more smooth. Picking up that the right tone here is a bit tricky but if you are working with a wet palette you could still figure out what colours you used for the first shadow. Now use those for smoothing the areas below the basic tone.

Roman even went one step further as he enjoyed the warm cold/contrast that appeared in the steps before. On one side of the bust he mixed in a warm red into this precise shadow glazes, on the other side he added a little darker blue to it. If you add more glazes to one spot the colour there gets stronger.

A simple quick tattoo was freehand painted to his chest.
The tongue got more alive by applying a more saturated colour there.


The last steps on this bust were:

- Increasing some contrasts here and there by adding stronger - but smaller lights to already bright areas

- Painting the metal piece of the belt in true metallic metal

-  Working on the skin with more reddish and blueish shadow glazes to intensify the effect of two light sources influancing the skintone. This also influances the leather belt and the metal piece if you look close enough.

- Working on the eyes and eyebrows a bit more

- Trying to hide the mould lines and rough surfaces here and there with blood and smut (failed on that one)

- Taking better photos in a photobox, with proper light and a better camera


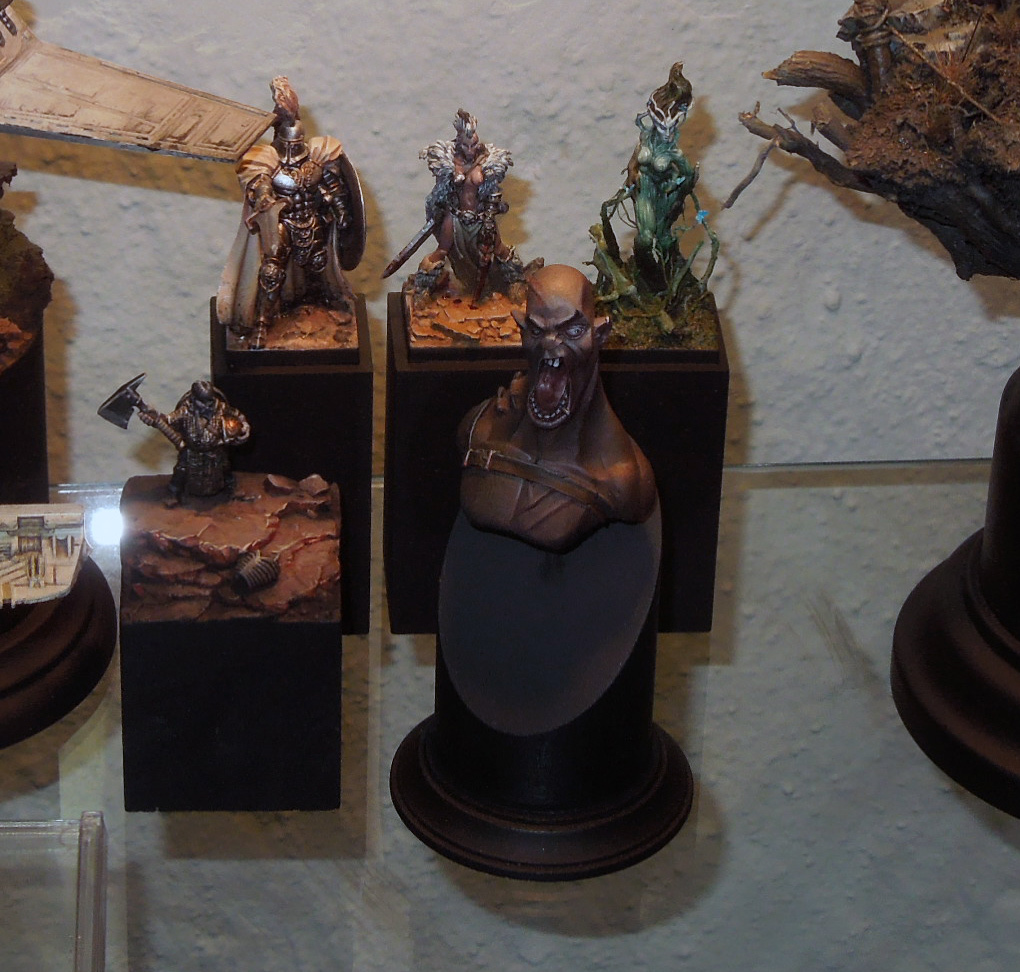
This is how he looks in a way too dark cabinet beside other figures:


Personal Closure
Hopefully you enjoyed the article. Massive Voodoo hopes that you did find one or the other hint or tip in here even the paintflow of this bust was different than usual. Roman should have taken more time to clean up that bust, definatly, but sometimes this happens and if you are facing such a mess on a figure his decision was just throwing paint on it after a normal clean up. Maybe not the best idea, but an issue that happens sometimes, so why hide it?

As mentioned, it was done for fun, not as a competition piece. If this would have been done for a competition the time invested for proper cleaning and preparing would have taken many more hours. Maybe the painting on the bust would have been more fun in the end, but sometimes it is like that if you set yourself a limited time to finish something. Sadly the figure itself was such a bad cast. In some points this is definatly a fail-article, but in others not.

If you are interested in another Step by Step of a Tales of Wars "Barracuda" - click here!

Keep on happy painting!
Best Wishes
Your Massive Voodoo Team

Forged Hope - Contest Update

by Roman aka jar


Hello Robot-Forgers,

as Massive Voodoo's Contest "Forged Hope" is up since two weeks
it is about time to bring you all an update.

This update is to announce an addition to the three main prizes.
There also will be a random prize pool again. This means everybody who enters the contest
has the chance to win one of the prizes in the pool by being randomly picked.

Random Prize #01
We start the random prize pool with a brand new Issue of the Scale Model Handbook, Number 8. Sponsored by Putty&Paint.


Random Prize #02
The great Gaul bust by Yedharo is sponsored by CoolMiniorNot.


Random Prize #03
A cool robot Battlegroup for the game Warmachine. Thanks Privateer Press!


Random Prize #04 
MV trainee Sanne decided to hand out one of her "Jason" casts to one lucky random winner.


Random Prize #05
Sgt. Blackart sponsored one "Kate" from their Terrible Kids Stuff range.We heard rumors that she is already sold out! Very cool! Gracie Mille!


Random Prize #06
Imbrian Arts sponsors some drunk town folk of the recently unpacked Miniatures. Time for a lucky winner to get utterly drunk, eh? Thanks a lot!


Random Prize #07
Our friends from Sgt. Blackart sponsored another miniature as an addition to the random prize pool. 
This time it is "Smokingclouds", a really cool and funny sculpt. Gracie Mille!


Random Prize #08
This time we have to say thanks to BigPandaV.de, a pretty young and cool online store for your hobby equipment, who throws in a supply package, cool for every hobby enthusiast. Thank you!


Random Prize #09
This time the random prize pool is growing bigger with thanks to Sockelmacher.de, who throws in two fine plinths for your hobby joy!


Random Prize #10
One brand new copy of one of Roman's favourite inspirational book from the beautiful city of Paris, brought to you by Sanne who went there for holidays a while ago. She had homework and she did well, thank you Sanne!


Random Prize #11
This update on the random prize pool is sponsored by Modelmates and brings one bright Rust Effect and one green Verdigris Effect to the lucky winner. Thanks to Modelmates!


Random Prize #12
This time one lucky person who enters the contest will get six cool pigments from Broken Toad. 
Thanks for their help!


Random Prize #13
Forged Monkey hands out a brand new, yet unreleased bust of "Jamal" to one lucky winner. Thanks for the support!


Random Prize #14
Our friends from Hong Kong, Marrow Productions sent a copy of their "Borrack Bull General" from their game "Journey" to make one lucky winner happy. Check this out:


Random Prize #15
This is a big basing and color package by our friends from Secret Weapon,
a massive load of really cool stuff! Thanks to Mr. Justin and Secret Weapon!


Random Prize #16
This time Massive Voodoo's gratitude goes to "Ayora Studio" from Sevilla, Spain who supports the random prize pool with one of his cool 54 mm "Captain Crocodile"-sculpts.


Random Prize #17
This time sponsored by our friends from Wonderlands Project.
Five cool models will find a new home with this random prize, including their brand new model "Whati, the War Turtle".


Random Prize #18
One of Massive Voodoo's Figure-Art Artbooks, signed by Roman and Raffa with special thanks of telling you how great it is that you took part in the Forged Hope Program!


Random Prize #19
Coming soon! 

Musica

by Roman aka jar

Painting Class Review: Forchheim, Germany

by Roman aka jar


Hey you all,

it took Roman a while to sit down with a cup of coffee and write this up properly.
Massive Voodoo had another miniature painting class weekend about two weeks ago in Forchheim, Germany. With big thanks to Mathias and Peter who organised the class this review is about to drop in.


Mathias helped Massive Voodoo to hold the class in the place where he works as a teacher himself, a tendance vocational school in Forchheim. The location is a great place to hold a class in as everything is like in a real school. Mathias prepared everything already as we arrived on Friday and during Friday afternoon the students dropped in, even it was not the easiest place to find via navigation systems. Thank you Mathias for the effort, the help, your hospitality and the great place you provided for the weekend. During this weekend there were even Snakes involved, but just found this blurry photo, sorry.


Massive Voodoo wants to thank every participant who took part in the class.
Those who travelled far distances and those who travelled short distances. Roman and Peter were happy to see many new faces on the class, some painting their first miniature ever during the class. It was also cool to see many "repeaters of the class" who took the class for the second or third time. Thanks to Sebastian for his help and advice to his neighbours during the class. Thanks to Oliver and Peter for providing many photos of the class. Big thanks to Peter for his help during the class.


Thanks to the sponsors of the class,
who helped with material sponsoring:

PK-Pro
Sockelmacher
Juweela
Modelmates
and Kellerkind Miniatures.

Thanks to Peter who wrote his own review of the class experience over on his blog (german language) - click here!

Thanks to Kedohan who did the same over on GW-fanworld forums.
You can find his experience if you click here!

We started on Friday late afternoon and jumped into the schedule of the painting class: Introduction, theory, preparing the figures, more theory, basing and even more theory. Students who took the class the first time had to paint a GW's demonette in order to get the full amount of provided information to be painted to this figure, while repeaters brought their own project decisions to focus on.

Classroom.
 Before the storm.

Saturday arrived and still we were not at the point to take out colours and paint. We still got detail work to do on our bases, paint colour circles, prepare everything for the priming session outside in a back alley and pedestrians looked at this gang of sprayers pretty suspicious.

Pfft! Pfft!


After lunch it was time to sit down and talk about brushes, paints and the proper use of our wetplaettes. Luckily the school was placed with sorrounding stores so some students were able to get go and buy a proper wetpalette for small coins in just minutes. Next step was the introduction in Roman's wet and wet technique which helps to get a good sketch on your bases. The next hours were filled with working further on that sketch, improving the early rough basework to detail level.


After the initial work on the base was done Saturday evening granted us some dinner and a start on the figures themselves. It was time to make experience with new techniques again and while most of the painting work on the bases was fun the smaller surfaces on the figures helped to let struggle and frustration appear here and there. This is very important. If you get to know something new you might fail in the beginning. The frustration that appears is a good sign. In this moment you learn and if you go on you will conquer by gaining more experience. Train your painting muscles by painting. That is what we did Saturday night.


Next morning arrived and we strictly jumped into high concentration painting mode again. Bringing our figures closer to a final picture by adding details like skin variations, maximizing the contrast, cleaning up blendings, painting leather, painting metal parts and much more.


It was a pleasure to see everyone's project grow, see frustration fading away as the overall picture appeared more and more due the time which was put into the figures. Roman and Peter were proud to see the figures grow constantly, both always there if questions appeared wether it was our nice couple who painted their first figures or some veteran painters. Midday on Sunday had a quick lunch and then we closed in for final works on the figures. The theory and practical parts from Saturday and Friday were closing in to one piece, the figure and the base. It is always such a joy to see how everything comes together and that every painter, no matter what their level of painting is at the moment are growing in their experience level. Thanks to all the students in this class for painting such a big amount of time, for spending a full weekend thinking and planning on their own project, being brace enough to find their own colour choices and for the fun we all had together.

Let me show you the results of this weekend
- thanks to Oliver again for the photos. Keep in mind that a lot of different experience leveled painters took part in the class so you will find the photos with explanations:

Main focus of this class repeater was to work on his gaming army scheme but with more quality of the paintjob.
 Main focus of this class repeater was building up a big base idea and paint OSL to it.
Main focus of this class repeater were finishing this figure, improving his army themed bases and much more.
 This student took the class for the first time and this was his demonette.

This repeater of the class painted Forged Monkey's Brekk and focused mainly on the face.
 This student took the class for the first time and his demonette vision looked like this:

Again a first timers demonette and his vision to it. Brutal basework going on here, eh?
This student took the class for the first time and this was his demonette.

 Another repeater of the class going fro reds and OSL here.

 A class is incomplete with at least one lava base.

This was the class of blue demonettes.

 This class repeater had to leave during Saturday afternoon for a birthday party, but finished his base.
 The focus of this class repeater was also skintone and improving the quality of his paintwork.

Another blue demonette  plus an owl on that base here ...

Blue again, walking the path of destiny.

Well, a blue lady again. I kid you not if I say this was the class of the blue demonettes.

Hah! Another blue one ...

This demonette burns her sorroundings while roaming through spring.

This class repeater went for a orange beard and dwarf power.

Proudly Massive Voodoo can tell that this was one of the demonettes 
who have been painted as the student's first figure ever. Well done in our eyes, eh?

Not a blue one here, but blue included.

And another lava basa and a duck. 
Well, this was the second student who painted his first figure ever during the class.

I hope you liked the review and enjoyed that we did put the focus a little more on the results of the class. Massive Voodoo is proud of this class students. You did well and we want to thank all of you again for the great time we enjoyed together. Thanks to everybody involved as we all together made this possible.


Keep on happy painting and take care that your brushes stay wet!
Massive Voodoo is looking forward to see you again in the future!