... or: a story of attempts, failures and fixes
It's time for another step-by-step on an older project of mine.
This was the second 1/72 figure project I built after my love for the scale started in April 2017, in which I wanted to accomplish two different things:
- do another 1/72 mini
- and do another test with water effects.
My choice for subject was initially triggered by an in-box review of the WWII US Marines set by Revell over at Plastic Soldier Review. Once I saw the figure of the Marine carrying his rifle above his head, I knew I wanted to portray the grunt during the 2nd Marine Division's landing on Tarawa in November 1943. Our Marine is one of the unlucky ones who were not ferried to the beach by an Amtrak, but had to wade ashore.

The first step was preparing the mini for priming. As is typical for these Revell sets, the figure is cast in very soft light beige plastic, which is a pain to clean up because it cannot be sanded or filed, but has to be cut very carefully with a brandnew scalpel blade. As promised elsewhere, I will discuss this issue in detail in a future article. The tiny beige flakes you see lying scattered around my cutting mat are what I cut off from the figure.

Next I built a small base for the mini, which I had already primed in between to check for moldlines I missed during clean-up. I created the sandy ocean floor on a simple 2 x 2 x 4 cm beechwood plinth using Milliput and added a few stones, also made from Milliput, and added a bit of drowned wood:

After finishing the base, the project was on hold for a while, but at some point motivation struck and I started to put some first colors on the figure. In the following pics, the mini has received some first lights and shadows on the uniform, while helmet, skin and webbing/equipment are still in base colors.


Some more work on highlighting and shading the uniform:

I then highlighted and shaded the equipment, and worked some more on the helmet and skin.

I then highlighted and shaded the equipment, and worked some more on the helmet and skin.

Next, I put some sandy color onto the ocean floor and painted the stones black; then highlighted and shaded the base.


When I declared the mini finished (for the time being), I started preparing the base for the water effect. I built a first barrier from transparent plastic sheet, following - as always - my jungle brother Josua's incredibly good tutorial here on Massive Voodoo. However, I made a mistake somewhere because a first test-run using tap water showed considerable leakage. Pro-tip: always test your barriers for leaks with water before you pour the "real stuff" ;-)). So, I pulled down the old barrier and built a new one:

And then, the great experiment began. Since I wanted to emulate some kind of depth in the water, I thought it might be a good idea to pour the 2k resin in three layers, each tinted with blue and green ink. The lowest layer would receive the darkest tinting, the upper two layers would be tinted in lighter tones. For inks I almost exclusively rely on the Scale75-Inktensity Inks, which are plain awesome-sauce, strongly pigmented and transparent.
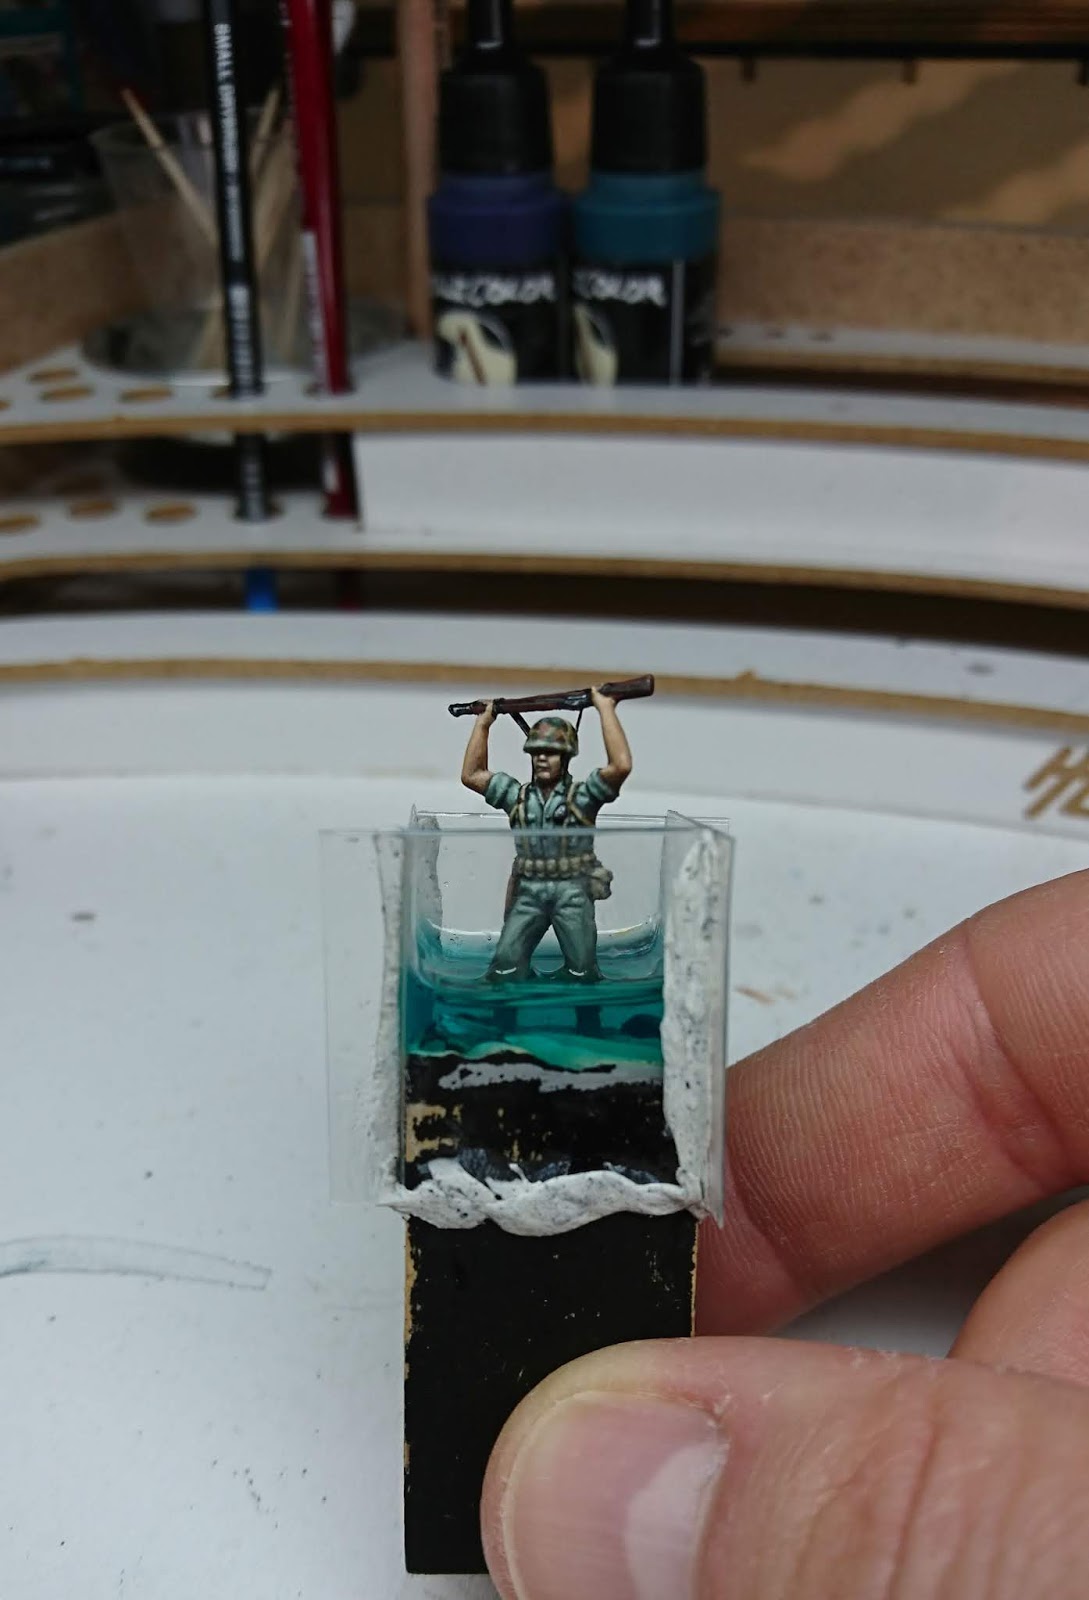


Once the first layer had hardened, I poured the second, slightly lighter layer. On the pic you already see the problem with my approach: you can see the division between the layers. The pic shows it a bit more pronounced than in real life, where the visibility of the layer depends on the angle of view and the lighting. But I can't say that I was really happy...

Finally, the third and final layer was poured on top:

The worst surprise was yet to come, however. After letting the third and final layer of the 2k resin dry for about 30 hours, I started to peel off the plastic barrier. Alas, the second layer (which had been "drying" for more than 2 days) had still not completely hardened, but stuck to the barrier. I guess I made a mistake in measuring the two components or did not mix them well enough.
Anyway. I tried my best to peel off the barrier as carefully and gently as possible, including putting the whole thing into the freezer for half an hour, but it still did not work out: the second layer had a really nasty dent in the resin and it still would not harden. So there also would not be any help in sanding and rebuilding the layer.
Anyway. I tried my best to peel off the barrier as carefully and gently as possible, including putting the whole thing into the freezer for half an hour, but it still did not work out: the second layer had a really nasty dent in the resin and it still would not harden. So there also would not be any help in sanding and rebuilding the layer.
Another mishap happened while I filed away on the resin surface: the knife slipped and I cut into the Marine's arm, ripping off a tiny piece of paint and knicking into the soft plastic. I tried to repaint the part, but the surface remained rough, so I decided to just treat the mistake as something that might have happened to the Marine while he was boarding the landing craft, and gave him a small bloody bandage.
To add some detail and interest, I created straps for the M1 rifle and the grunt's helmet from post-it strips. These were cut with a sharp scalpel blade, glued in place with super-glue, "drenched" in matt varnish to make it malleable and, after letting it dry, painted, highlighted and shaded.


When all was set and done, I was really unhappy with the botched resin pour and the obvious "lines" that were showing between the layers. So, I decided to hide my troubles as good as possible by simply gluing strips of plastic sheet around the base to a height just above the line dividing the second and third layers.
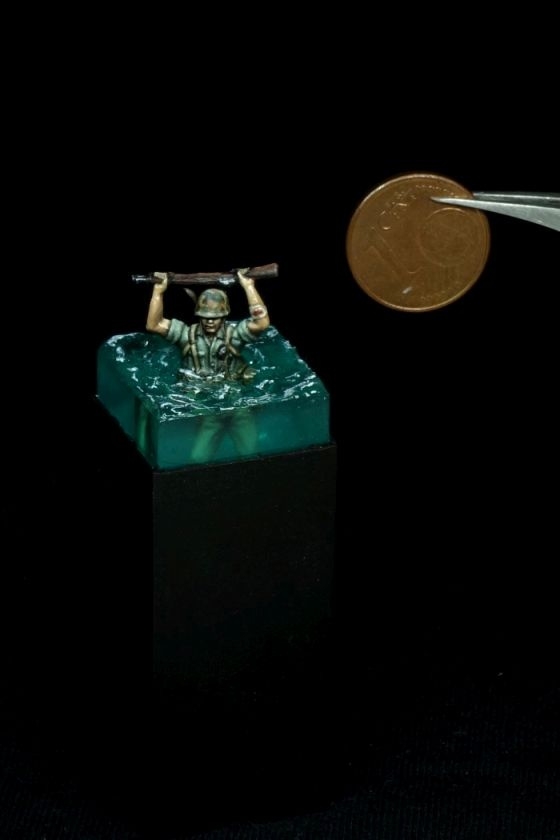 |
| The final project - with the resin imperfections hidden behind plasticard |
For more pics of the final thing, see the mini's own gallery over at Putty&Paint.
In the end, I have to say that I am really happy with the way the scene turned out, despite all the troubles I had with the water. It's not how I envisioned it and in between I felt really bad about the mess I created with the resin water, but in the end it worked out fine. Today, I think the scene is particularly special to me precisely because it didn't go as planned, but that it involved a lot of attempts, failures and fixes.
Thanks for reading. If you like, tell me in the comments about your biggest "fails" that you fixed and that made the project particularly dear to you!
All the best,
David
David
Hey David,
ReplyDeletegreat article and a great Miniature with a lot of character. Was a pleasure to read and surprise to see that anyone else had the same problems with different layers of water.
In 2017 I took part in the MV Challenge about water. Did a coral reef with plants and fishes and to get the fishes swimming I poured several layers of resin.
I love the final project but it cost me al lot of time to overcome my sadness about the same result as yours: you can see those different layers. I tried to hide it on the fotos by shooting them from several angels but couldn't cover them on the mini.
Now that I'm fine with this project it gives me a little bit of reassurance that I'm not the only one...
Thanks for sharing your project and experiences. I love the mini and will try to get me one of this marines. Can see hin wading through the deep jungle of vietmam.
Kind regards,
Alex
Yes, resin water is difficult. I did a test, where everything worked well and when it came to the real thing, several things went wrong. I also encountered the layer separation, used the wrong paint to color the water (there were distinguishable pigments, sinking to the ground of the layer and making the separation more visible). In addition, I had a leak and all the water poured down into the details of the structured plinth. Since I wanted to simulate a diagonal wave surface, the material cured asymmetrical and I had to remove most of it with a cutter knife. Finally I glued some wooden planks onto the plinth to cover most of the mess.
ReplyDeleteSee for yourself:
http://www.coolminiornot.com/419074?browseid=7426900
cheers, Frank