I am very happy to bring you the first part of this series of posts about my project "Giu's Robot Repairs" that I recently finished. The project was first shown on the Monte San Savino 2013 show in Italy.
I somehow managed to win the "Best of Fantasy" award with this project and I really have to say it was a very big suprise to me and I am still shocked and happy at the same time!
The project is very unusual and maybe strange at first for many painters and so I was so happy to see that the painting community gets more and more open for changes, new concepts and approaches to this hobby we all love so much.

At this point I want to shout out some thanks to the people around me:
Anci, my lady, for the never ending support for my madness...
Roman and Bene for beeing able to handle me even when I am away in my Dreamland for weeks.
Michael "Dellolyn" Hansen for making me such a nice socket, thanks, thanks, thanks!
For my friends supporting me with electronic devices that I could destroy to get motors, lenses and other important parts :)
Philip for the nice talks in the time!
And all the other friends that supported me at the project.
But why start at the end? Let's do it like it is done with any good story, at the beginning :)
I won't show any finished photos right now, I want you to have almost the same interesting travel that I had ;)
After the Games Day in Germany this year I was somehow oversaturated by chain sword swinging Space Marines and the other typical science fiction and fantasy slaughtering. Two of my "non-miniature" friends from my hometown told me they loved our Artbook, the quality of the paintjobs were excellent, but they disliked the typical brutal themes of our fantasy creations.
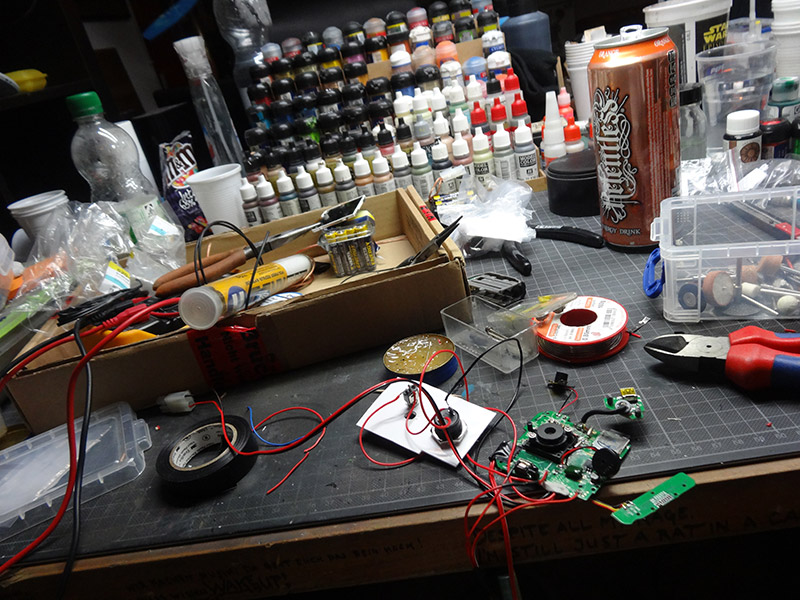
This really gave me something to think on. The first day we returned to the studio I searched for a quick project without guns and big muscles and I found the robot that I got from the last painting crusade, a peaceful fella. So I decided to give him a quick paintjob when it suddenly struck me out of nowhere... the eye socket of this robot was perfect to put a camera inside! A real interactive project. I wanted to do this for quite a while and the muse put the project right inside my head.
I jumped in the car and drove to our next electronic store to get the cheapest camera to mess around with it. In the beginning I felt quite stupid opening the camera carefully... I did an apprenticeship as a Specialised Computer Scientist so I knew a bit about electronics and other basics.... but still I got some electric 330v shocks from some stupid electronic part that I don't want to spend time on explaining. That was the moment I realized that this will not be a "quick and dirty" project.
I spend more time on planning the project and converting the robot. I had some ideas in my mind but finally I decided for the robot repair store. I wanted to do something Pinocchio-ish and so I decided to hide some references to this old story. When I got the layout in my head, how the workshop should look, where the scene should happen, etc. I started to gather ressources. Different kind of 1:24 tools were pretty hard to find, thou not impossible.
I thought about a name for the shop and wanted to give a reference to Pinocchio. Gepetto is Pinocchios father and so I thought it's a nice reference naming it as his workshop. But I wanted to do it not too obviously. Gepetto is a nickname for Giuseppe and so the name was born: Giu's Robot Repairs.
At this point of a project, many things happen at the same time inside my head. Planning of the technical part (I decided to go for light, sound and a camera), compositing the project, drawing mindmaps of different things (for example what items should be in a repair workshop), sketching of different scenes and ideas and a rough color layout. It is very hard to give a straight explanation or a tutorial for this kind of work, everyone is different. Most of these things happens inside my head.
A lot of time was spent on how to make a very fluid and nice interaction between the viewer and the project to really give the feeling of beeing a part of the project. Building a connection... the project doesn't work with people using it!
At this point I could ask Michael for the socket, it needed some special things that I explained to him with a 3d illustration:
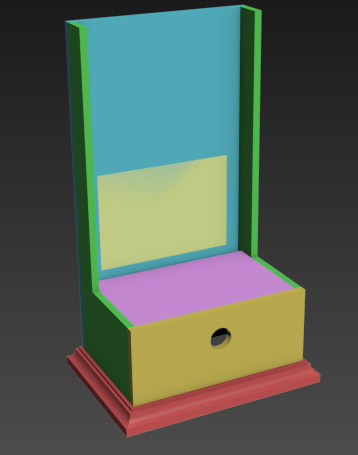
This was enough for Michael to create the perfect platform for my project, I knew it would get pretty large but in the end it was perfect.
It was pretty important that the size of the socket would still allow most people to hold it in hands and press the camera button that will be put in the hole in the front at the same time.
Again and again I was shocked and frustrated by the time that I spend planning.
Which part to create at which time, when to add which part at which time to be able to paint the other parts and don't paint on the lights. How big is a small hand? How to I get down to 3,7 volts from 9v? How to make it possible to run the project by batteries and a wall plug at the same time? How to build a small amplifier? How to remote control a camera? How to extend a very small and thin cable to run the monitor?
Such a wall of quests is only managable if you break down the project into smaller projects and break them down again to mini projects like:

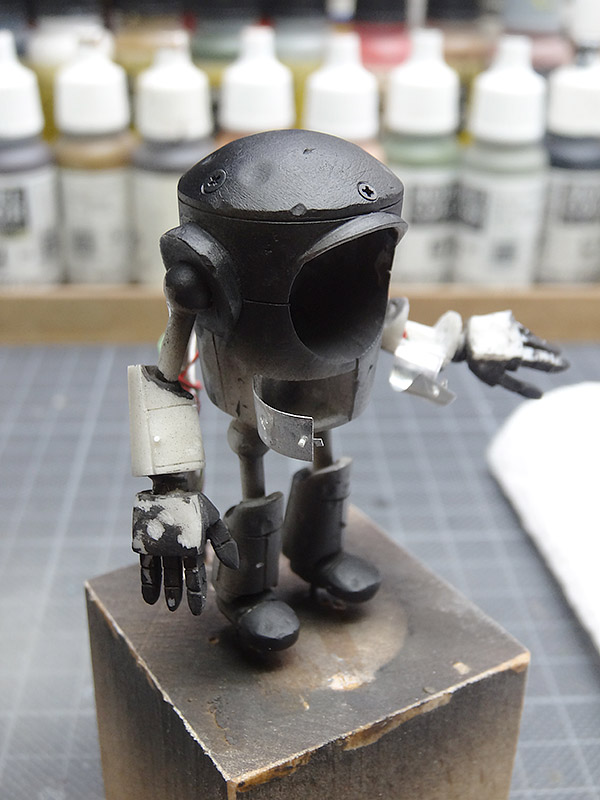
painting the robot


scratchbuilding, painting and lighting an oscilloscope.
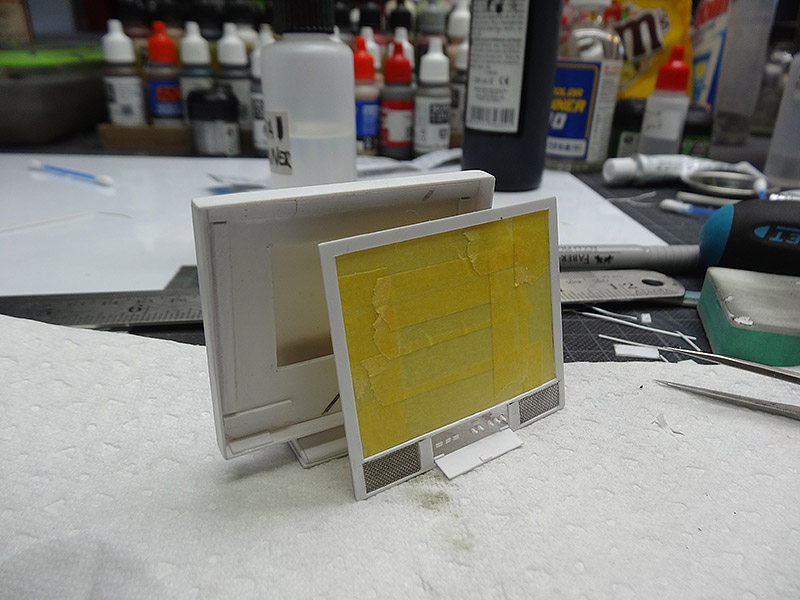

scratchbuilding and re-cabling a flat screen television and test the camera. I had to turn the screen around due to the build type of the lcd screen :-(

scratchbuilding and painting small circuit board for the robot. (lit by fibreglass and smd leds)


scratchbuilding, lighting and painting a small radio and building a speaker inside.
It really plays music!
It really plays music!

scratchbuilding different small robots from brass, plastic and old electronic and watch parts.


designing layouts and etching pcbs to create a small amplifier for the radio.

creating a 3d design for the shop sign. It will get lightbulbs around the gear.
That was a small collection of all those "mini-projects" that were finally assembled to one project...
And it's also the end of the first part of the series. I really hope you enjoyed this first part!
And one preview photo of the finished project ...

And to give another small feature to every part of this series, some photos shot "from" the project in Monte San Savino, thank you for beeing brave enough to press the button and a part of this piece!


Read you soon! And to say it with the words of our friend, the Galactic President:
Share & Enjoy!
Best wishes,
Raffa
Magnifico Raffa
ReplyDeleteHappy to see it finally finished :) I´m proud of you my friend ;)
ReplyDeleteBravo Raffa. I´m agree with you, new concepts for open minders. The miniature world need changes. Congrats!
ReplyDeleteThis is simply amazing.
ReplyDeleteOMG.......first the dio from roman and now THIS.......you are true artists! I bow my head in respect....
ReplyDeleteThis is awesome on so many levels!
ReplyDeleteOne of the coolest things I have seen for a looooong time! thumbs up from the north!
ReplyDeleteThis is so brilliant - you have that much creativity and - what is even better - you can put it into practice!
ReplyDeleteYou (and Roman) extend this hobby further and further...
My deepest respect!
Fantastic mate.. far better than how you described it in Hamburg! And amazing attention to details on it.. amazing!
ReplyDeleteThank you very much for the nice comments!
ReplyDeleteYou continue to amaze and amaze
ReplyDeleteIan
So cool!
ReplyDeleteSimply amazing, I am speechless. Unbeleavable that every project is much more astonishing than the one bevore. You should find a way to fill up your creativity onto bottles - you will be a rhich man :)
ReplyDeleteI think this a prime example of what Roman warned me about...; "...his ideas can make your head explode..." Awesome work, and I'm looking forward to see the following posts!
ReplyDeleteTruely amazing my friend! I knew it would be something great but I did not ecpect it to turn out that great! Definatly my favourite project from you so far!
ReplyDeleteAbsolutely mind-blowing Raffa. You are my reference in this world from quite some time now. Raffaele Spearhead!!! :D Bring us more buttons to push :P
ReplyDeleteGreat congratulations for the achievement! I'm not talking about the prize. Obviously is a masterpiece! But I completely agree on the thought of moving to more casual dioramas or stories to tell. It makes this miniature world more friendly and opens a myriad of possibilities and concepts. Just like the one you've just created so amazing! I was looking forward to dig in this field but it's difficult to find pieces or miniatures to build up unusual scenes as you said. As far as I'm not an initiated sculptor it was even more difficult to start seriously. I'm glad someone with your ability has pointed this way! Thank you and congratulations!
ReplyDeletecan only say: great job
ReplyDeleteReally amazing Raffa!
ReplyDeleteAfter you send me the 3d illustration for the socket my head was burning. Not of the building of the socket, it was bruning of think what will you build on it ;-)
And all I can say is, I was stunned by this awesome Diorama.
Hope you will take it with you to the workshop in Trier :-)
Best regards,Michael
Do you have a creativity robot at home? Thumbs up! Very impressive again.
ReplyDeleteI already know the answer of course but I would be stupid not to ask. Do you have the robot repair shop for sale? If no, do you have any parts or pieces I could buy to make my own? Do you have any of the light up parts you could remake for me or can you tell me where to get the radio that plays?
ReplyDeleteMy son is @ Cal Poly studying artificial intelligence and robotics. So... of course I want to obtain or make one for him. Any thoughts appreciated. AMAZING work!
what is the scale?
ReplyDeleteI assume this has been sold already since it was years ago.
ReplyDeleteI would love to buy things of this type!