posted by roman, jarhead, kong
Aloa.
This time it is about how to do it right or better than before :)
If you are intrested in what can went wrong by doing 2 Component water check this article!
Using 2K water effect on a base
What you need is:
- Some kind of 2K water effect (beware to read the instructions, everyone is different)
- 2 cans
- a toothpick
- adhesive tape
- and a base where you want to put your water
- and maybe some coffee, if you like coffee
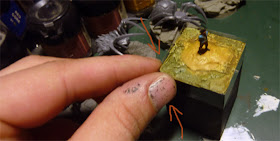
Next use the adhesive tape and bring it into the same height you want the water height to be. Make sure it is everywhere on the same level. Then make sure to streak the sides plain to avoid that the water runs aside later on. Also make sure you'll reform the edges with your fingers, it is important that those are very exact.
Now, take the cans and fill the same amount of the 2K bottle content into them. One can for every 2K bottle. Make sure you really hit the the same amount, if it helps make a mark with marker at the cans. Now you got to choose one of the cans you want to mix it in. In the other can you'll do a bit more of the content, not much, just a tiny amount - this provides that you'll get the 50/50 mix you want when bringing both together. The last addition is to negate the loss you'll get when pouring it together. Then mix it slowly by using the toothpick. Really slowly, if you do it too fast you'll get bubbles, make sure it is really mixed well (about 3~5 Minutes). Now pour it up to your base and make sure you bring in as much to reach the height of your adhesive tape. Do a little bit more, as the 2K water downsizes a bit while drying.
Now get it back to a place where it is safe by flour and wait until it is dry. If you have done everything right this should take about 2 days, for sure it is important how deep your water is. I have not tried deep water yet, but i guess you have to go there with more steps. You can check the drying status of your 2K water by looking back at your toothpick and the remains in the can. When it is dry you can try to remove it also from the base. Be carefully and when you are not sure if it is already dry stop it and wait one day more. After removing the adhesive tape you'll get a plain area if you did that extra drop on top that i have explained above. If not, you will get an ugly edge.
After the tape is removed you still can clean that mess up by using sandpaper from low to high numbers and make it even more shiny again. Carefully use a scalpel to remove ugly edges. Using Sandpaper again and again. In the end the final step would be to use gloss varnish to repair areas which are not so nice, even you have taken your time with the sandpaper, that helps a lot and i guess doing this more often you'll get better and better - at least i hope so for me.
I hope you like this tutorial, finally it worked a bit better than the first try :)
Keep on happy painting!
Regards
Roman


I love this little fella :)
ReplyDeleteAs a hint:
Use two cans.... one for each component before mixing it together, if you don't get the 50/50 mix almost perfectly it can happen that the water doesn't get dry and will stay sticky.
So always be very very precise when mixing 2k water or you can destroy your base.
Glad to hear, that some of my old hints have been helpful to you :-).
ReplyDeleteA postal scale may also be useful to get the right amount of each component into each can.
Grumbler
Thanks for your help to both of you :)
ReplyDeleteGreat tutorial! It works very good.
ReplyDeleteHere you can find my result:
http://www.hemmesmann.de/blog/2011/04/20/arctic-imperator/
Many Thanks
Bastian
Hi, really good tut thanks, will need to try it out.
ReplyDeleteRandom question but i really like the ultramarine with lightning claws, and better pics? And What parts were used? Cheers