Hi jungle,
preparing a modell might be the most important thing - i wouldn't have say this in the past, because i also had to learn this through pain and agony. Totally mad about painting something up and then saw mouldlines and gaps over the miniatures didn't make me do happy painting at all! So it is good to take a moment of patience to prepare the model you want to paint as calm as you can.
Here i want to show you how i fill gaps, which come from buliding a model. I will do this bust of this gladiator from young miniatures to a good friend of mine somewhere in the future. He did make a cut from the hobby, because he has to concentrate a lot on his studies and wasn't really happy to let go painting, but sometimes time needs to be focused on important things like the future - that is why i will paint this one up for him. I wish you the best in your future plans, my friend.
Let me explain in some words how i fill the gaps here - i did get the bust from my friend, as he planned to paint him on his own - but time and so on - already glued together. It must be cleaned in some places, but there is no hectic at all in this project. Filling gaps like this is just my way, sure there are a thousand ways to do so, from Green Stuff over to other stuff, haha... check out mine, which isn't the best for sure, just an idea of my way of working:
What you need:
- An old brush
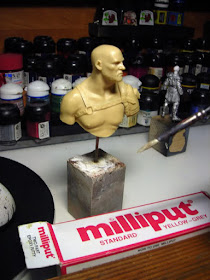
- Milliput Standard Yellow
- Water
- A model to be prepared
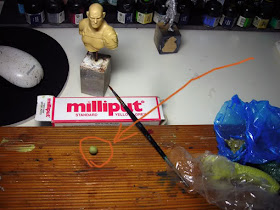
Milliput is a 2 component sculpting stuff, which comes from the industry to work on ships, car, etc. - just take it 50/50 and take your time mixing it until it becomes one clear color - yellow.
For this action in particular, you don't need a lot. Make a small ball of it and prepare your workspace.
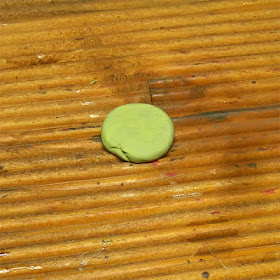
Next step on the schedule is flatten that ball with your fingers, you may use a bit of water, just some wet fingers:
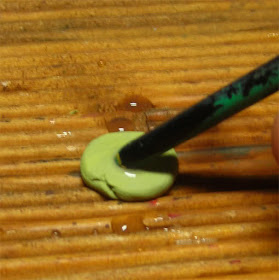
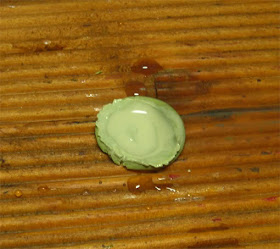
Take the dead end of your old brush and make it wet, now make a mould in there with water and move the end in there to get some sort of milky stuff.
Now take this Milliput milk up with your brush's normal side and 'paint' it on the gaps to fill. You can choose the thickness of the milk with a little practice and so fill up big gaps too, when it is a bit thicker. I mostly go over the gaps with 3~4 runs of this, because while drying it often happens that it loses its thickness. Just have a go and try. Small gaps are filled mostly after the second go, bigger ones need more.
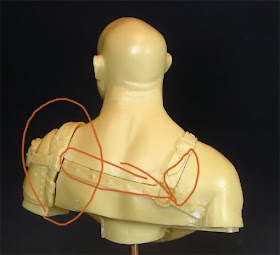
Before:
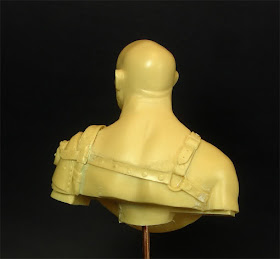
After 2 gos - more to come (ahh yellowish photo):
All in all the model has to be worked and cleaned with fine sandpaper later on, because the friend of mine didn't put much attention to it - bad guy ;) - before he glued it together. I am doing this after filling the gaps, because Milliput is easy to handle with sand paper and can be flattened without a problem.
I hope this article may help the one or the other...
Keep on happy gapfilling!
Regards
Roman
You want to support Massive Voodoo?
If you like to support or say thanks the monkeys of Massive Voodoo in what they do, please feel invited to drop a jungle donation in their direction via paypal or check their miniatures they got on sale here.
_______________________________________________________________________________
Thanks for this - the visuals are just what I needed to understand this concept!
ReplyDeleteGreat job. I will use this hint in a military kit that I'm starting.
ReplyDeleteCongratulations and thanks for the help
I am finding myself going back to good old Milliput quite a lot in preference to green stuff or magisculpt for the same reason that you pointed out here -it's clay like properties. Being able to thin it down is very helpful in the gap/void filling.I find GS & magisculpt are more suited to sculpting that filling but with a little effort can still be used as such. Nice tutorial, thanks :)
ReplyDeleteYour welcome, thanks for your comment. Indeed we enjoy Milliput too very much for this task!
ReplyDeleteHaven't had luck with the Milliput milk. I've since used putty (Vallejo Plastic Putty). Easy to use, "thins" with water, and can be sanded.
ReplyDelete