


Posted by Raffaele "Picster" Picca
Hey everyone,
today I present you the first part of a 3 part series of work in progress photos of my latest project: "Touch of Death". I start with the sculpting part as this was the first step of the project (including planning and concept).


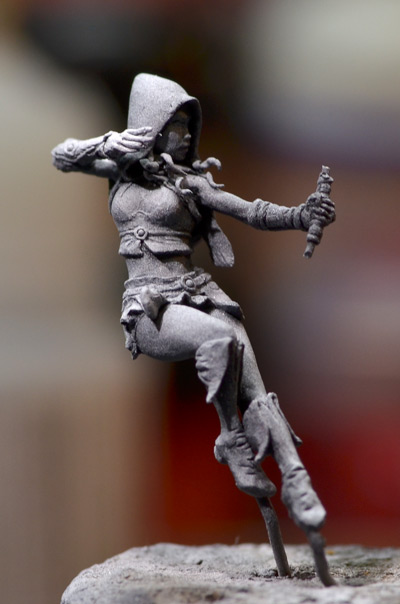
 Here you can see the "almost" finished sculpt, already basecoated. I had to change the hand and bow somewhat later.


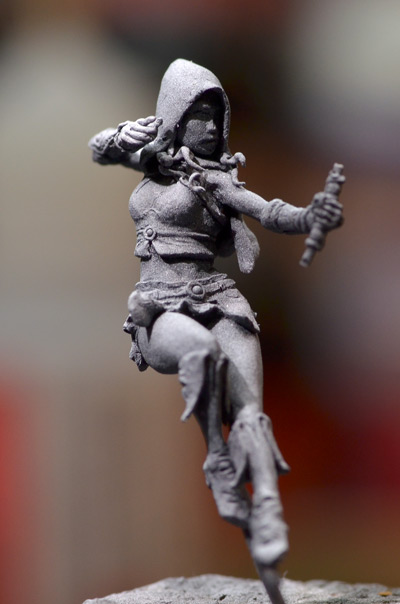
 Positioning was a very important element when sculpting everything. All parts needed to be in place and correctly align with all the other parts.
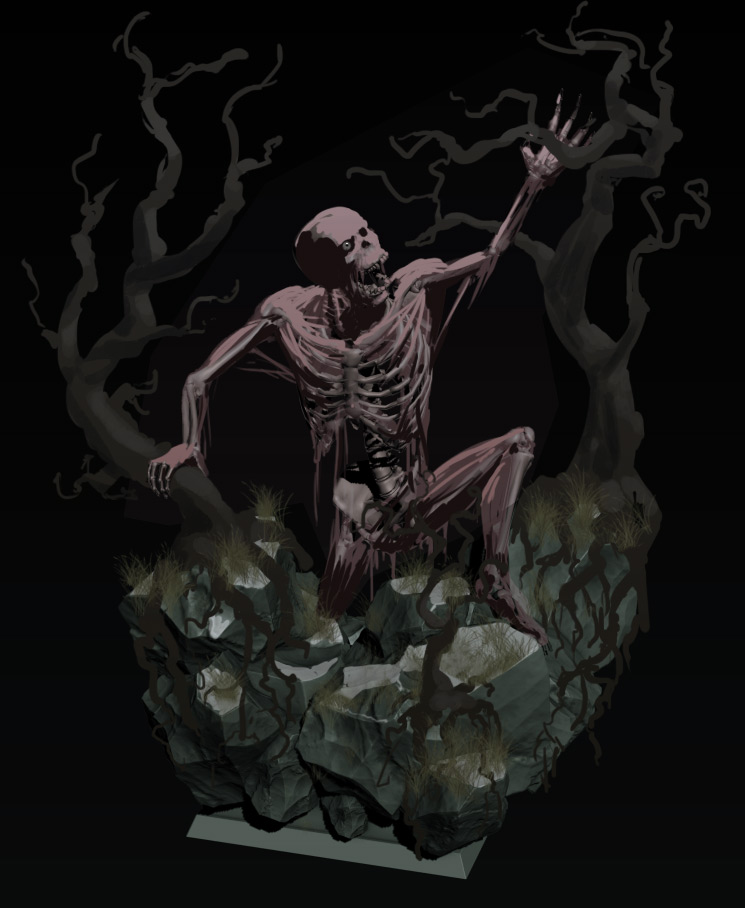
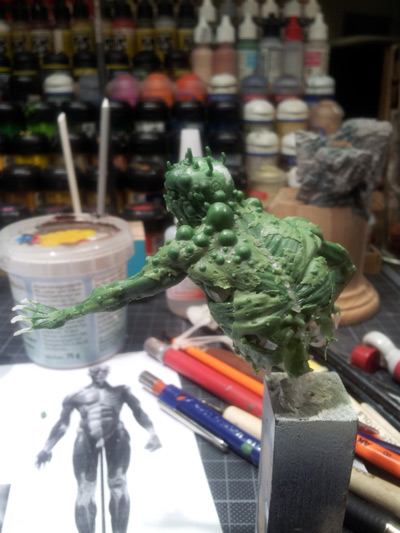
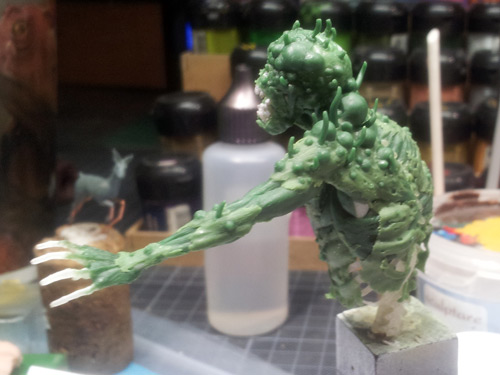
 Here is the finished sculpting part. You can see some pustules and structure had been added to the tree he is touching. Everything worked out pretty fine in the end and I started painting!
So far the first part of this series of posts. Next up is painting the elf. Stay tuned and I hope you liked this article!
Best wishes,
Raffa
Hey everyone,
today I present you the first part of a 3 part series of work in progress photos of my latest project: "Touch of Death". I start with the sculpting part as this was the first step of the project (including planning and concept).
...and before you start reading, remember the donation button! We put in a lot of work, effort and love into our blog and sometimes it's nice to give something back ...
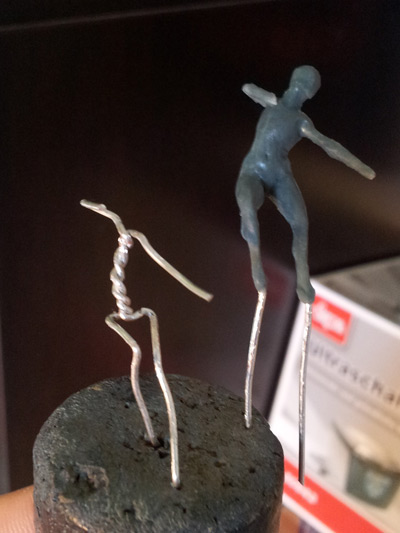
I always start sculpting with a wire dolly, on the right you can see my first try of sculpting the mini.... a big fail ;)
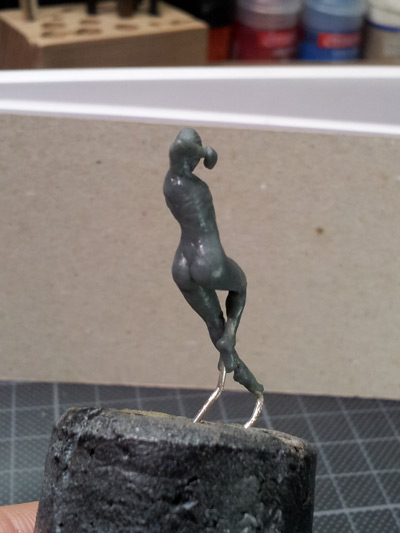
Here I already sculpted the basic shapes and volumes, paying special attention to include many opposing S curves.
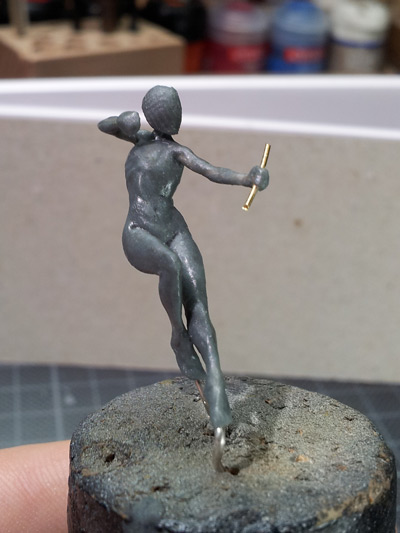
The Back
Sideview

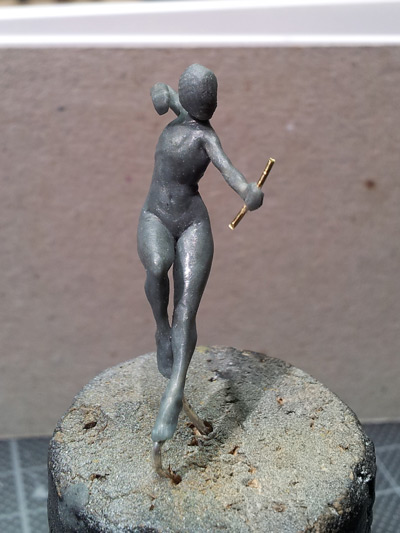
When the nude body was done, I added first layers of clothing, I always work from rough shapes to finer details.
Other view
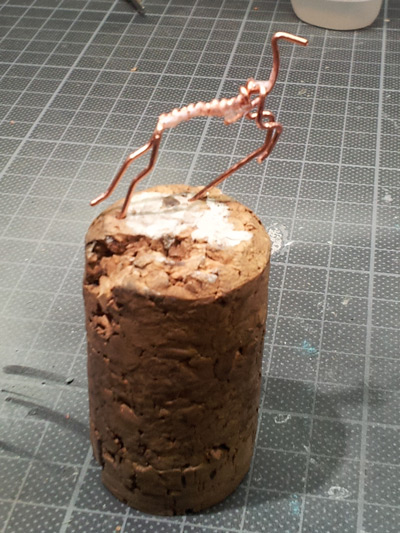
This is the wire dolly of the dead deer.
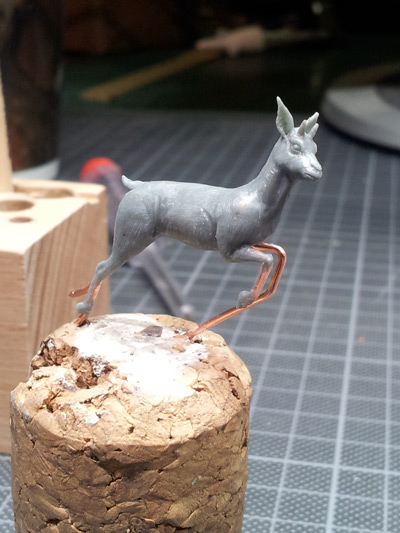
The almost finished sculpt of the deer, later I added more of the death pustules.
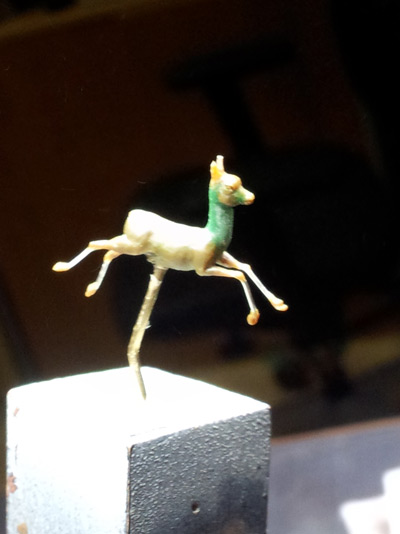
Here is the finished sculpt of the baby deer, I used very thin wire for the dolly and used the dolly as the legs as the baby deer is really very tiny.
While waiting for the 3D print to be delivered, I already started with the base.
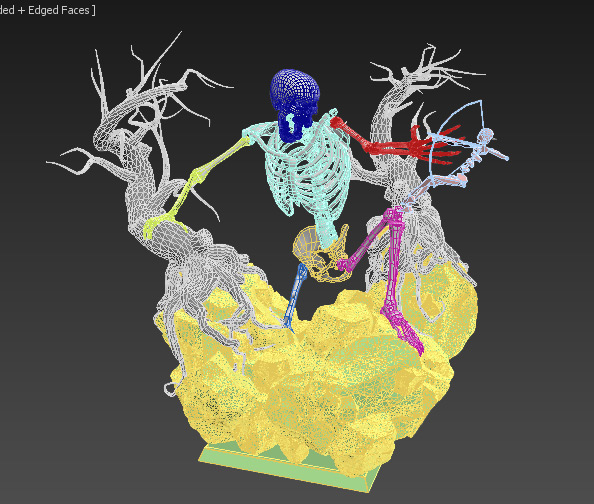
Here is the 3D concept I made before I even really started with the project. I created a basic layout of the project to reduce worktime.
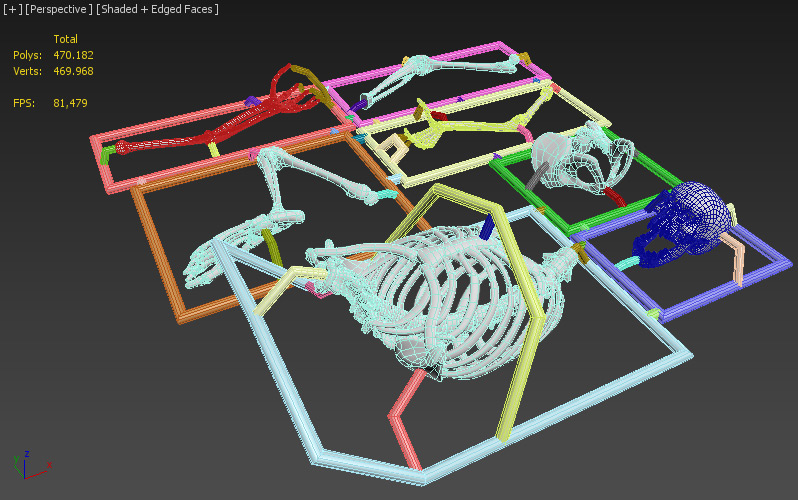
Here you can see the layout for the 3D printing parts.
A quick overpaint of one version of the concept.
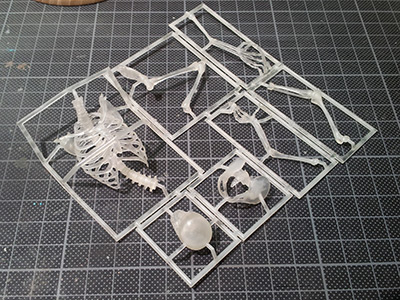
The 3D printed skeleton, cleaned and ready for assembly.

The pinned and cleaned skull.
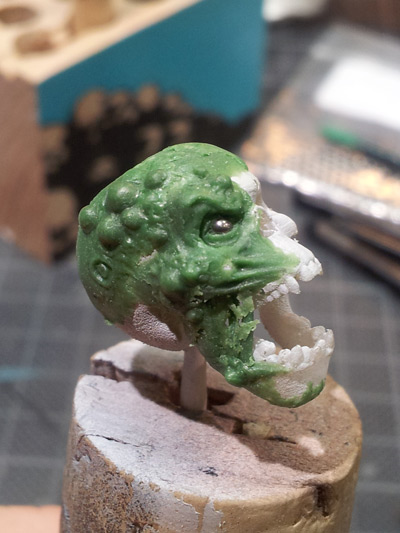
Sculpted the first half of the face. A mix of Uro and Super Sculpey was used for the sculpting (Thanks to Tue Kaae for telling me about he mix).
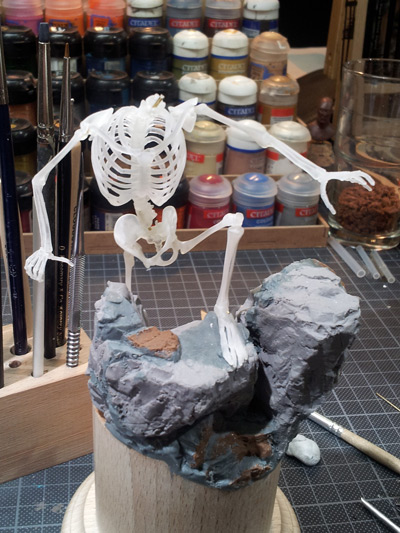
The skeleton got assembled and pinned. I already tested the pose on the rough base layout.
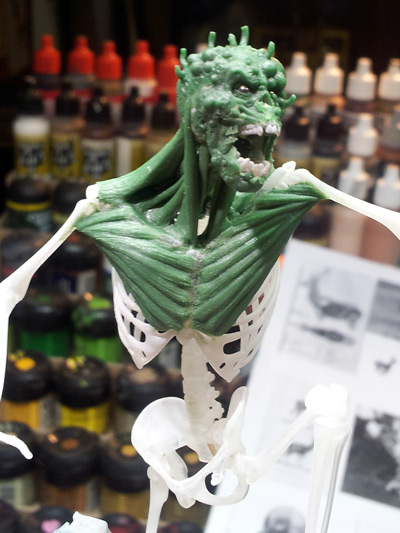
Attached the head to the neck and started with the upper body muscles.
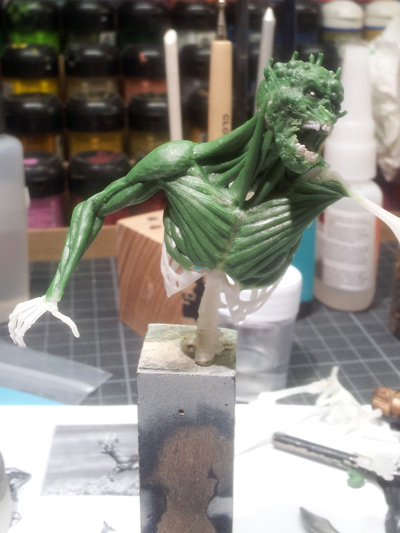
More muscles...
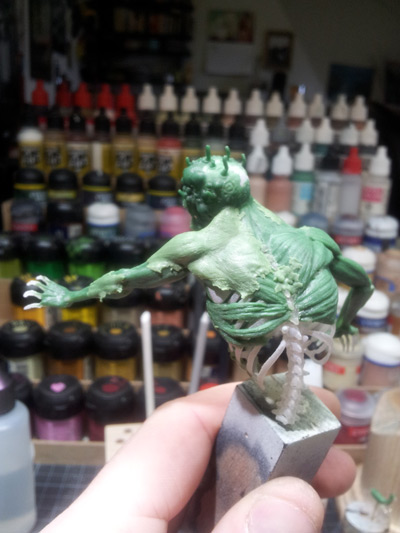
First layers of ripped skin were attached. To do this I rolled out the clay to a very thin layer and attached it to the muscles with a brush.
First skin patches on the front.
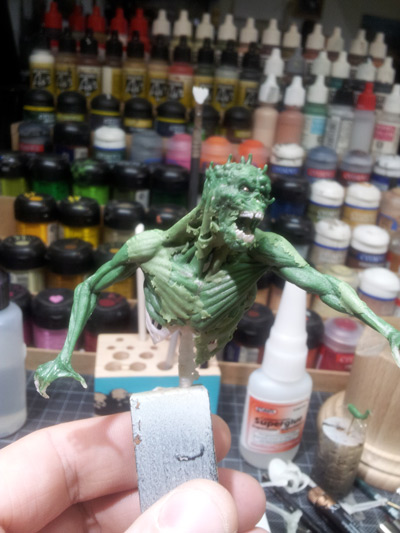
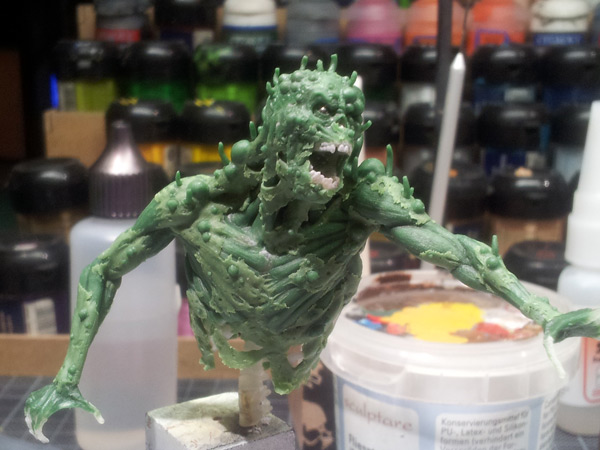
I started sculpting the pustules on the back. I used the same design as on the head.
To make these small pustules I rolled out a sphere of sculpting clay, cut it in half and attached the half sphere to the skin. After this step, I smoothed the surface again.
To make these small pustules I rolled out a sphere of sculpting clay, cut it in half and attached the half sphere to the skin. After this step, I smoothed the surface again.
More pustules ...

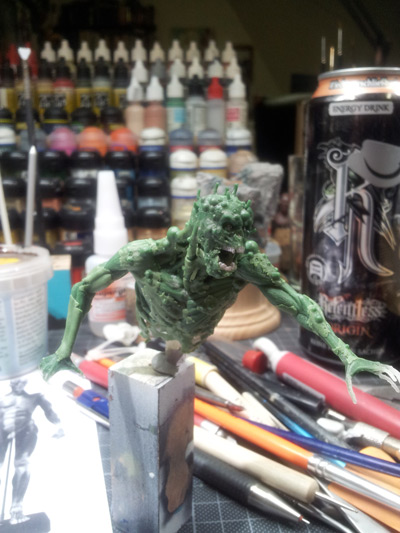
This is a view on the insides of the chest... you can make out the lungs.
The finished upper body.

The start of the leg muscles.
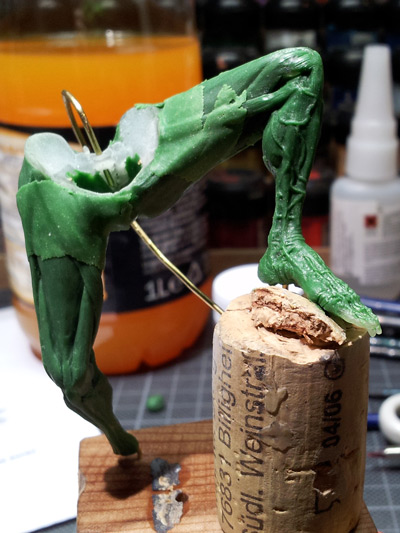
More muscles and foot was sculpted. You can also see first patches of skin appearing.

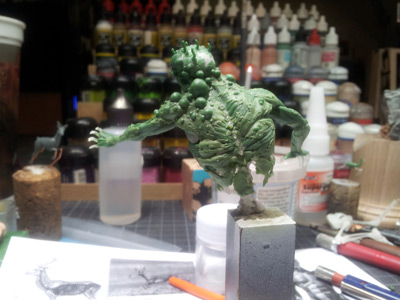
The upper body attached to the finished legs.
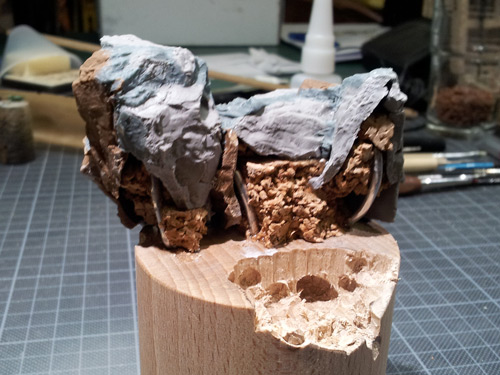
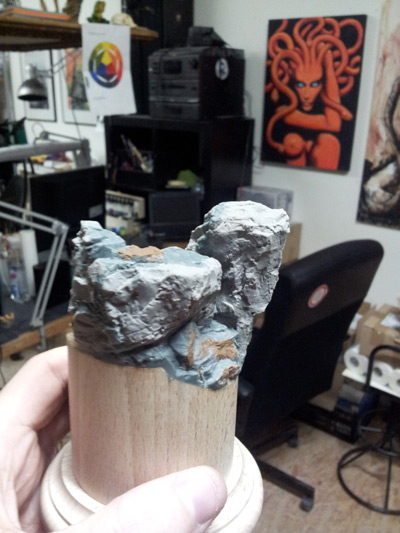
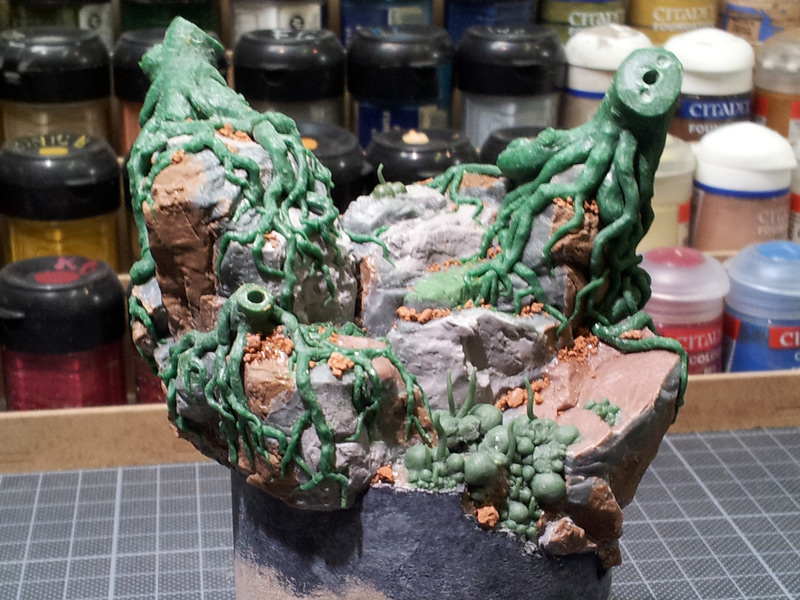
Drilled out parts of the wooden socket. The stone slates were created using different kinds of oven-baked sculpting clays using a "stone-mold".
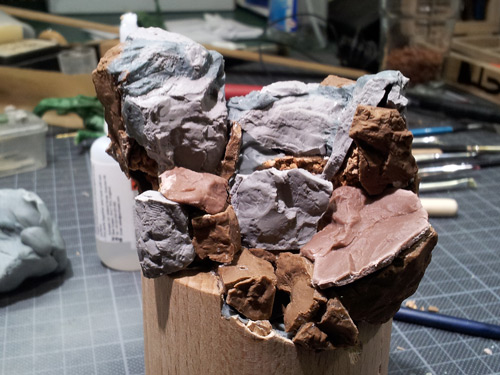
More stone pieces were added and the rough layout was created.

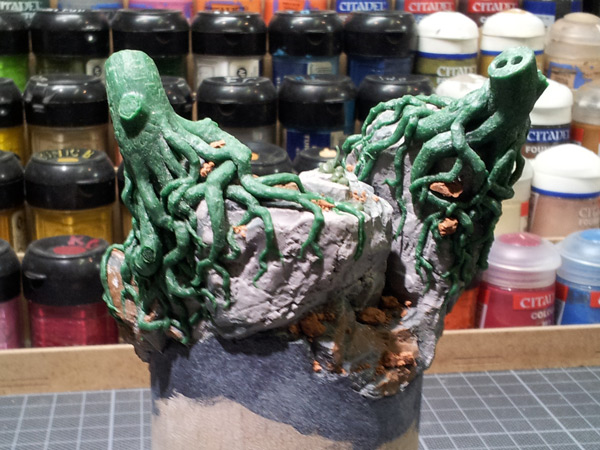
After filling all the gaps and finishing the stones, the tree roots started to take shape.
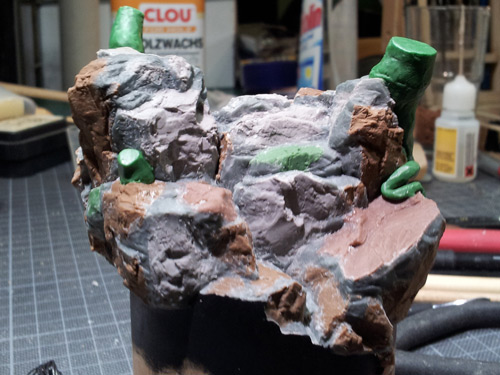
I drilled holes into the stones to put some very thick wire into place to support the trees.

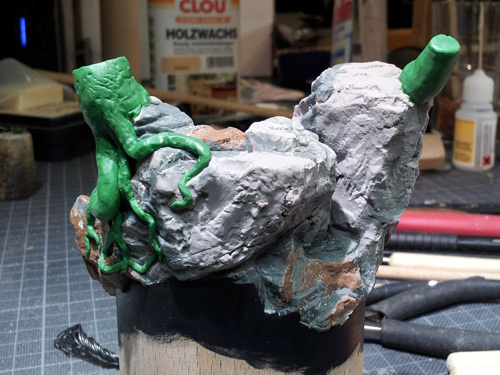

For the creation of plants and roots, a advanced understanding of growing directions and shapes is very important...
More tree roots had been added to make the roots much more dense.
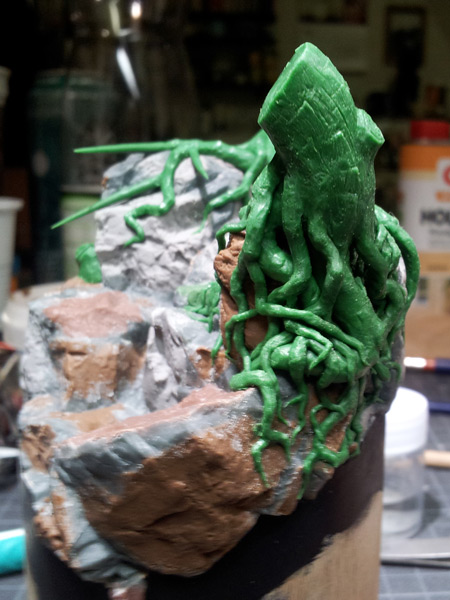
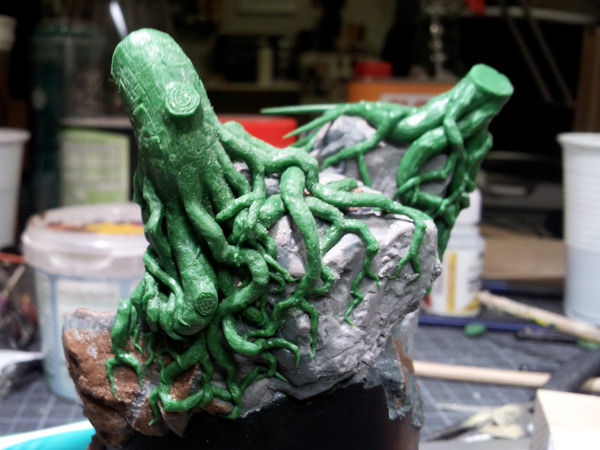


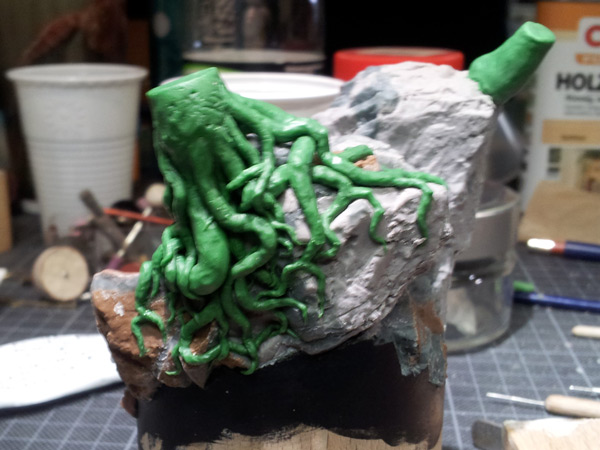
On this photo you can get a very good impression of how the roots were sculpted. First I rolled a cylindrical shape of sculpting clay, picked it up with a tool and attached it to the existing root parts. After that, the cylinders were sculpted into shape.
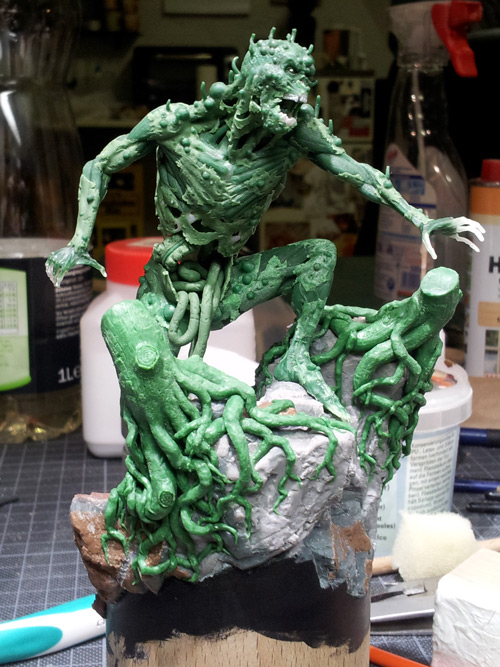
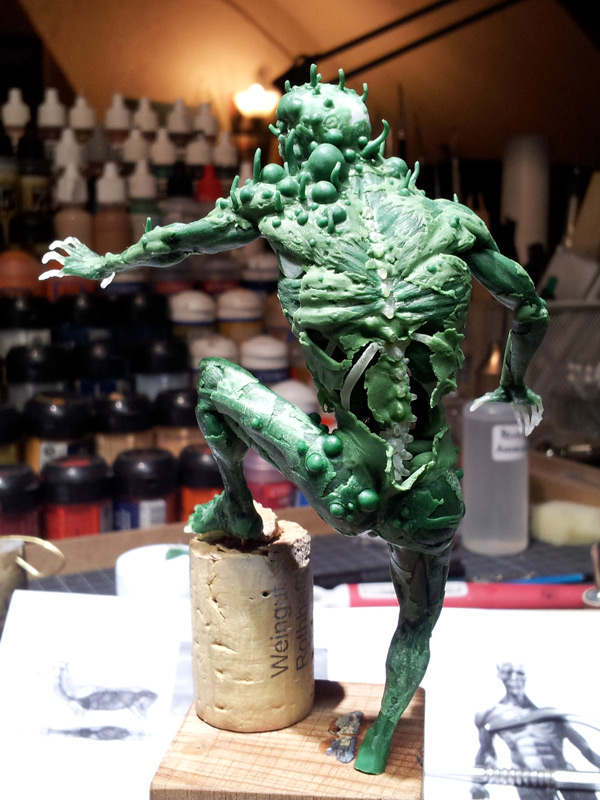
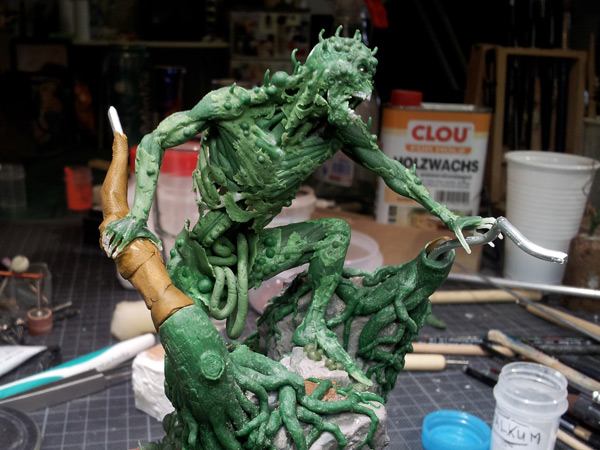
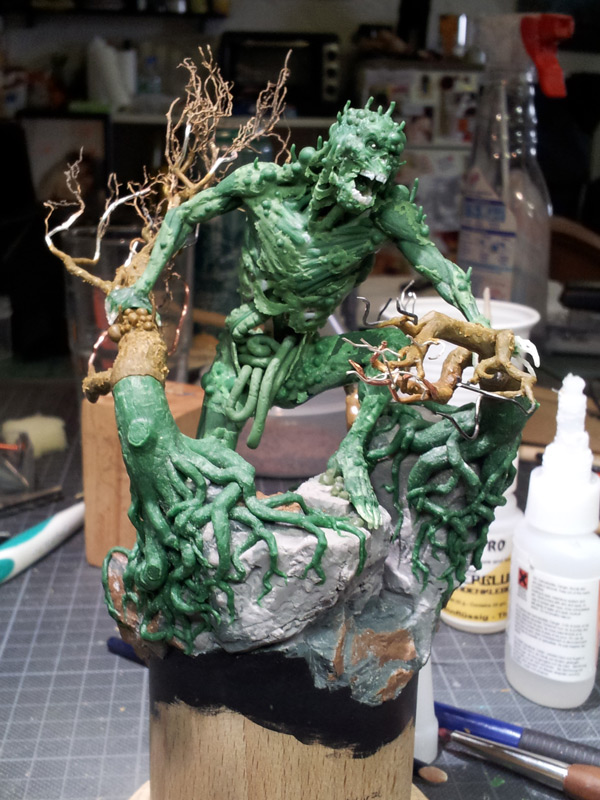
After baking the tree roots, I attached the giant to see how he fits the scene.

More of the nasty pustules were sculpted onto the base and deer to show how nature gets corrupted by the touch of the giant.

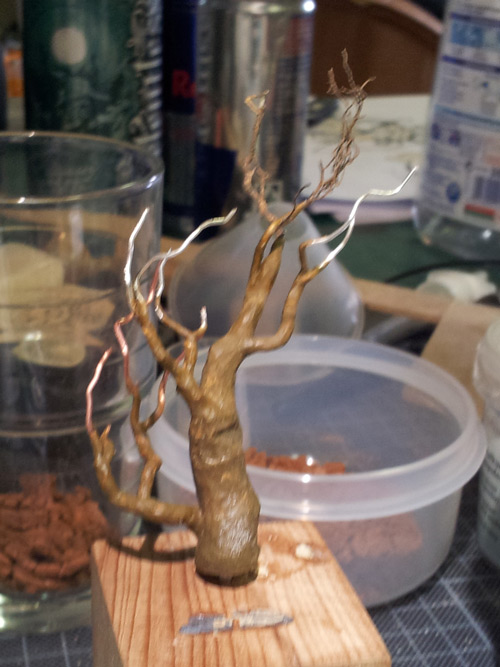
I made a rough layout out of wire for the upper tree parts. On the left tree you can already see some basic shapes appearing.
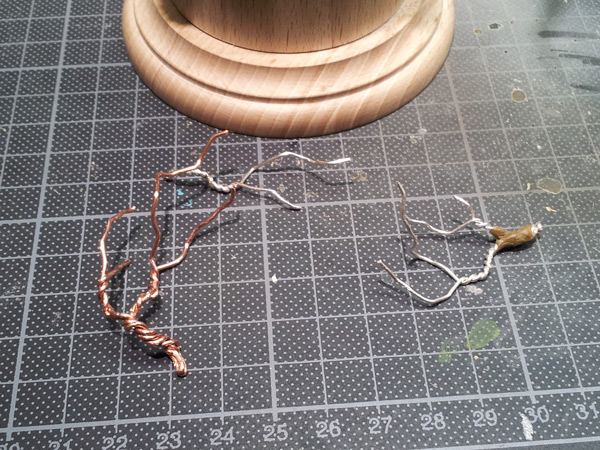
To make all the small branches, I used smaller wire, twisted and shaped like branches. After shaping the wire, I sculpted every branch detached from the tree and attached it later on.
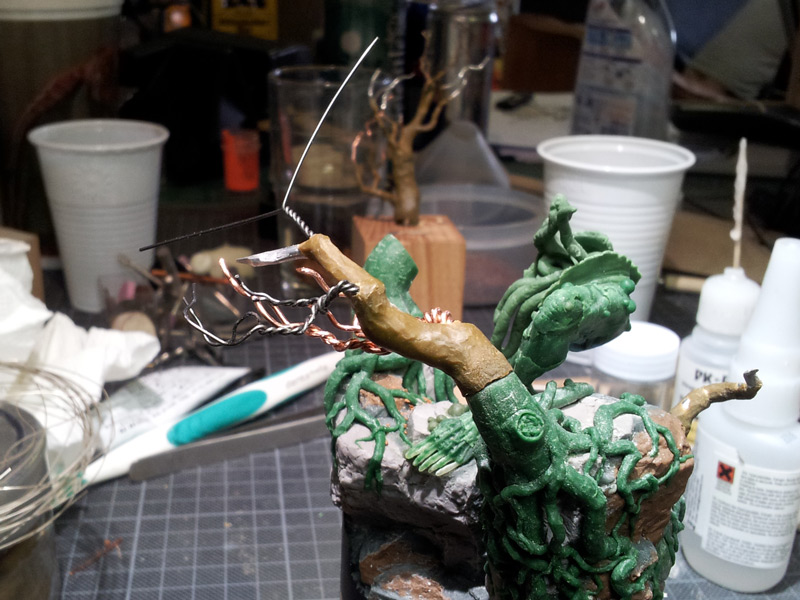
After drilling holes, the branch wires can be attached for further positioning and testing.
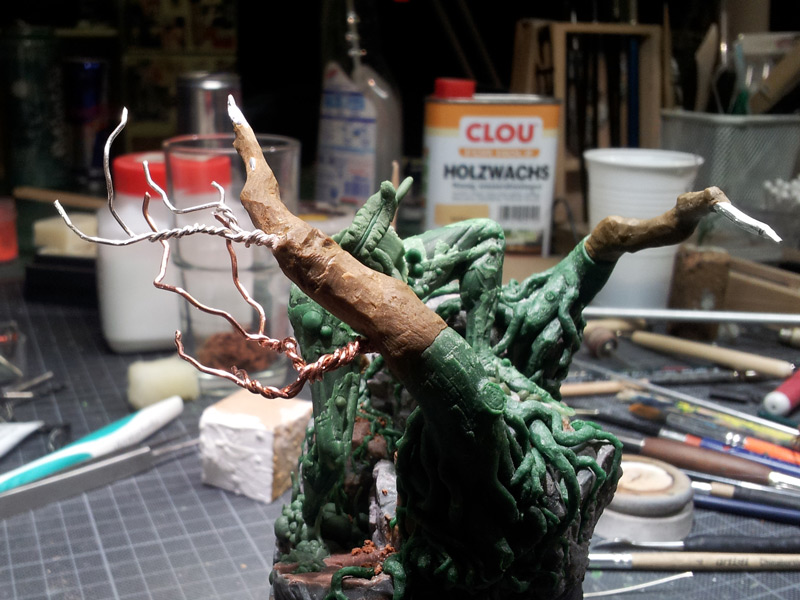
The positioning and testing takes a lot of time.
Small rock pieces (out of fimo) were attached to create some rubble.
The first tree got it's branches attached and prepared. On the top you can already see some natural roots (collected in the forest) to enhance the detail level.
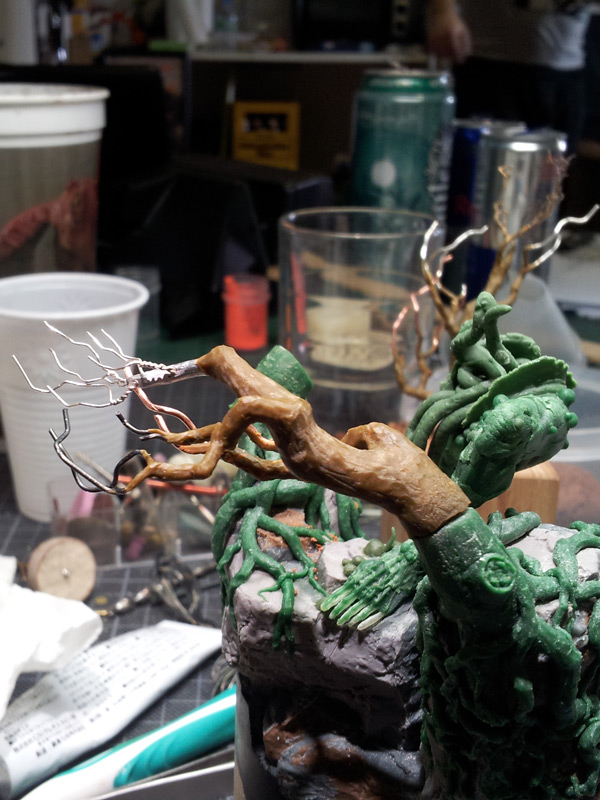
After backing the trees, I often continued to carve them with a hobby knife into a more natural shape.

So far the first part of this series of posts. Next up is painting the elf. Stay tuned and I hope you liked this article!
Best wishes,
Raffa


THANKS!!!!!!
That's some crazy cool stuff!
Amazing
Thanks for the photo's...stunning work!
Keep up.
Nico.
It´s very impressing, that alomost everything is built by your own. And it show how many energy flows into the project.
Is this the revolution for 3D-printers in our lovley hobby? ;)
Stunning work, thank for sharing!
Madness... but sheer creativity-bääm-madness.
Thanks for letting us all know the work, effort, time and love you'd put into this kind of art.
I bow before you, Raffa-sensai
amazing!! this is my favourite of the 3 crystal brush finalists. Congratulations for your work and for the prize!
I have one question about the 3D printing...in wich material did you print the pieces? some resin? polyamide?
Rgds,
paloji.
Impressive work with an insane attention to detail!
I still can't believe that this piece made only the 3rd place. The only thing I wondered about, was why the tree where the archer stands on is not infested by the touch of the undead giant like the other tree.
Dude ...you´re just so FUCKING, BANALICIOUS AWEEEEEEEEEEEEEEEEEEEEEEEEEEEEEEEEEEEEEEEESOME....what stars will you grab next from sky above? :-)
It's a great job and shows what can be done with hybrid works.
My only gripe is that you could have done it all, start to finish, in 3d and not have had to mess with that horrible greenstuff at all!
One word: Awesometasticolicious²
I wish I would be as half as good as you are :)
P.S. where did you get the skeleton printed?
Wonderful Part... great idea... perfect setting up ... and just to mention again, wonderful painting job!
Greets Michael
Amazing work my friend!!!
If you establish a sect I will following you everywhere ;-)
Realy great job, now I understand the over 400 hours work for this.
Fantastic works
Wow, that is amazing!!!! And what is URO? You colour Super Sculpey or something?
Great work here, and it really does put the whole project into perspective now on how much time you spent on it.. great work once more! And love how you built up the skeleton through 3D then 3D printing and then putting the putty over top! Greatness squared!
Wow wow wow!!!! Thx for the step-by-step guide - very interesting! /Hans
FAVOLOSO!!! I miei complimenti Raffaele ;)